Reproducing an 18th Century Burlwood Kneehole Desk
Follow along to see how the burl wood desk was made from both new and recycled materials. This was a rare opportunity for me to fully utilize my skills with period tools and techniques.

This is a photo of the original 18th century desk. It was used as the basis for this reproduction.
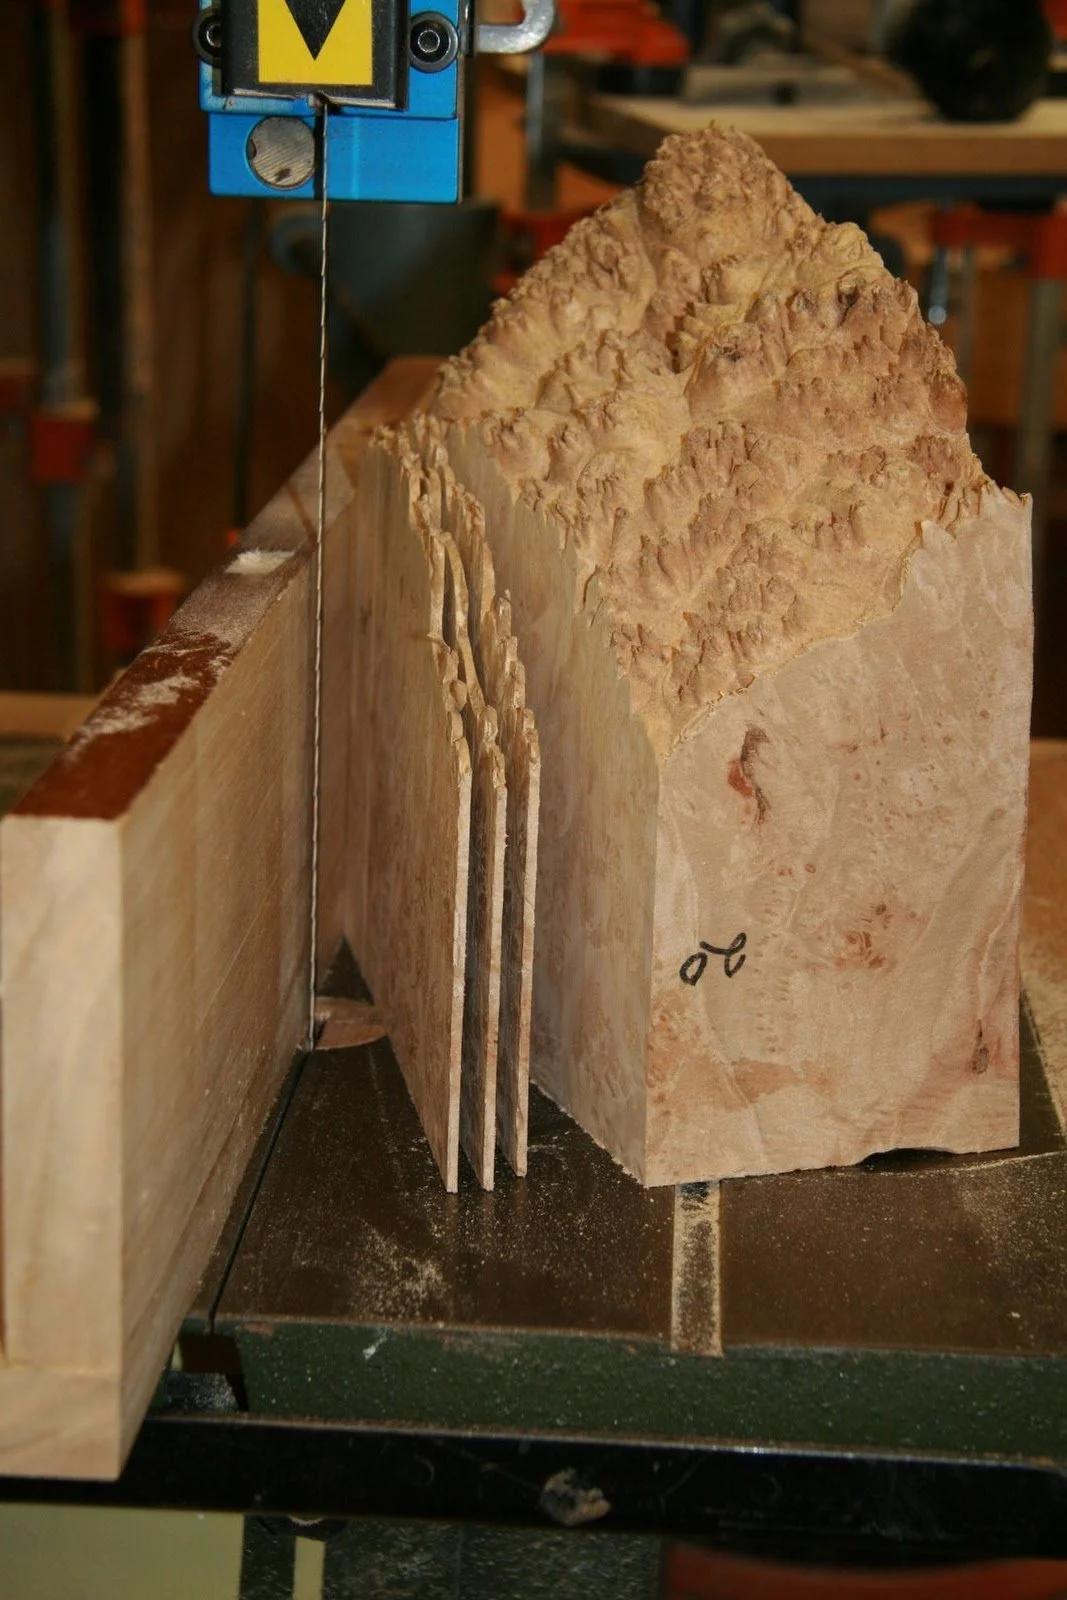
Desk construction began with resawing the thick period style veneer from a large block of Western Maple burl. All the carcass wood was resawn from 100 year old Douglass Fir construction beams that were salvaged from a dumpster.
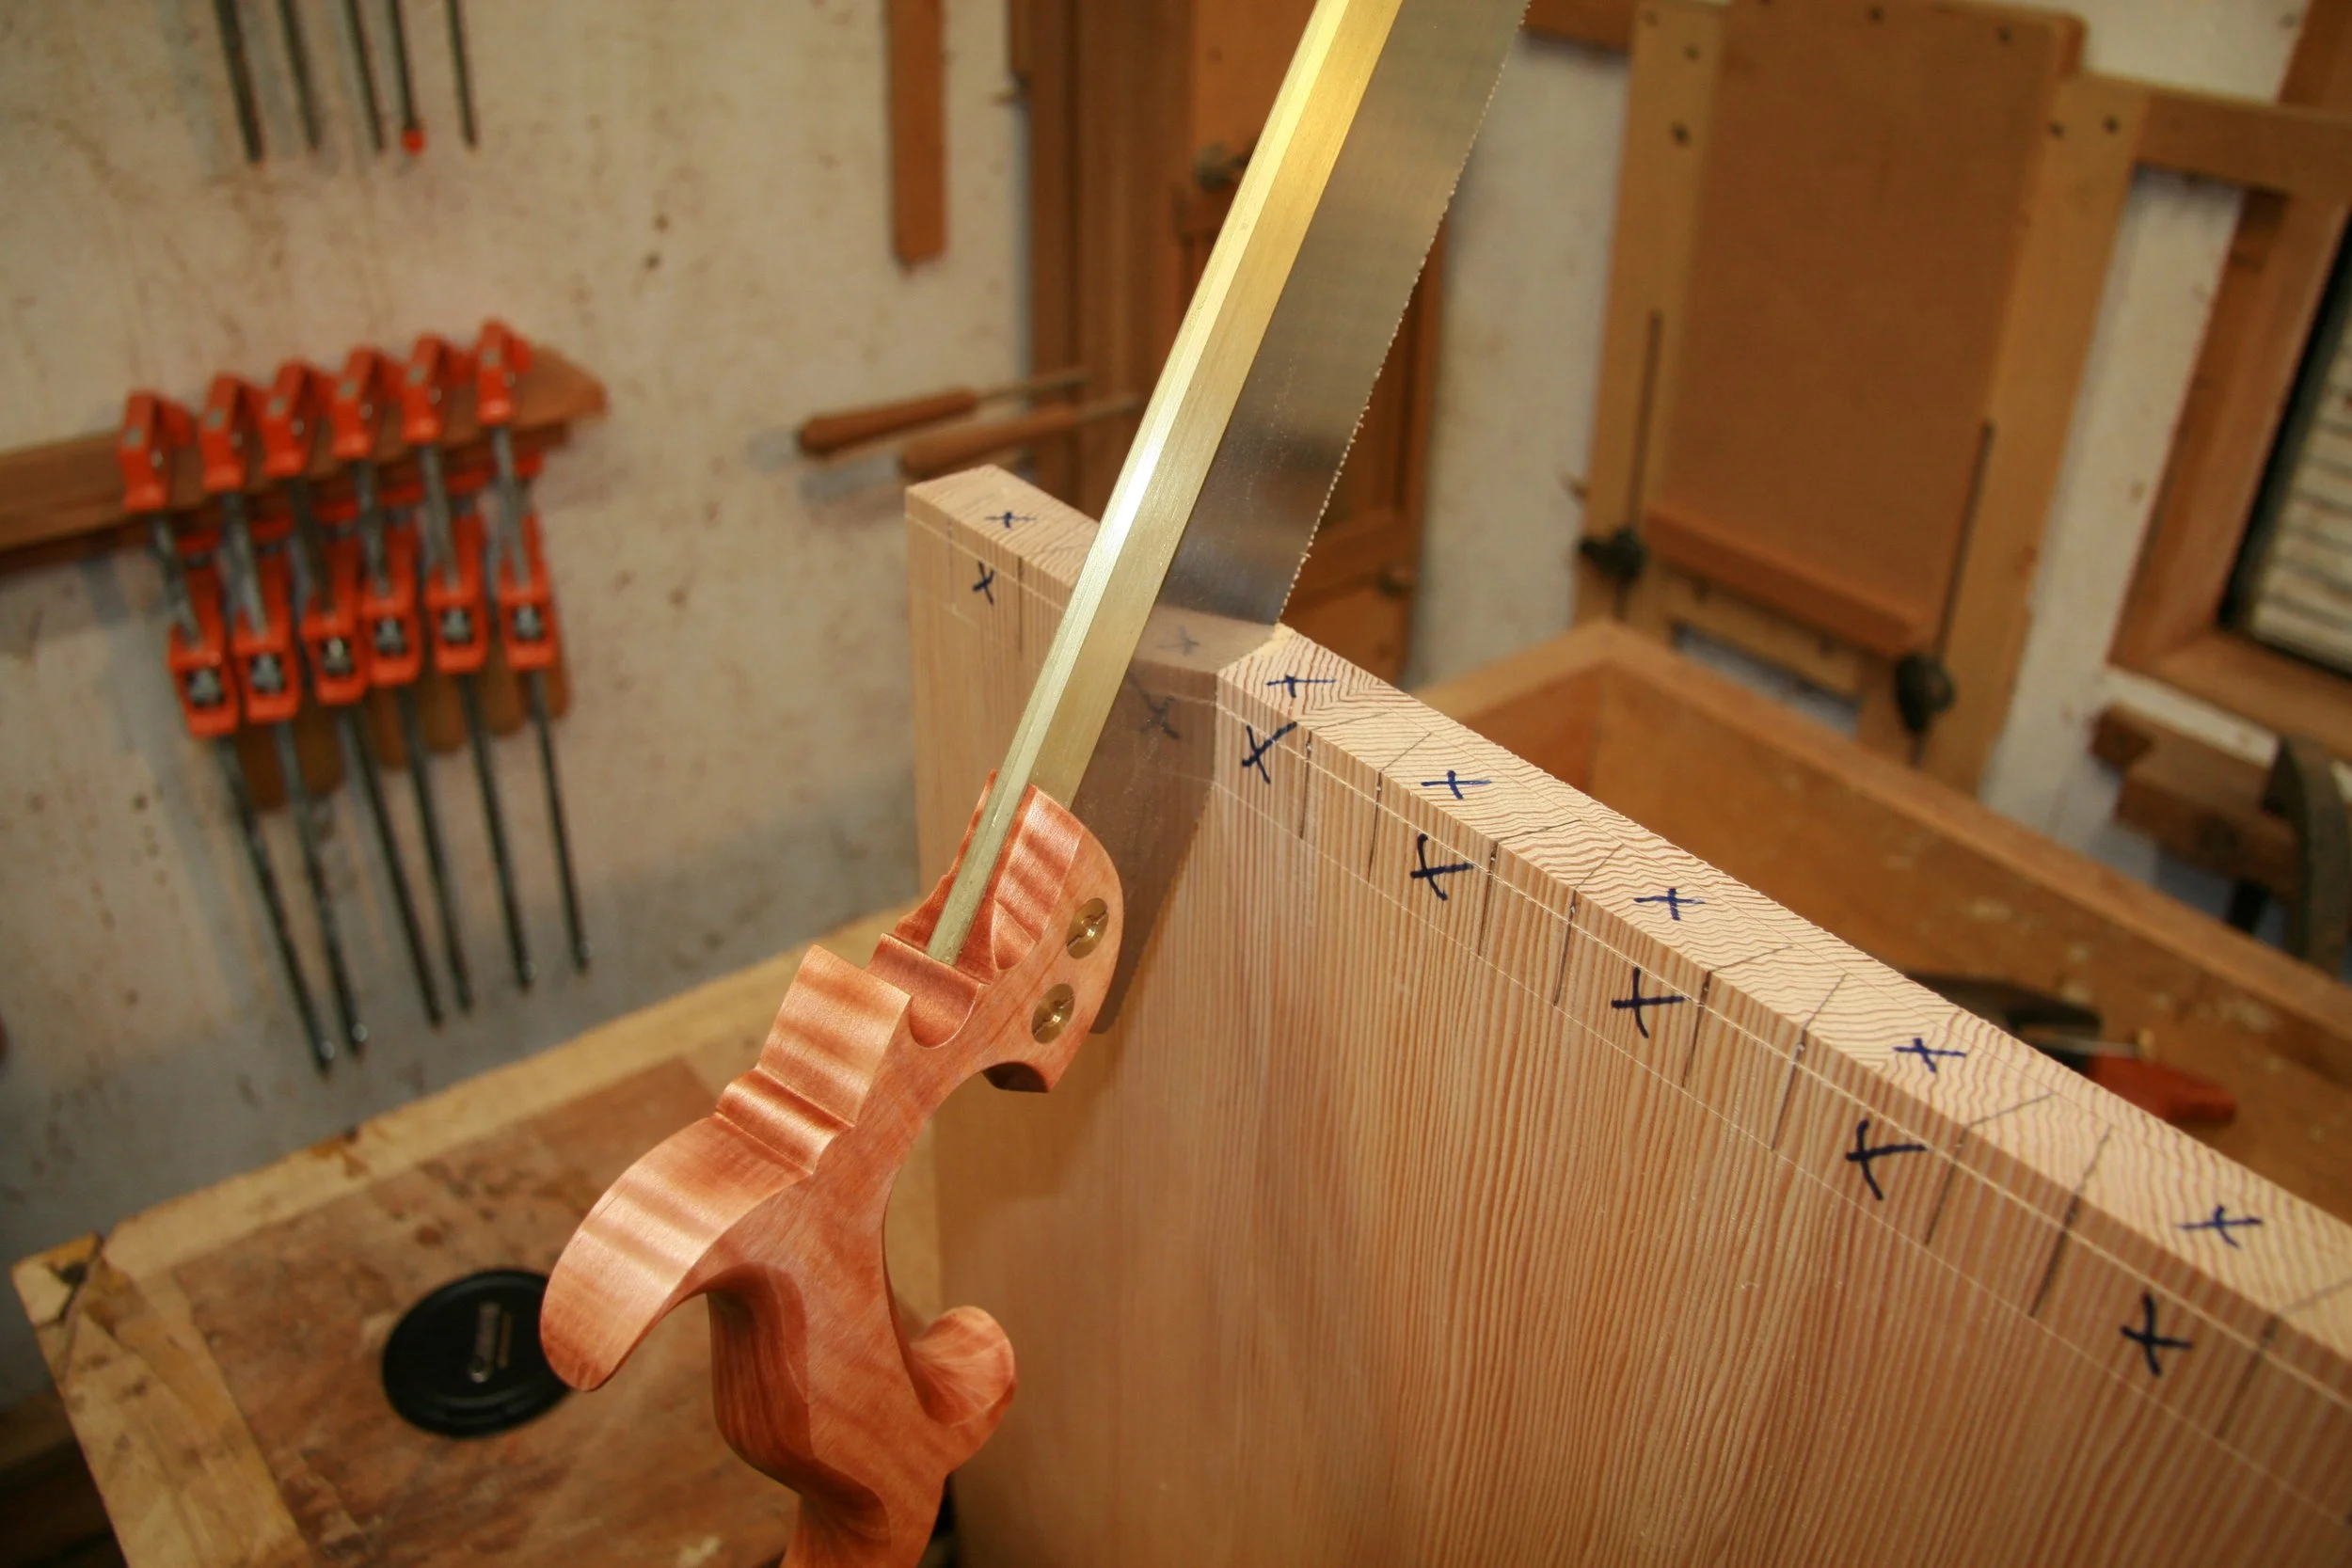
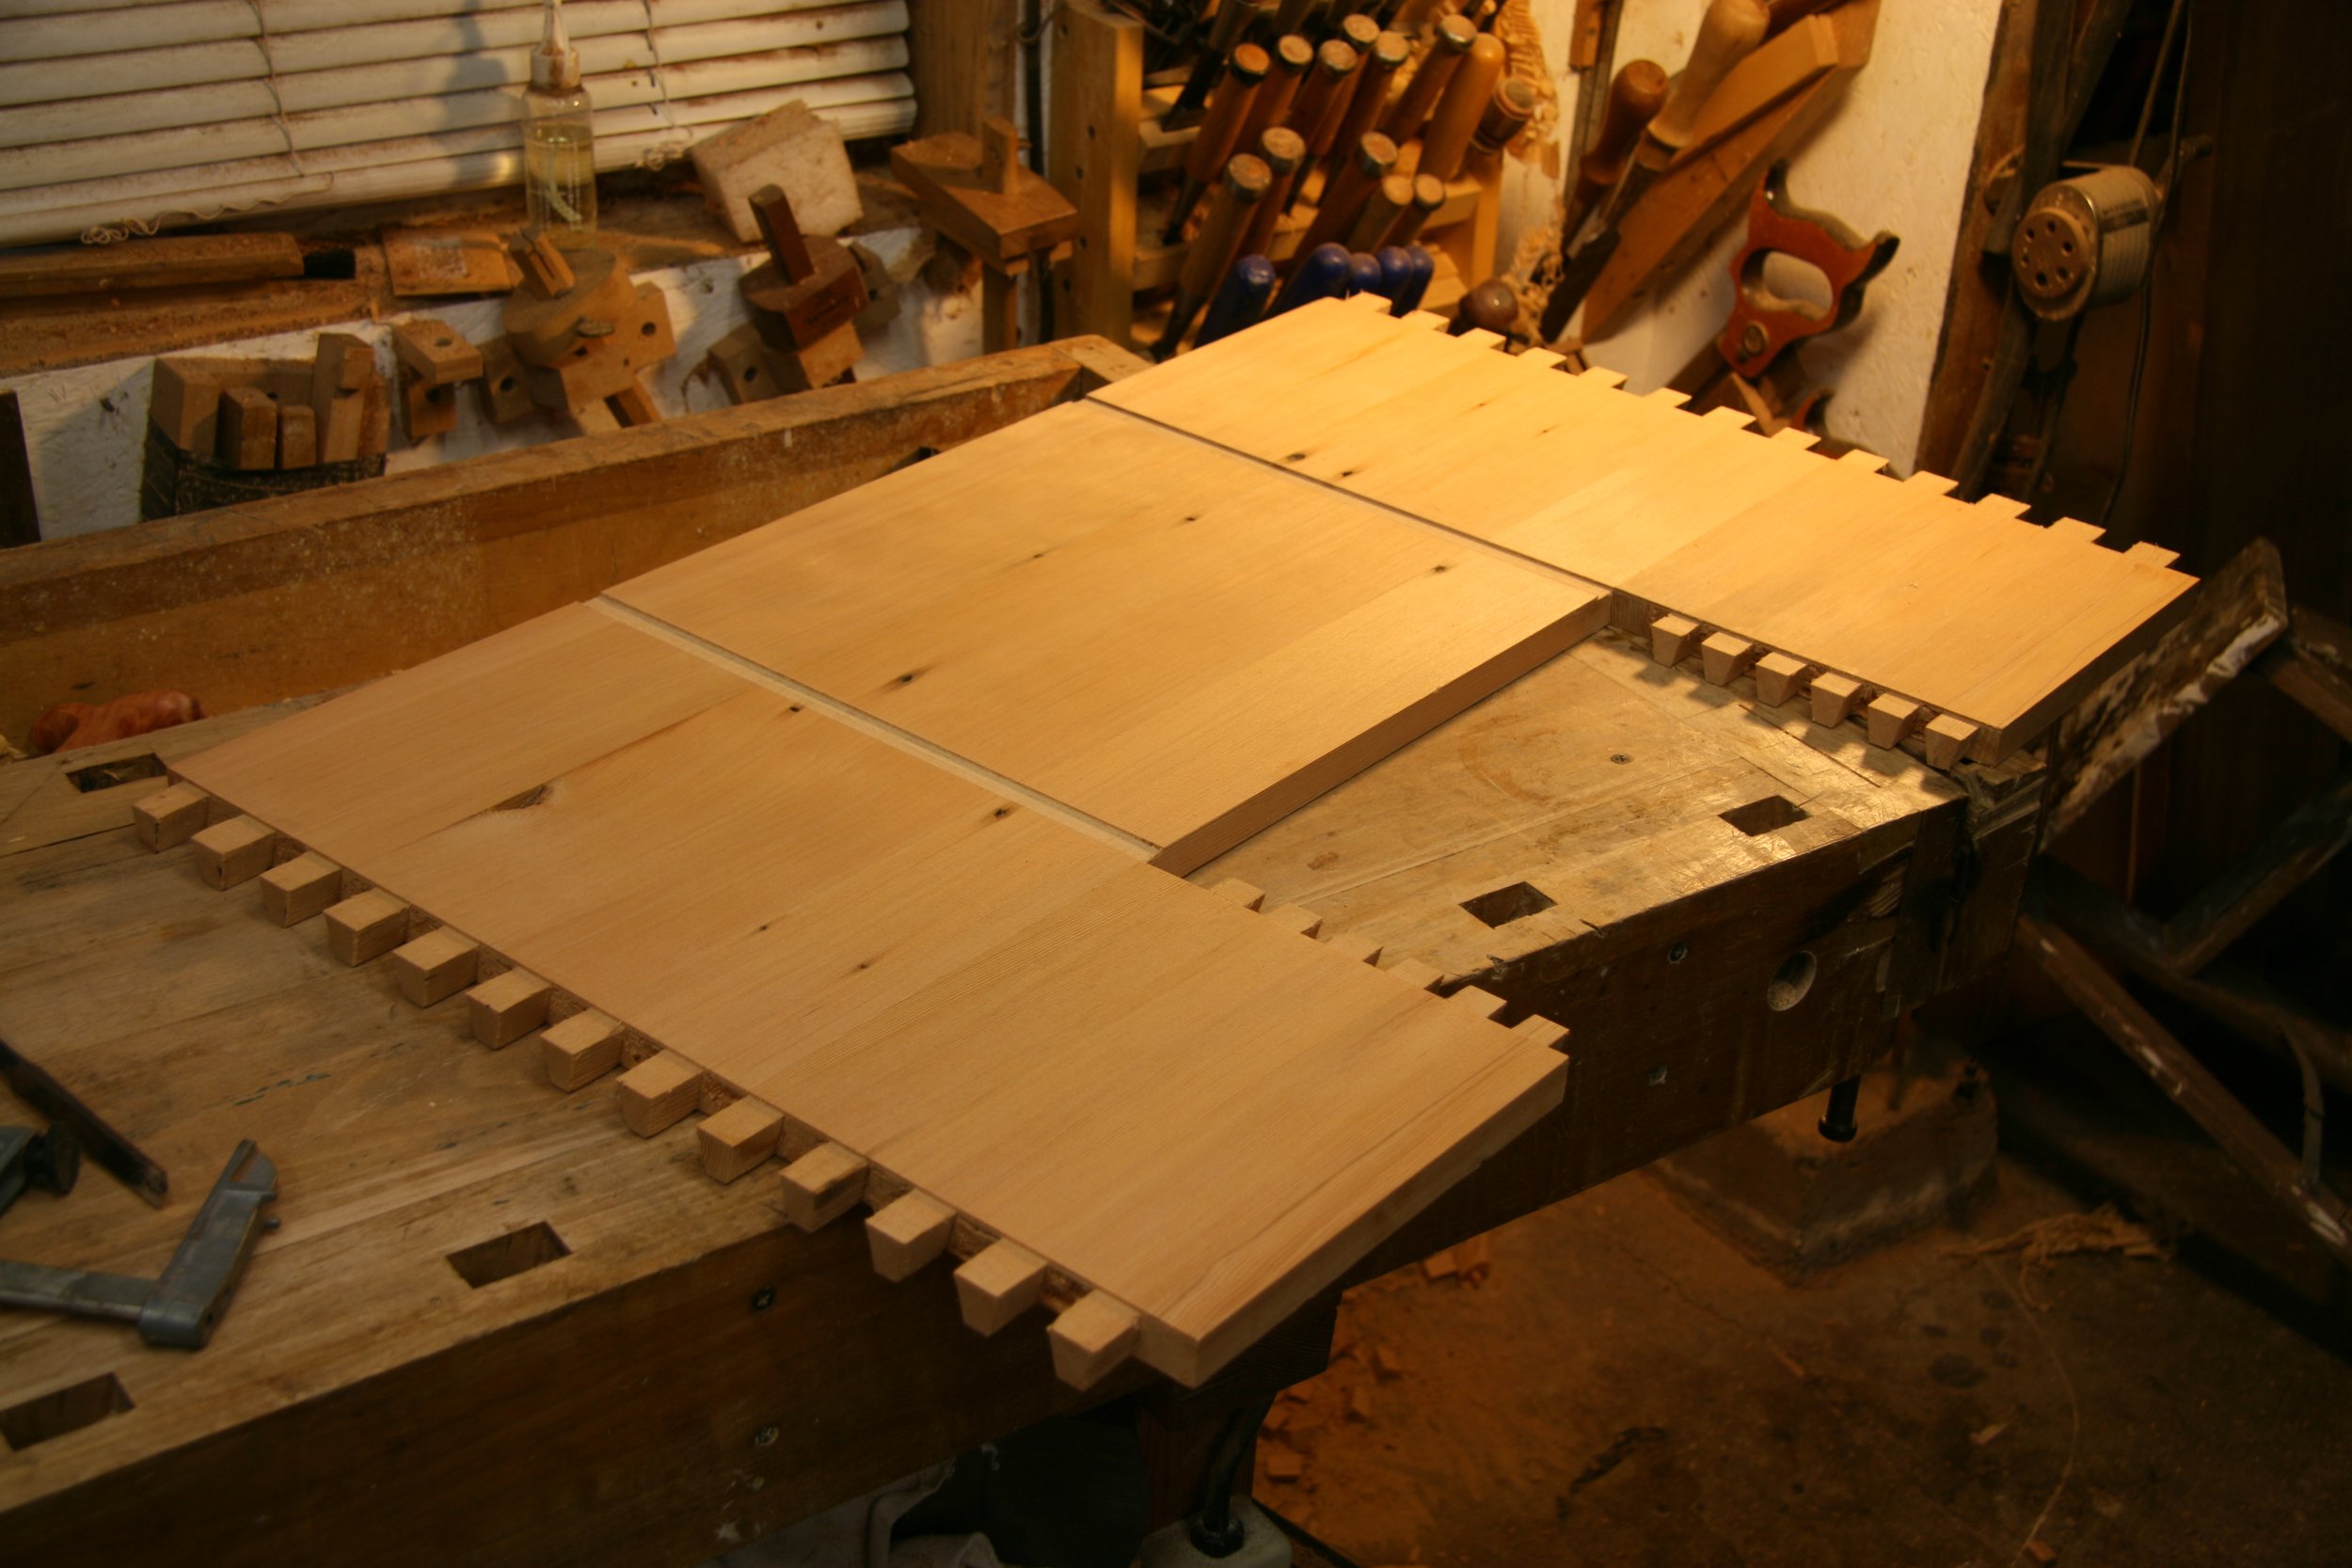
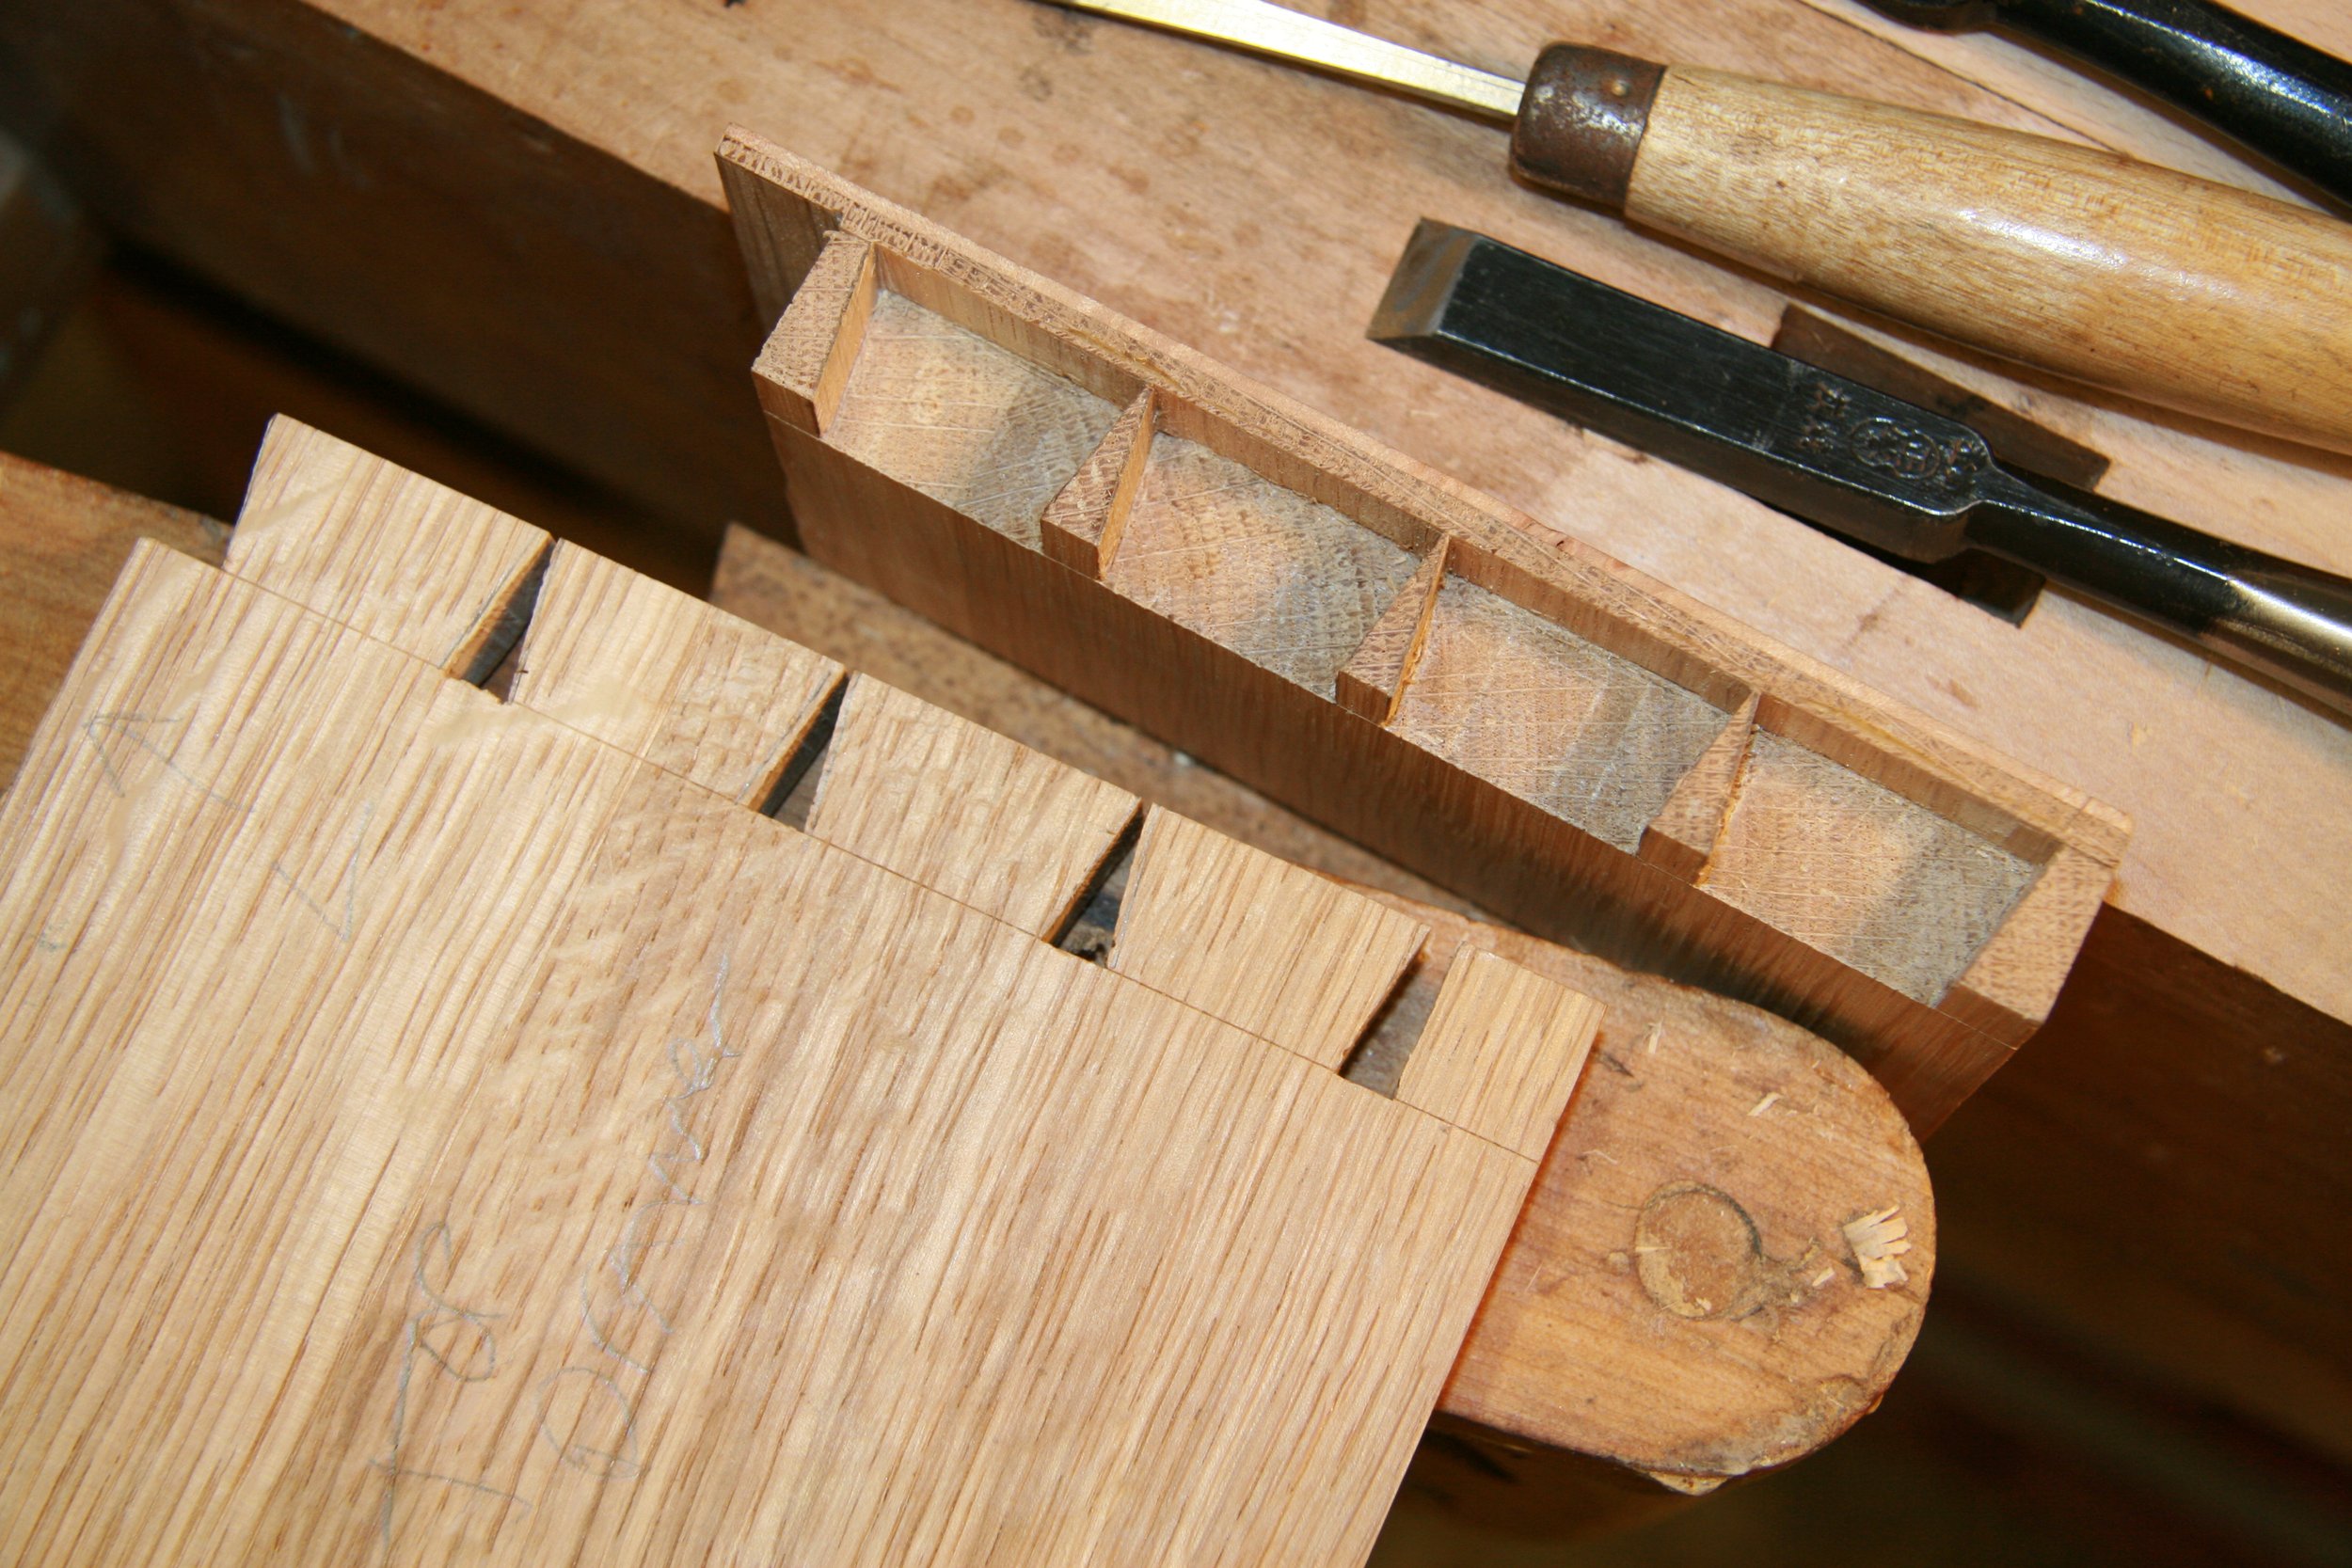
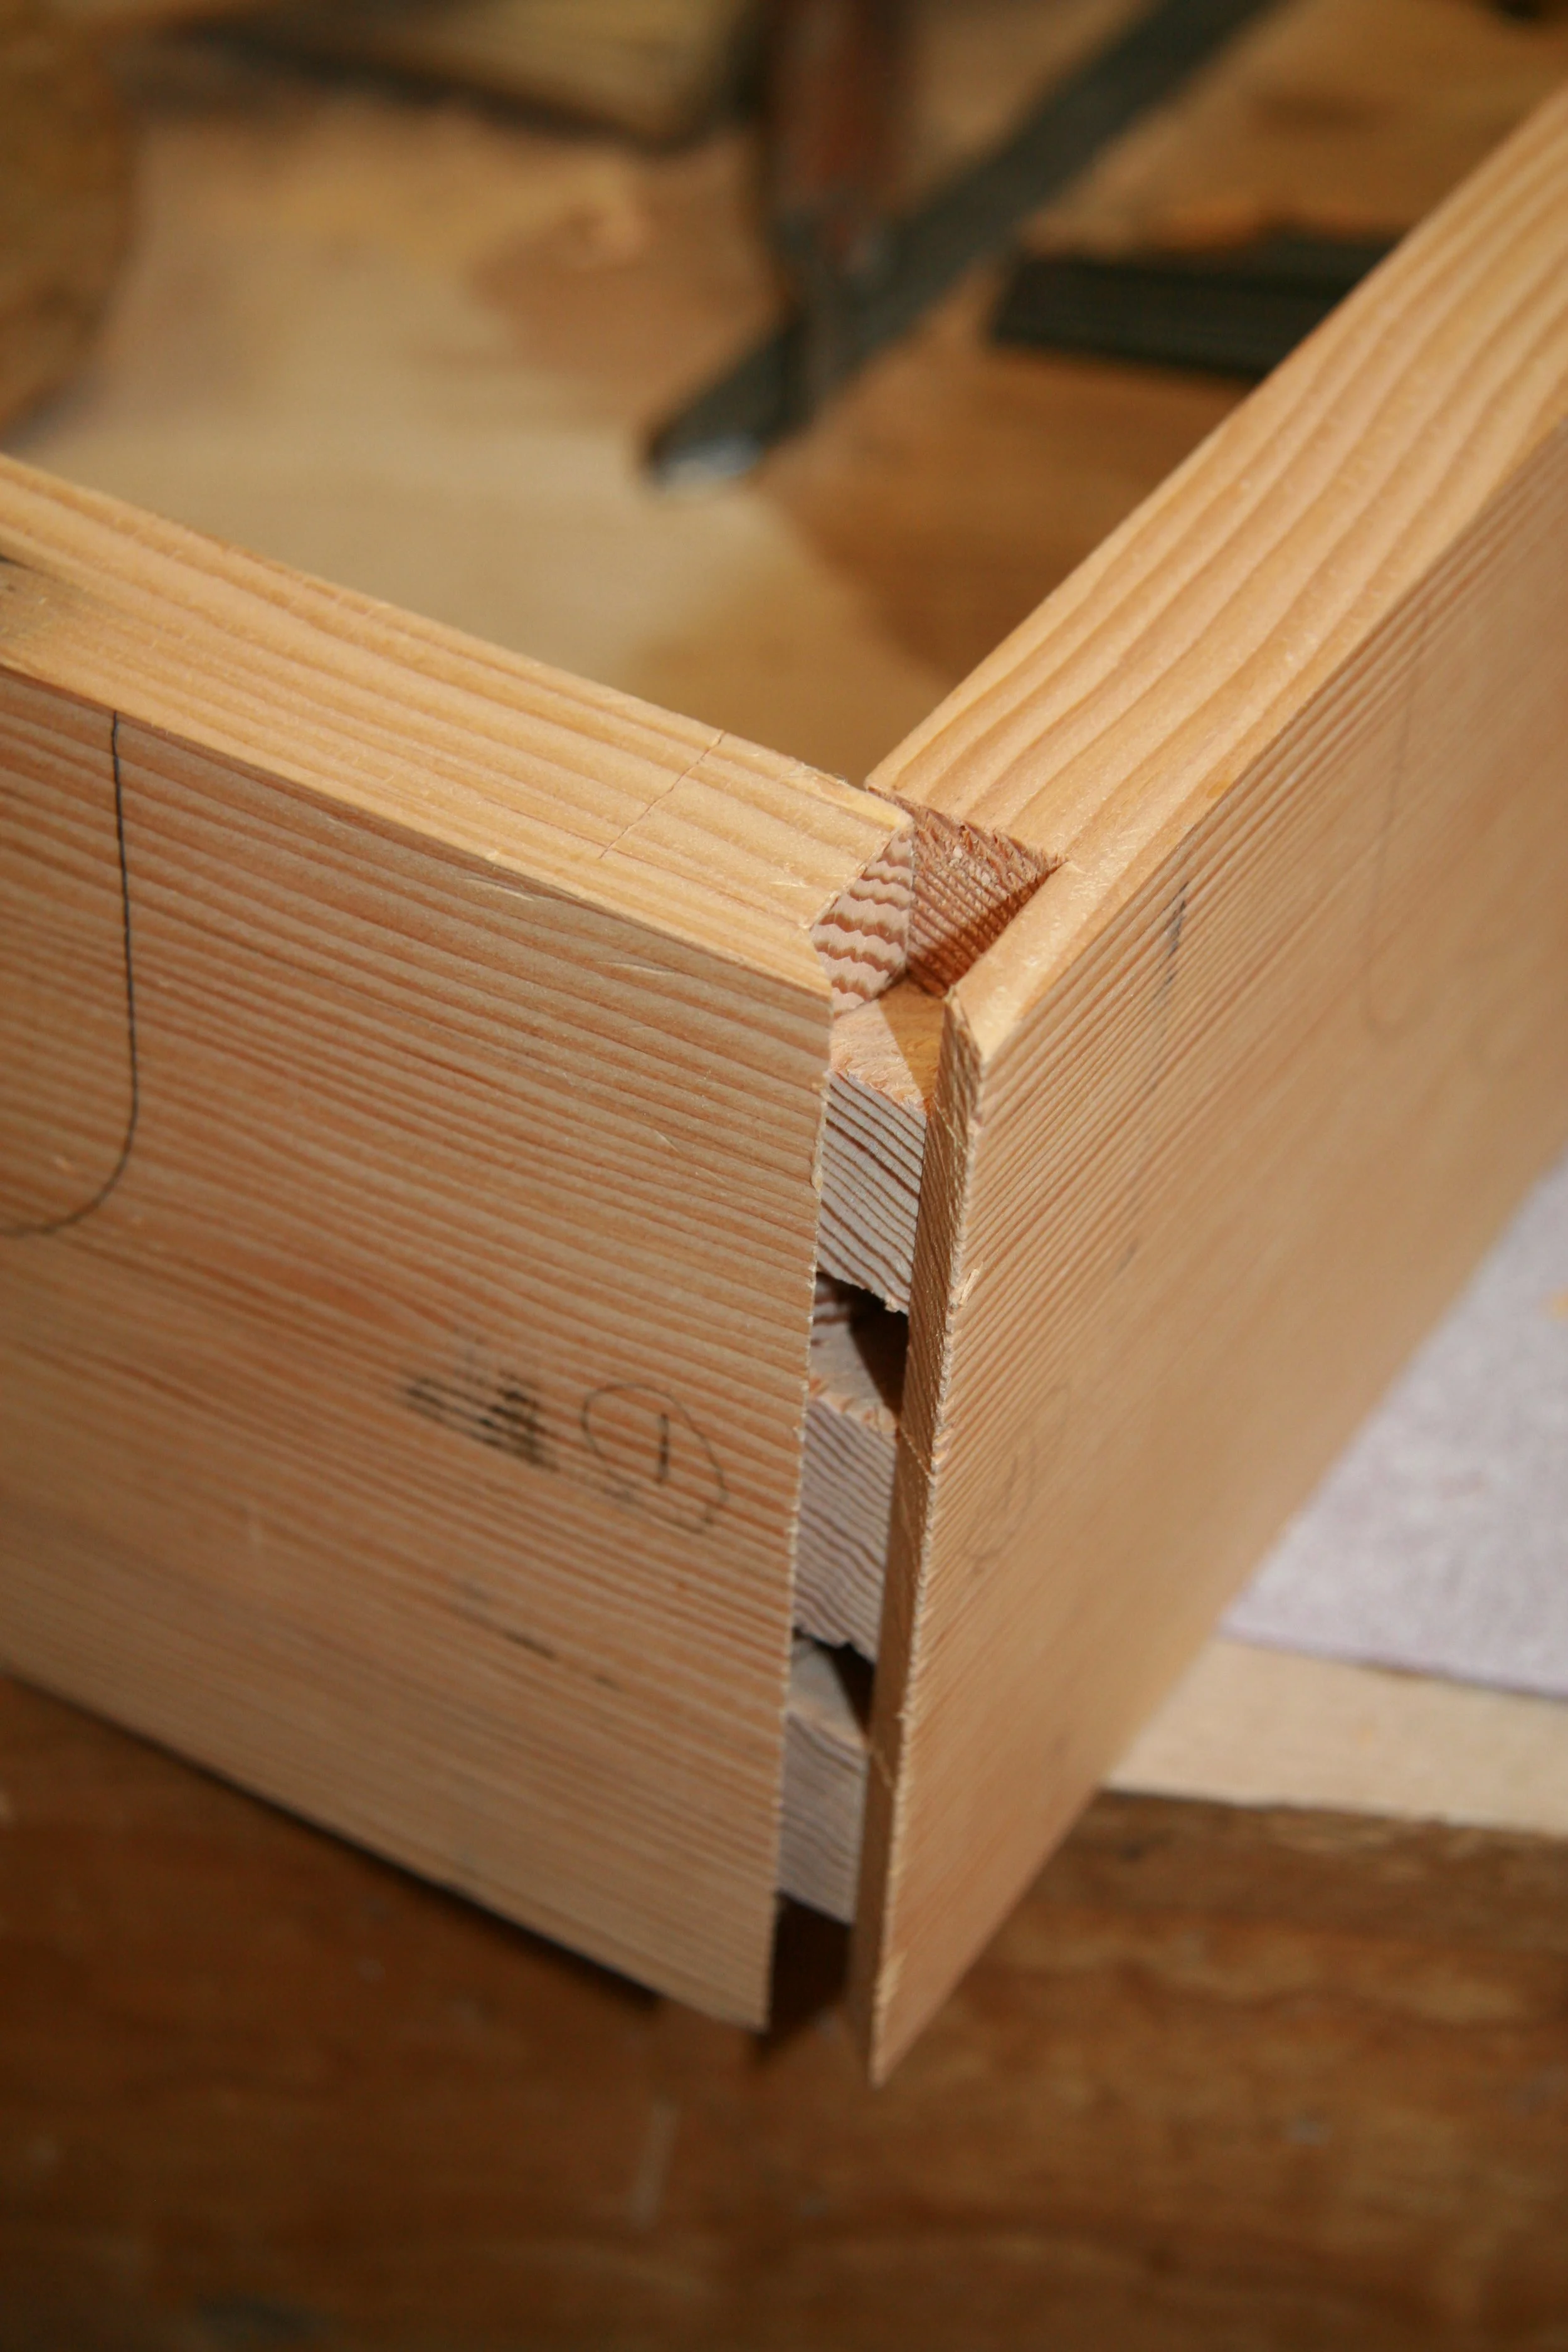
Sawing out the case dovetails. The entire carcass is "stiched" together with dovetails. Every style from the dovetail beastiary is represented in this project; through, half lapped; double lapped, sliding and even hidden miter.
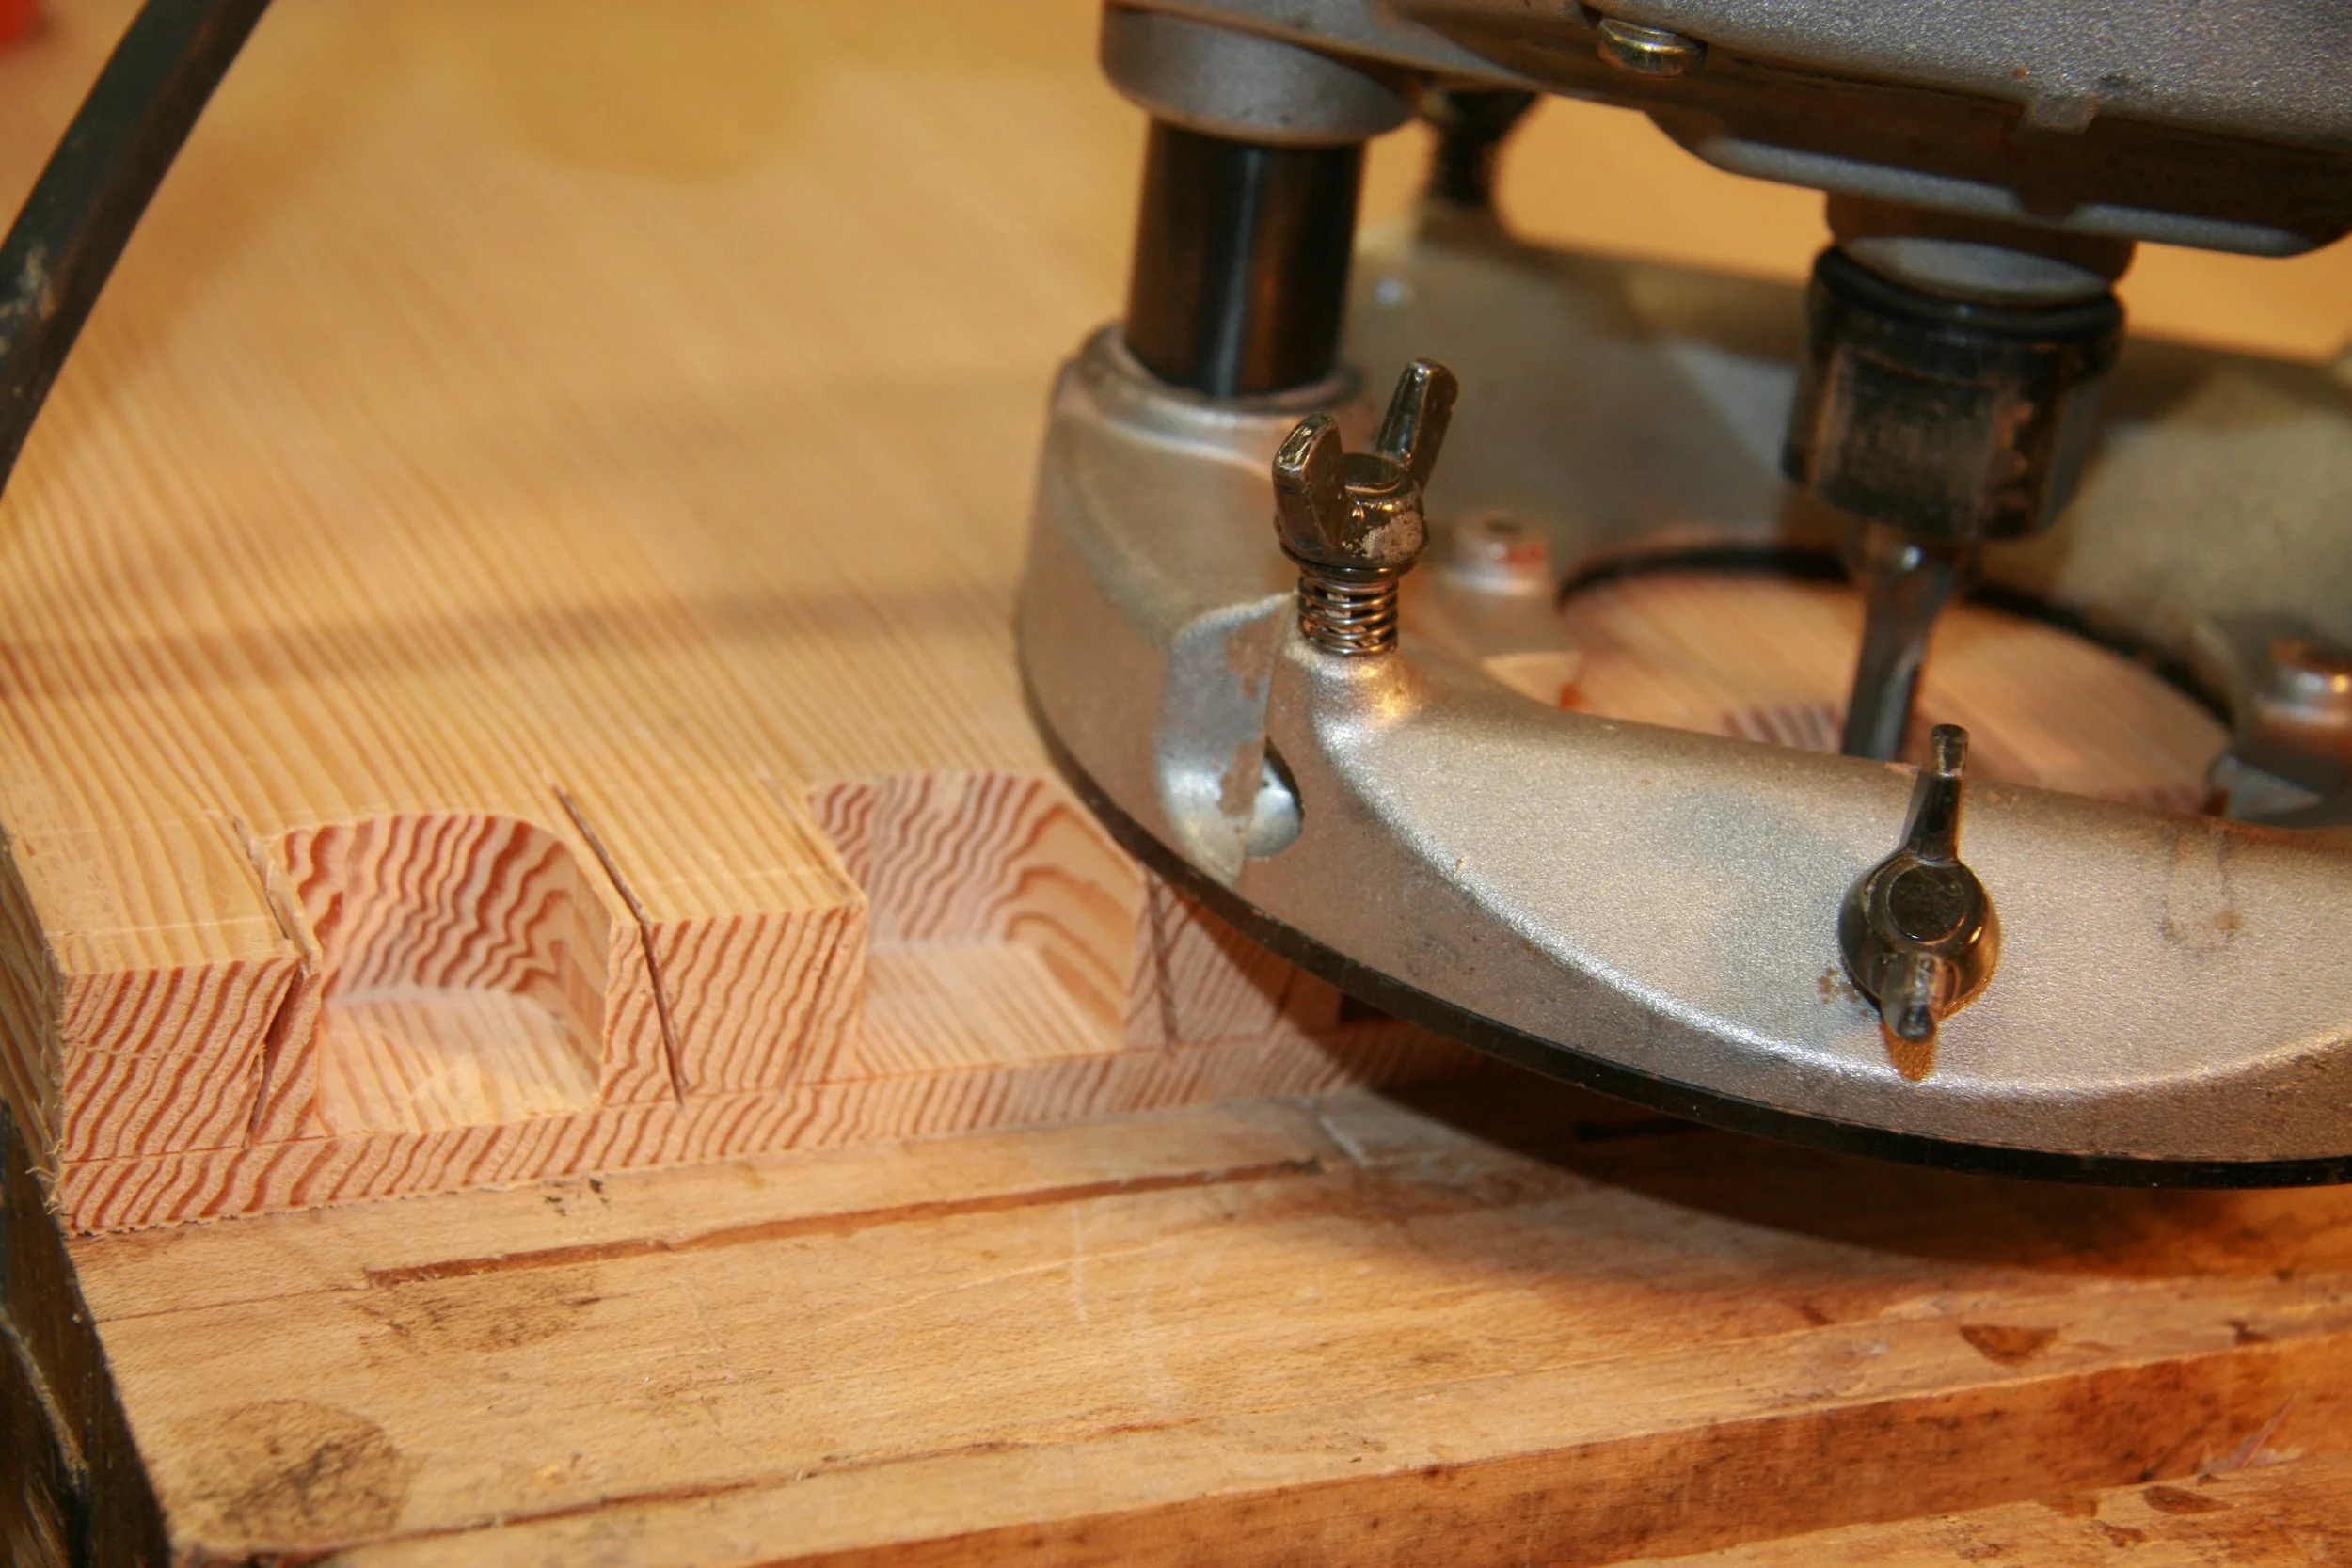
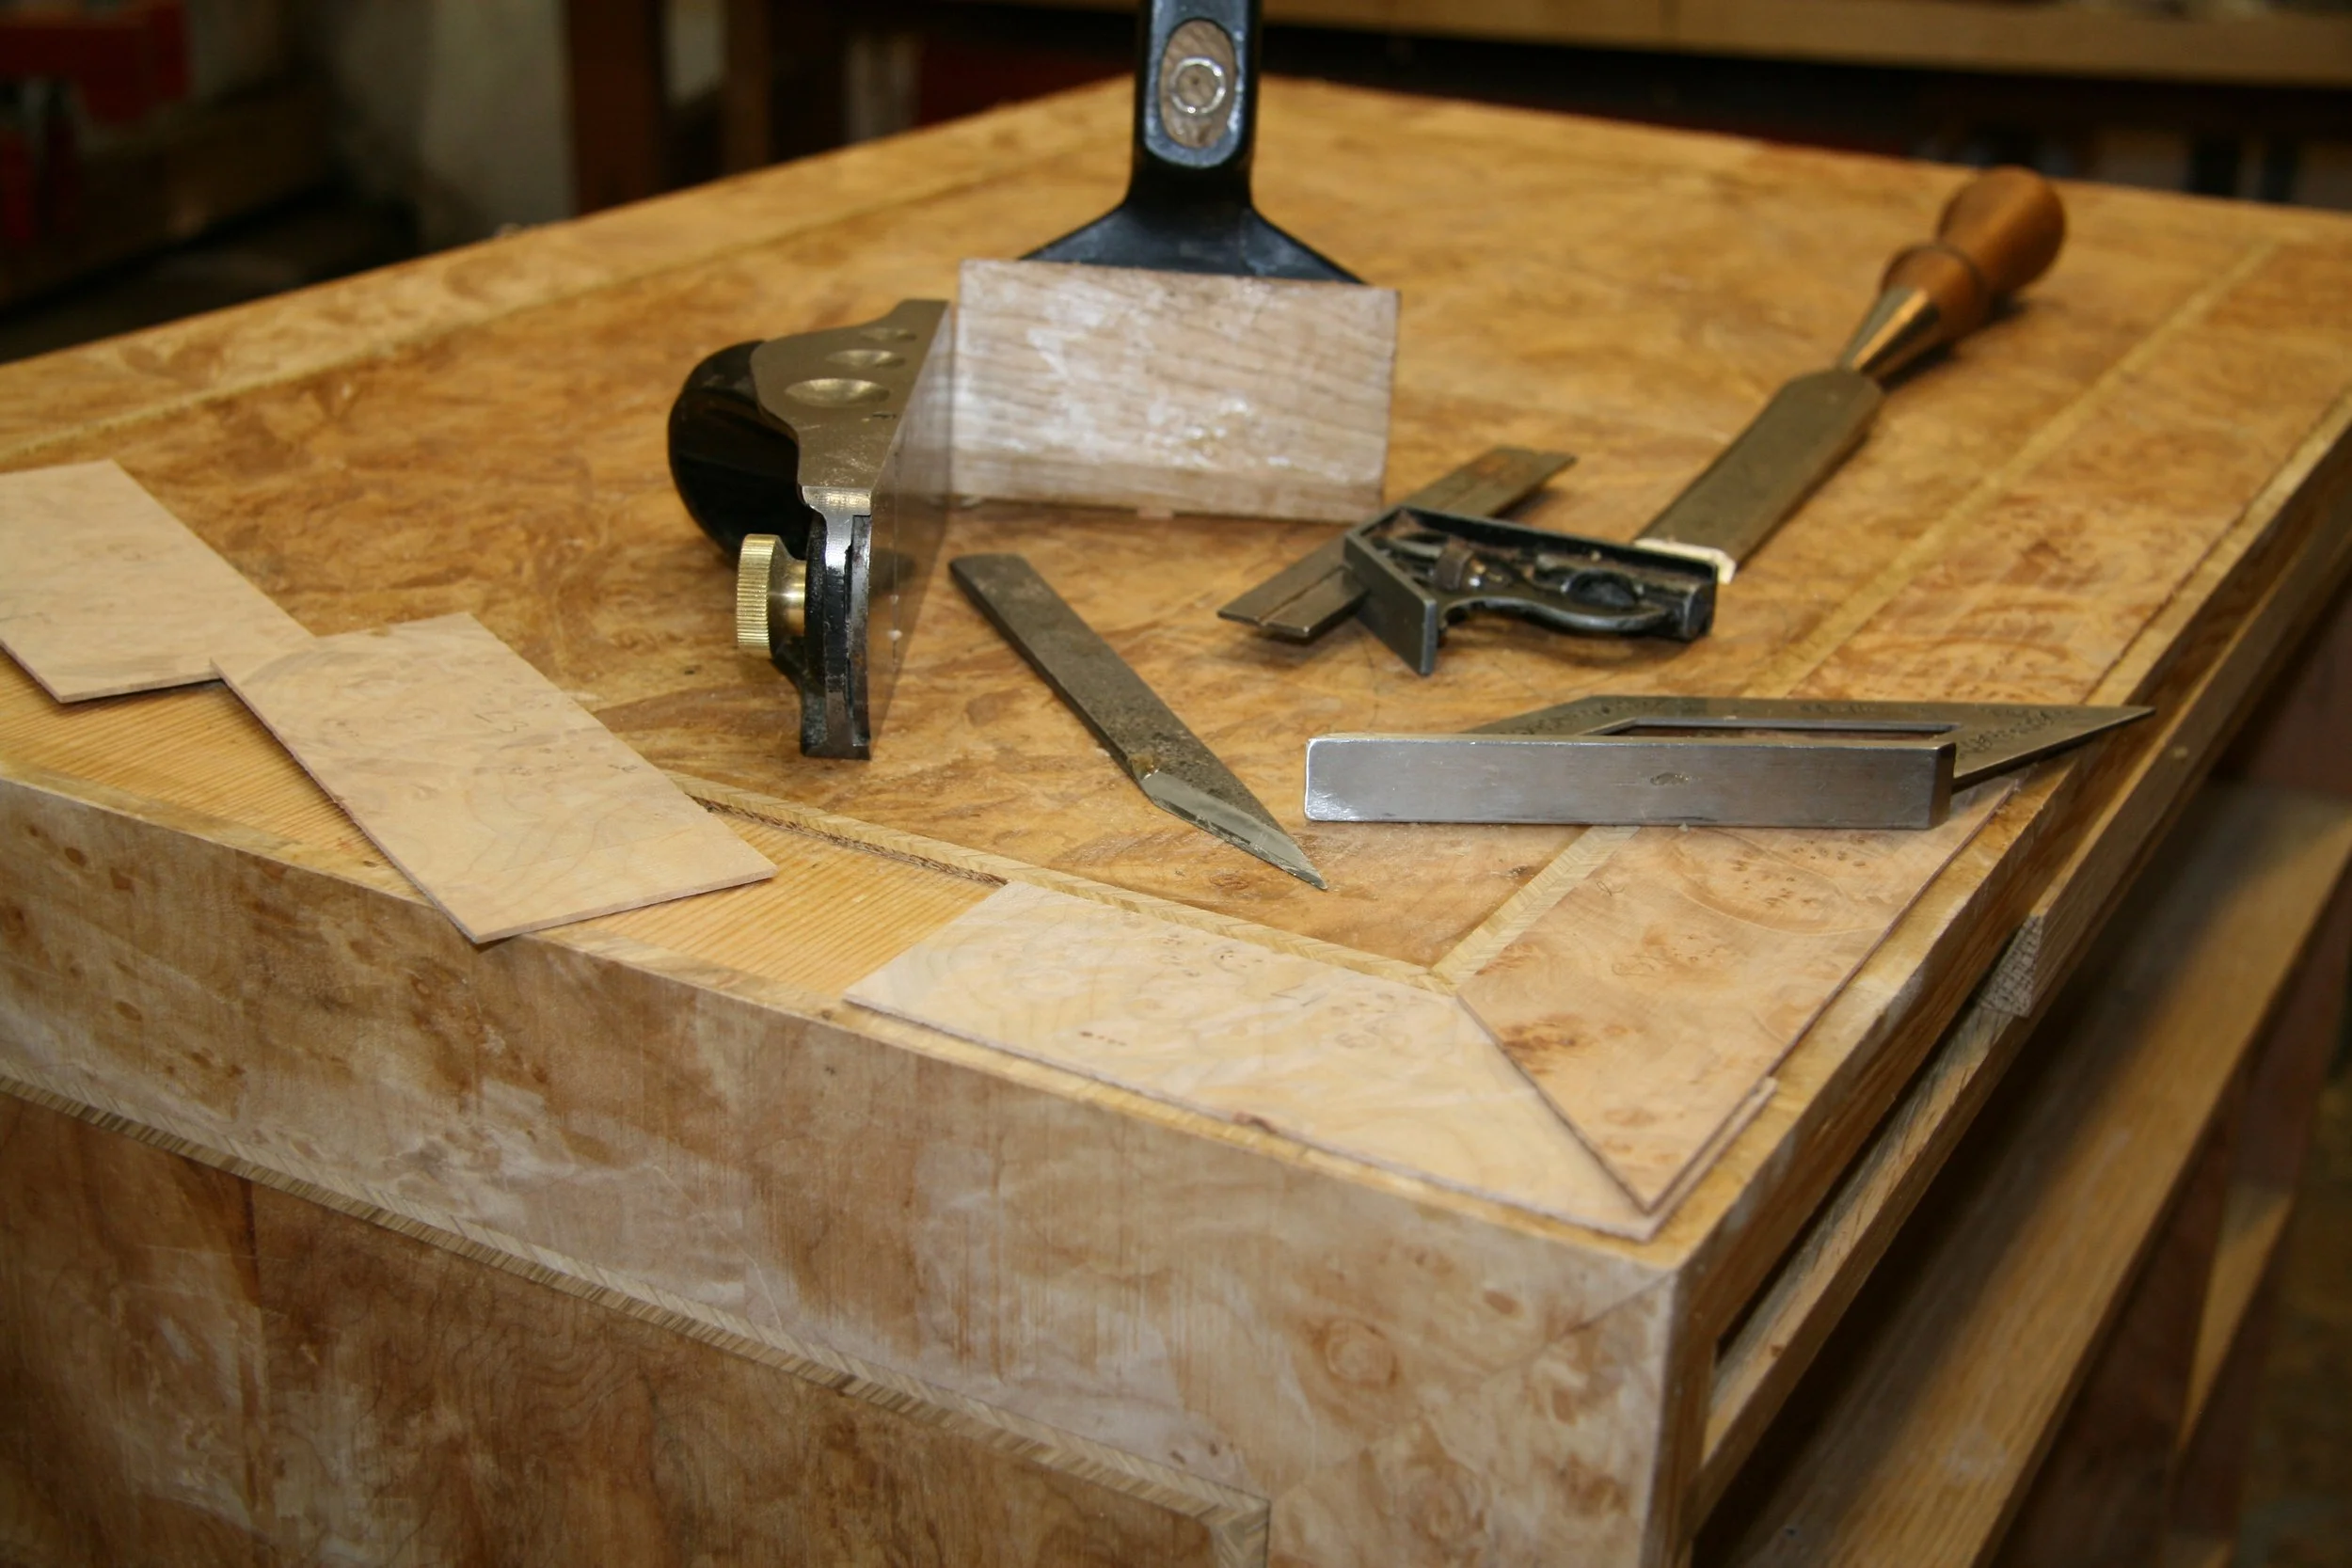
A router was used to remove the bulk of the waste for many of the dovetails. All of them were finished by hand with chisels.
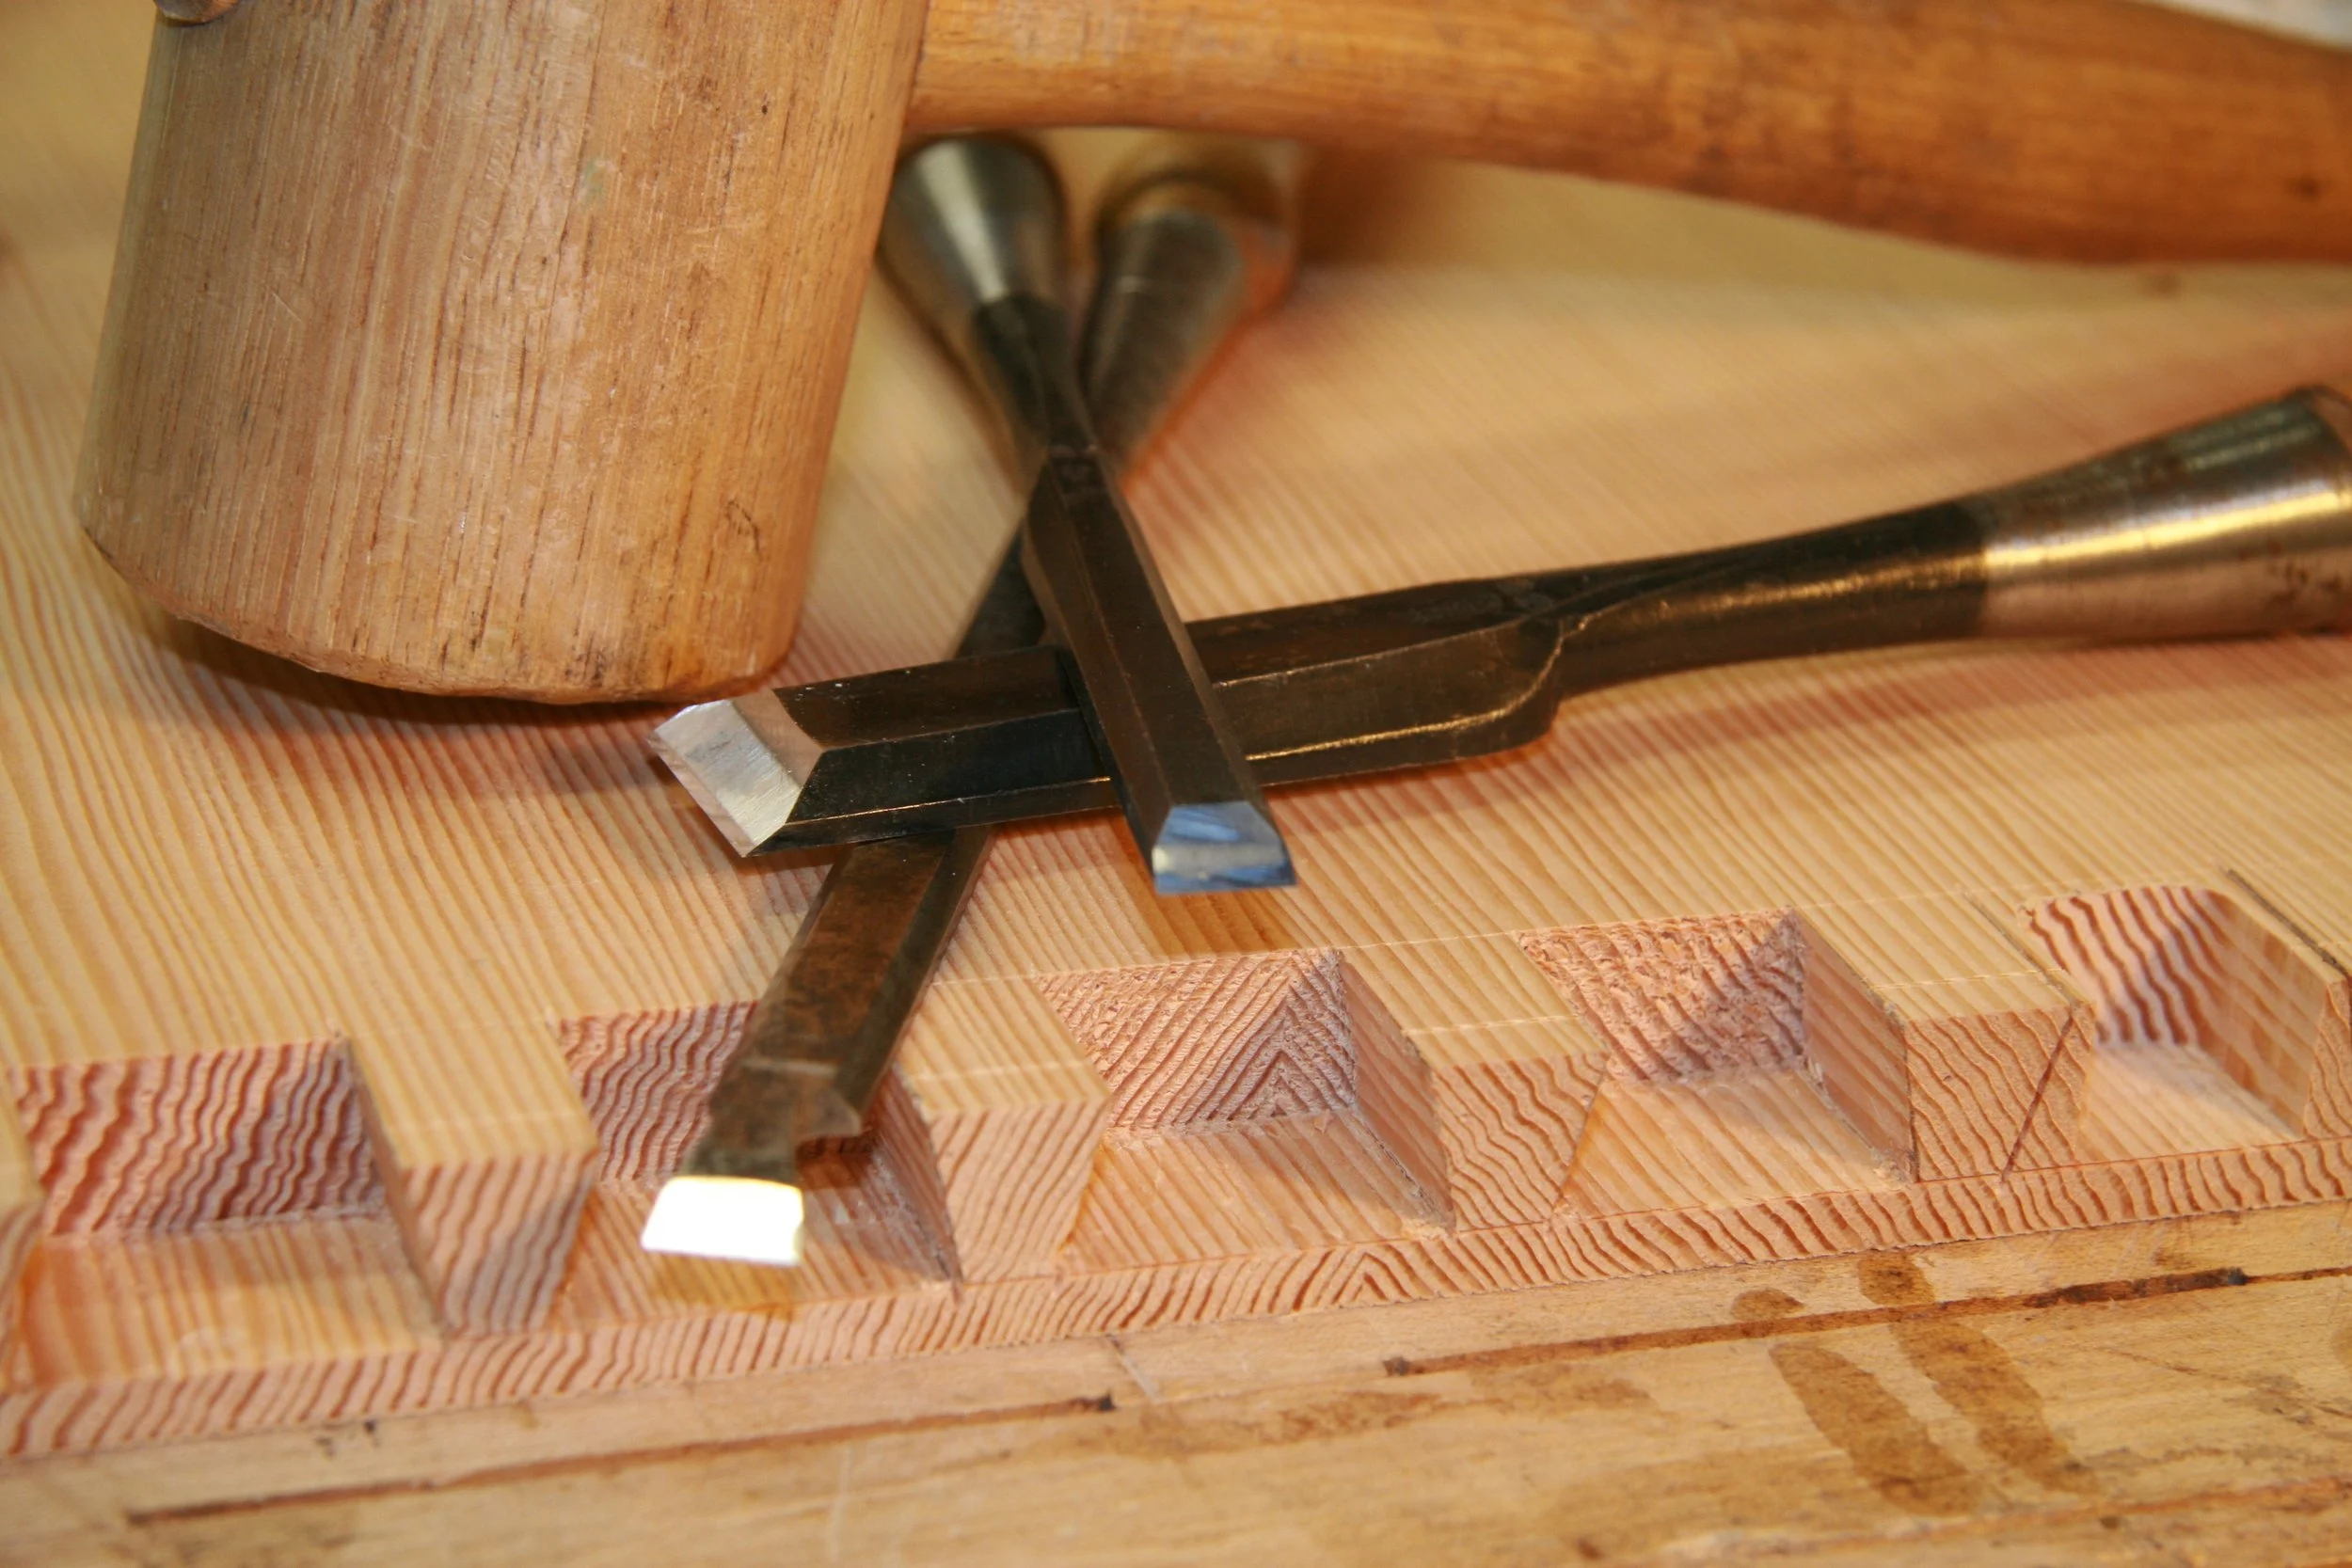
The tools used for cleaning up the dovetails.
The glued-up case bottom w/ the rabbets for the interior sides. Note the old nail holes in the lumber; betraying its origin as a resawn Victorian era construction beam that came out of a San Francisco garage conversion. Much of the wood used on this project was salvage.
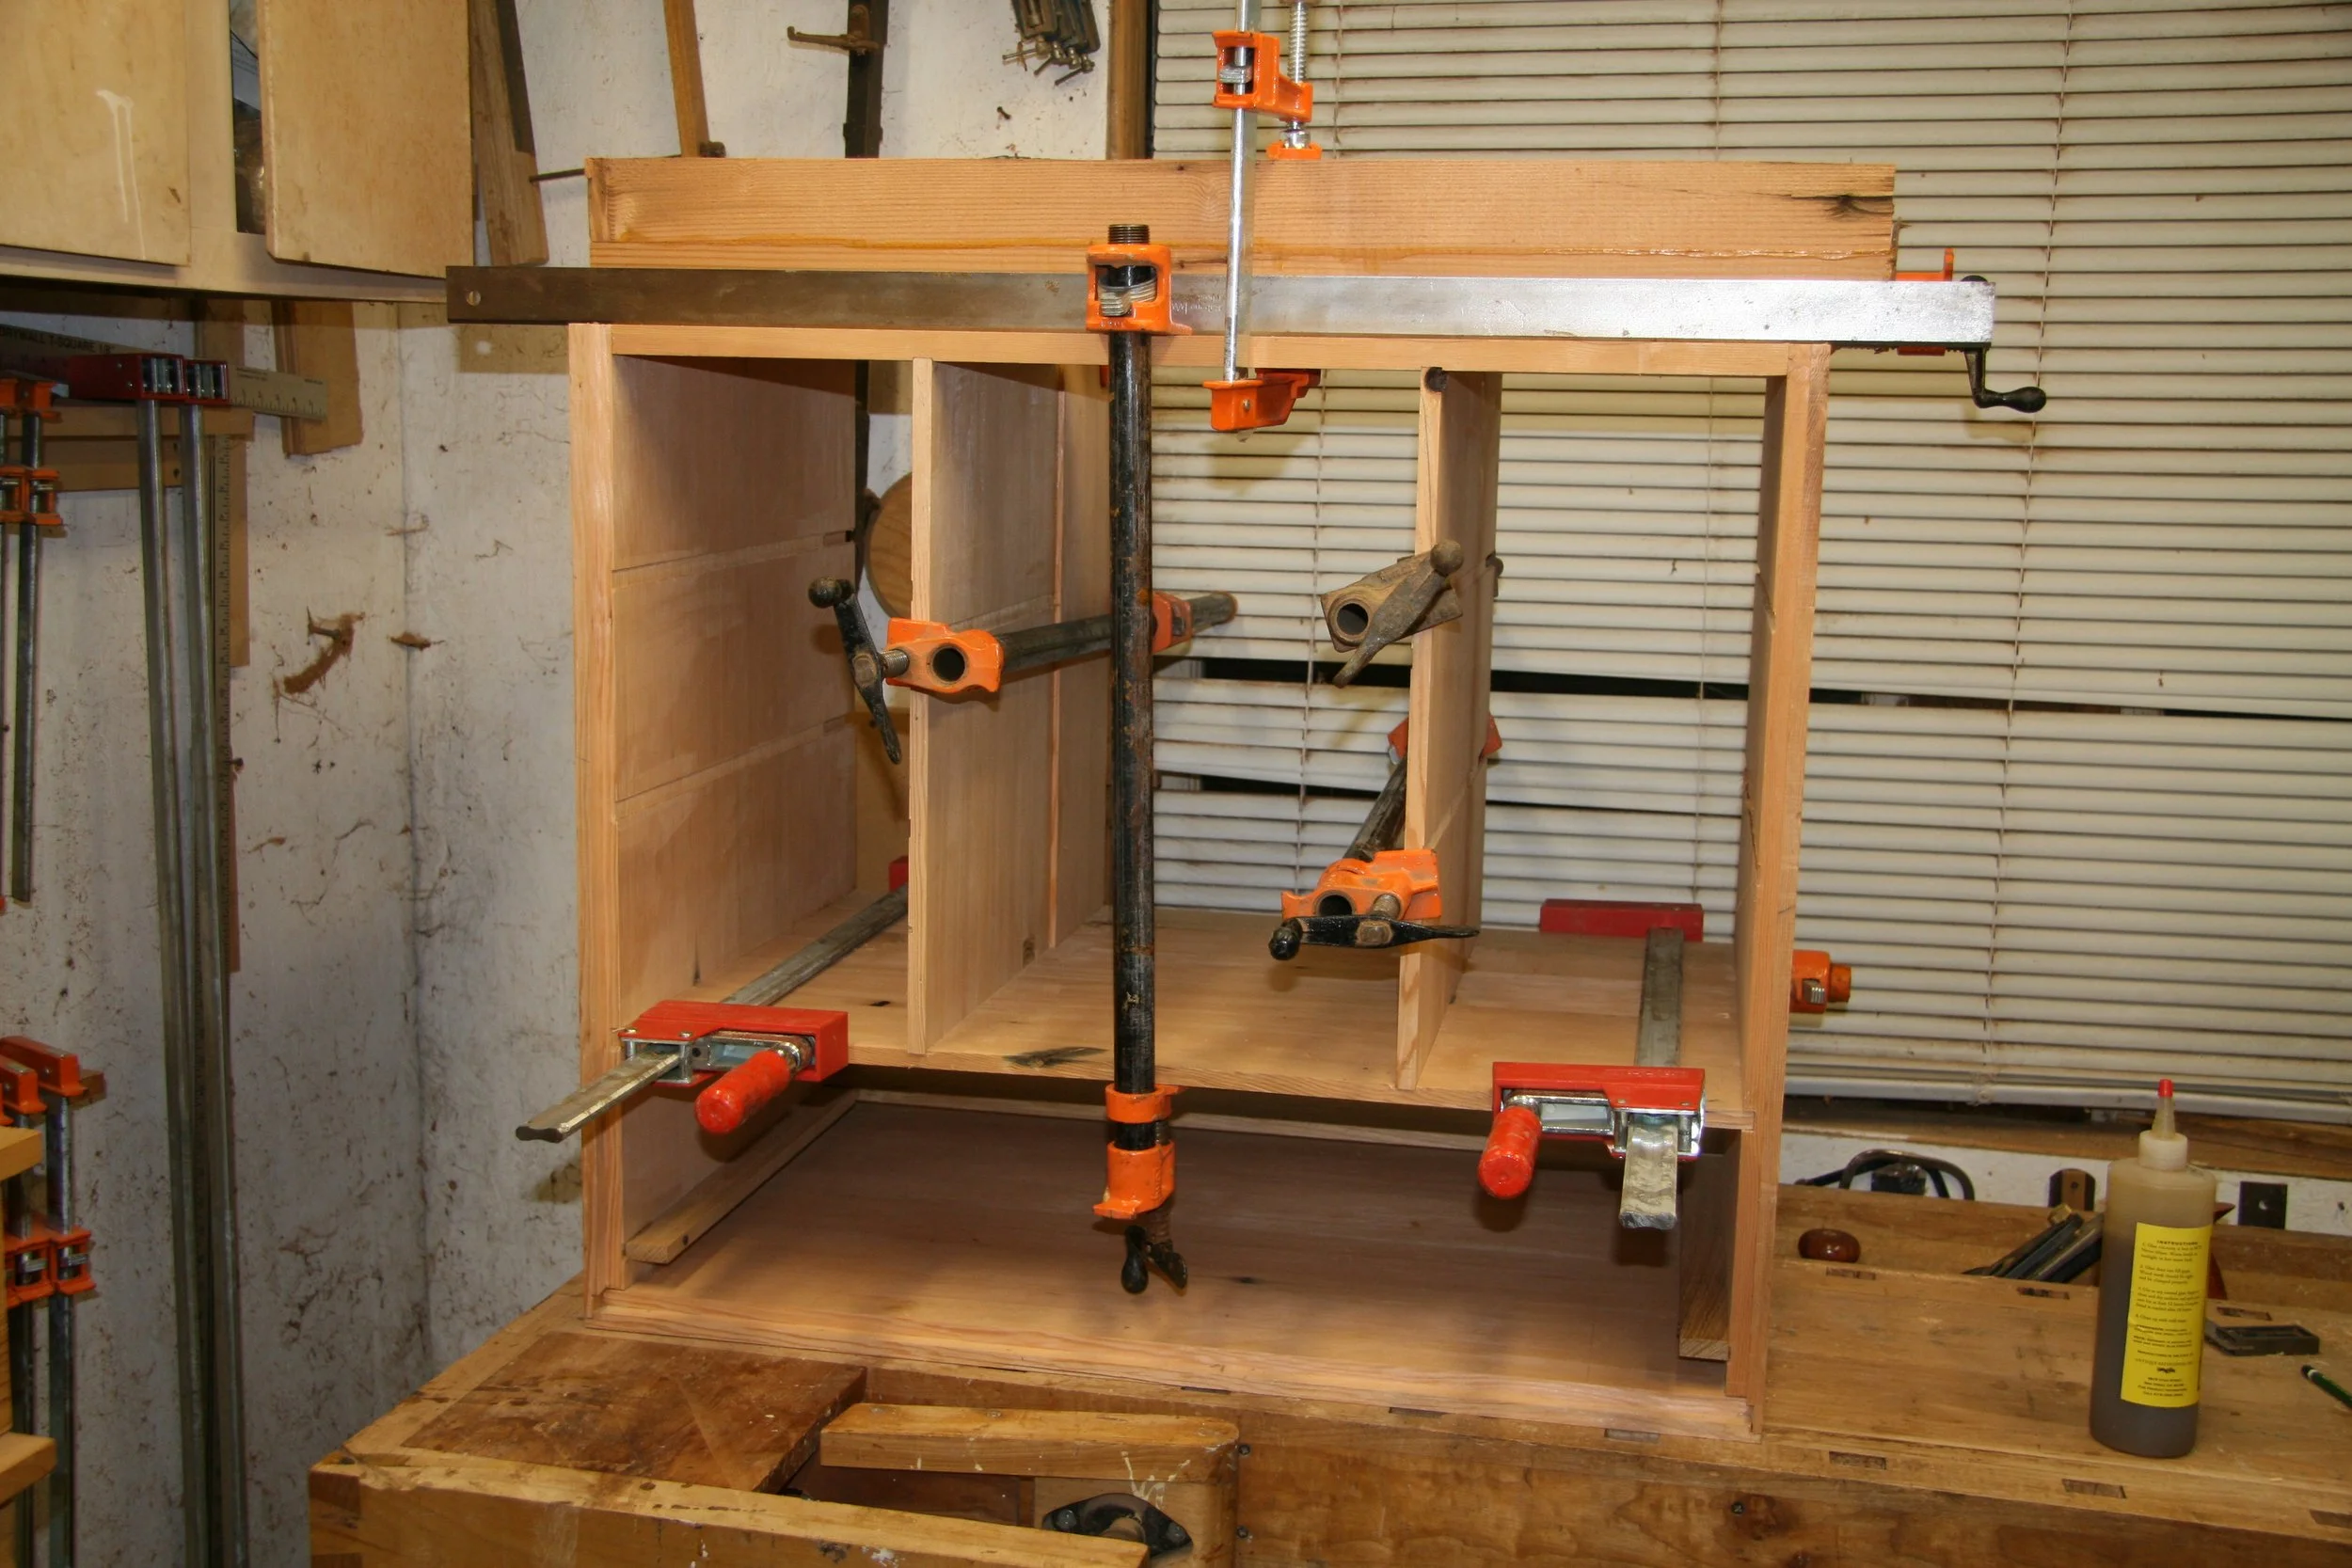
Gluing up the case. As in the original, animal hide glue was used.
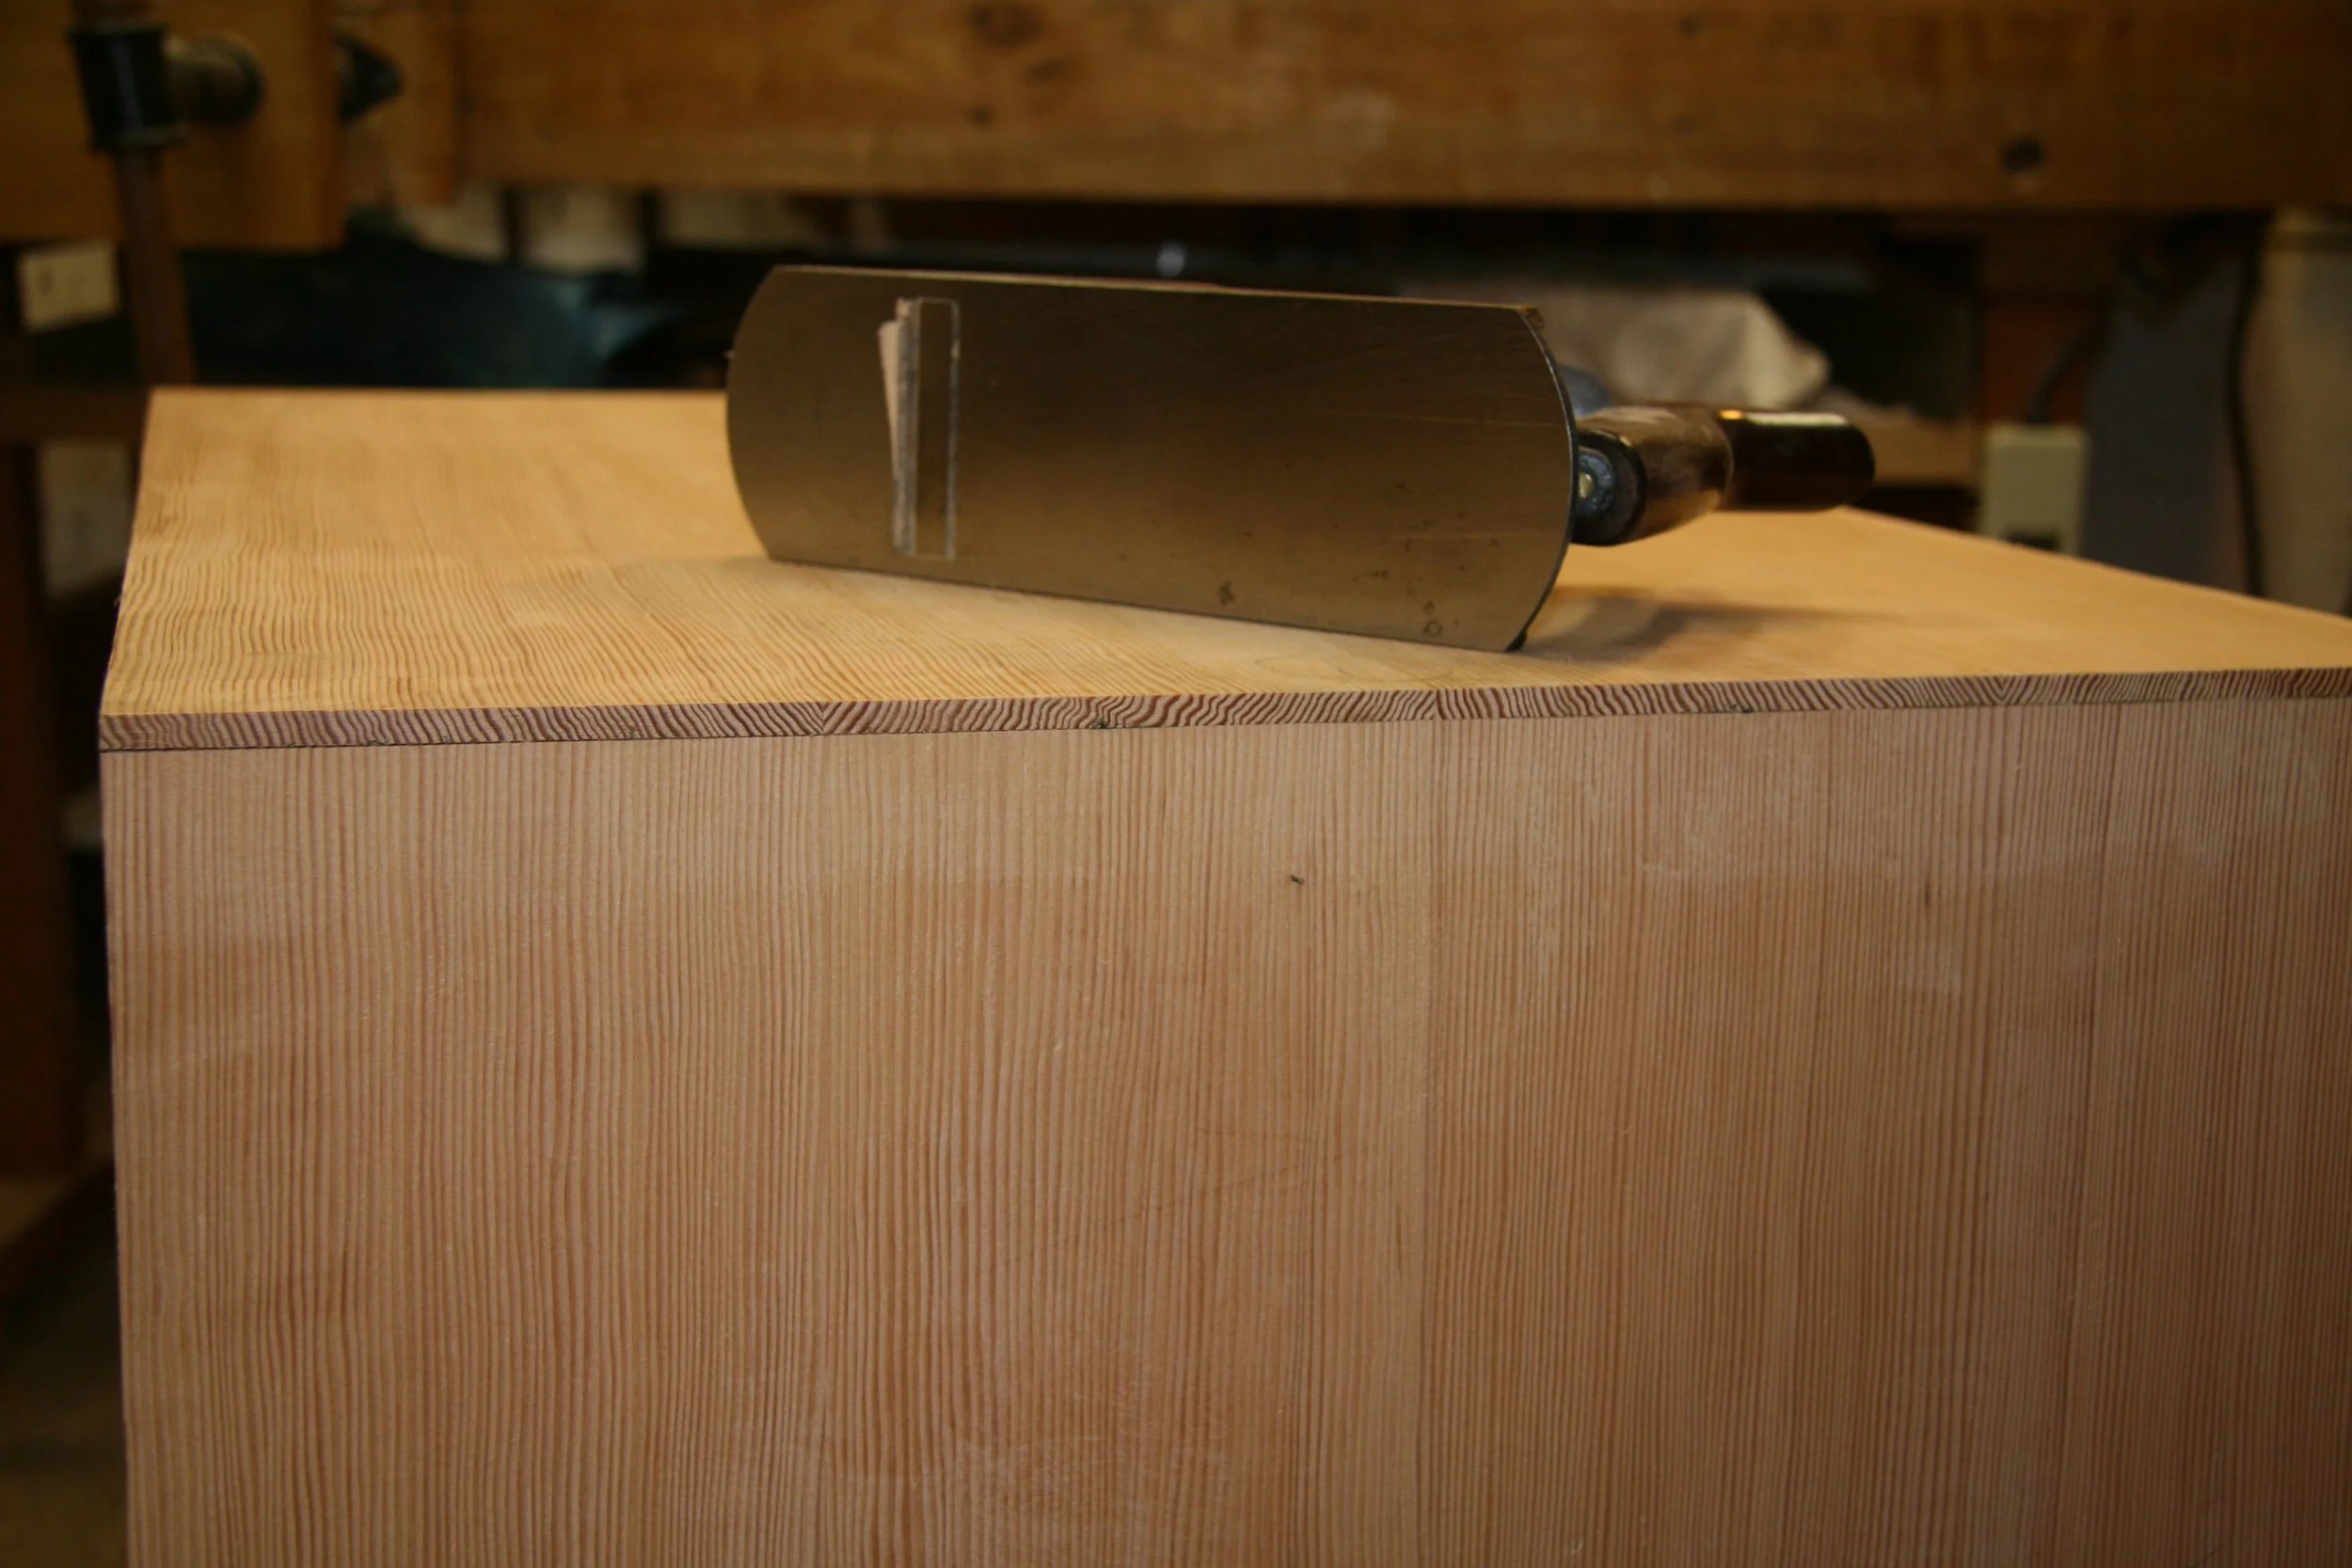
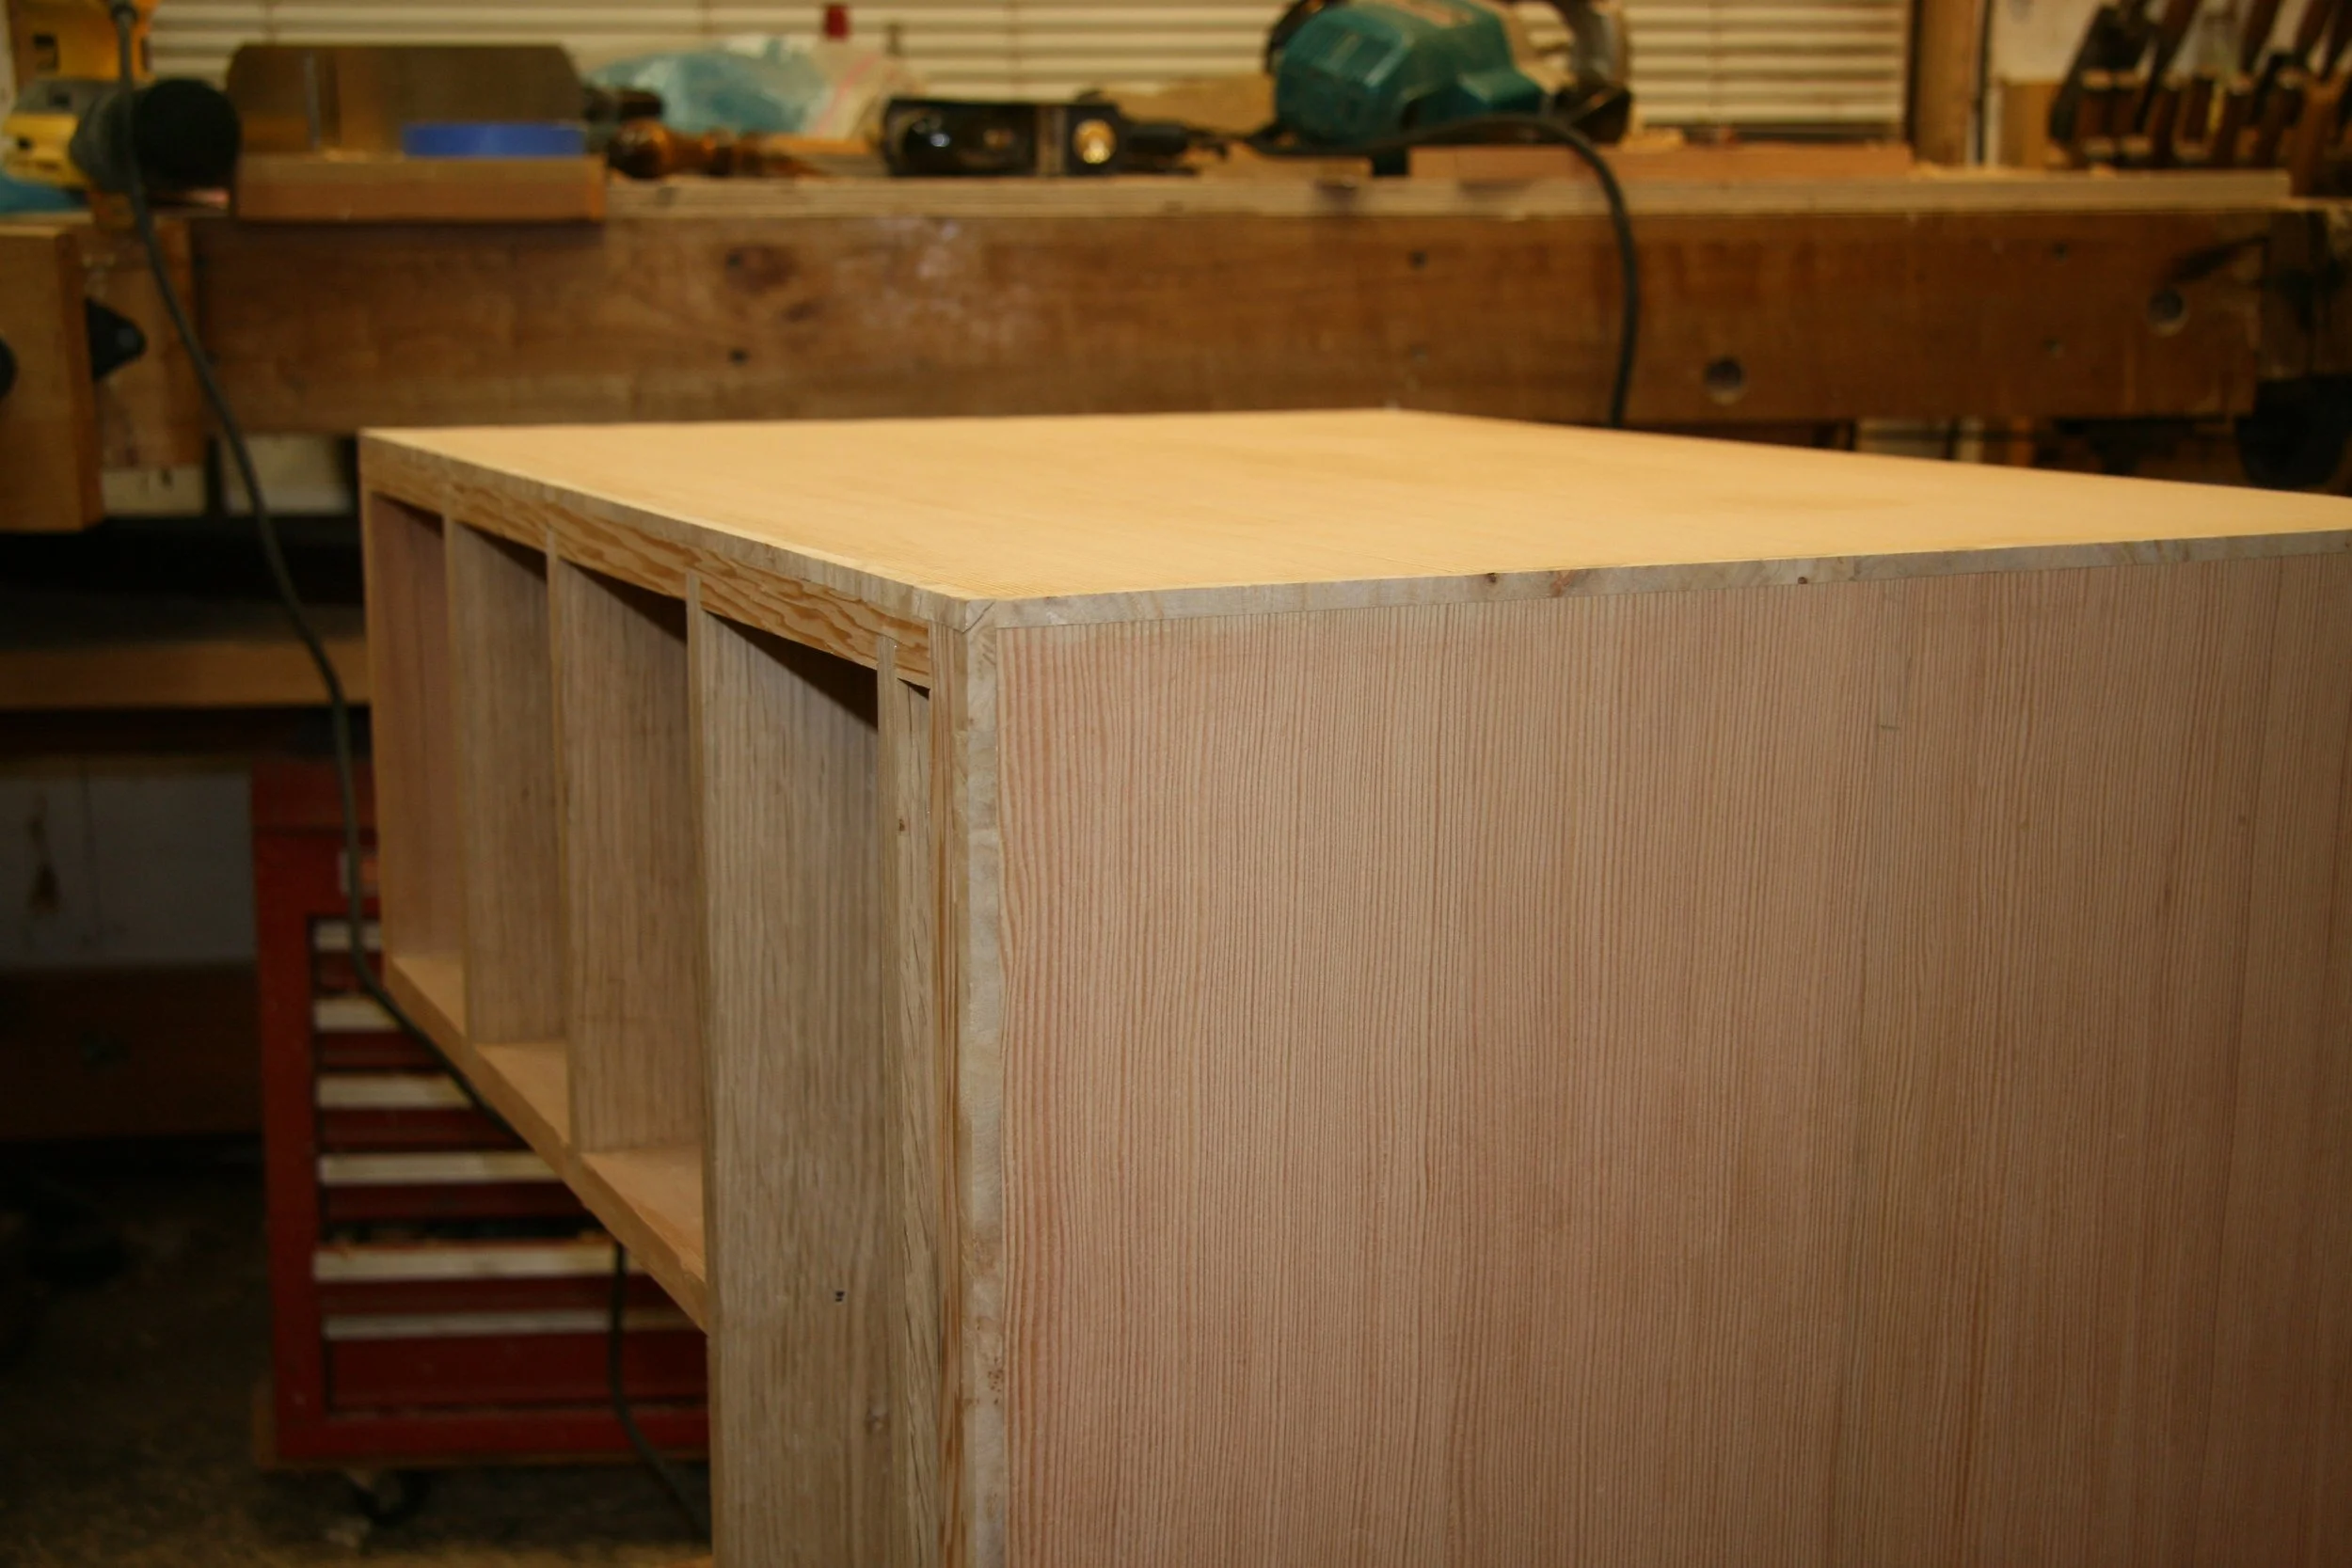
Cleaning up the case sides after glue-up. Even though it is beautiful in it's own right, this Douglas Fir wood will be covered over with the Maple veneer. It is difficult to believe anyone would throw something like this away.
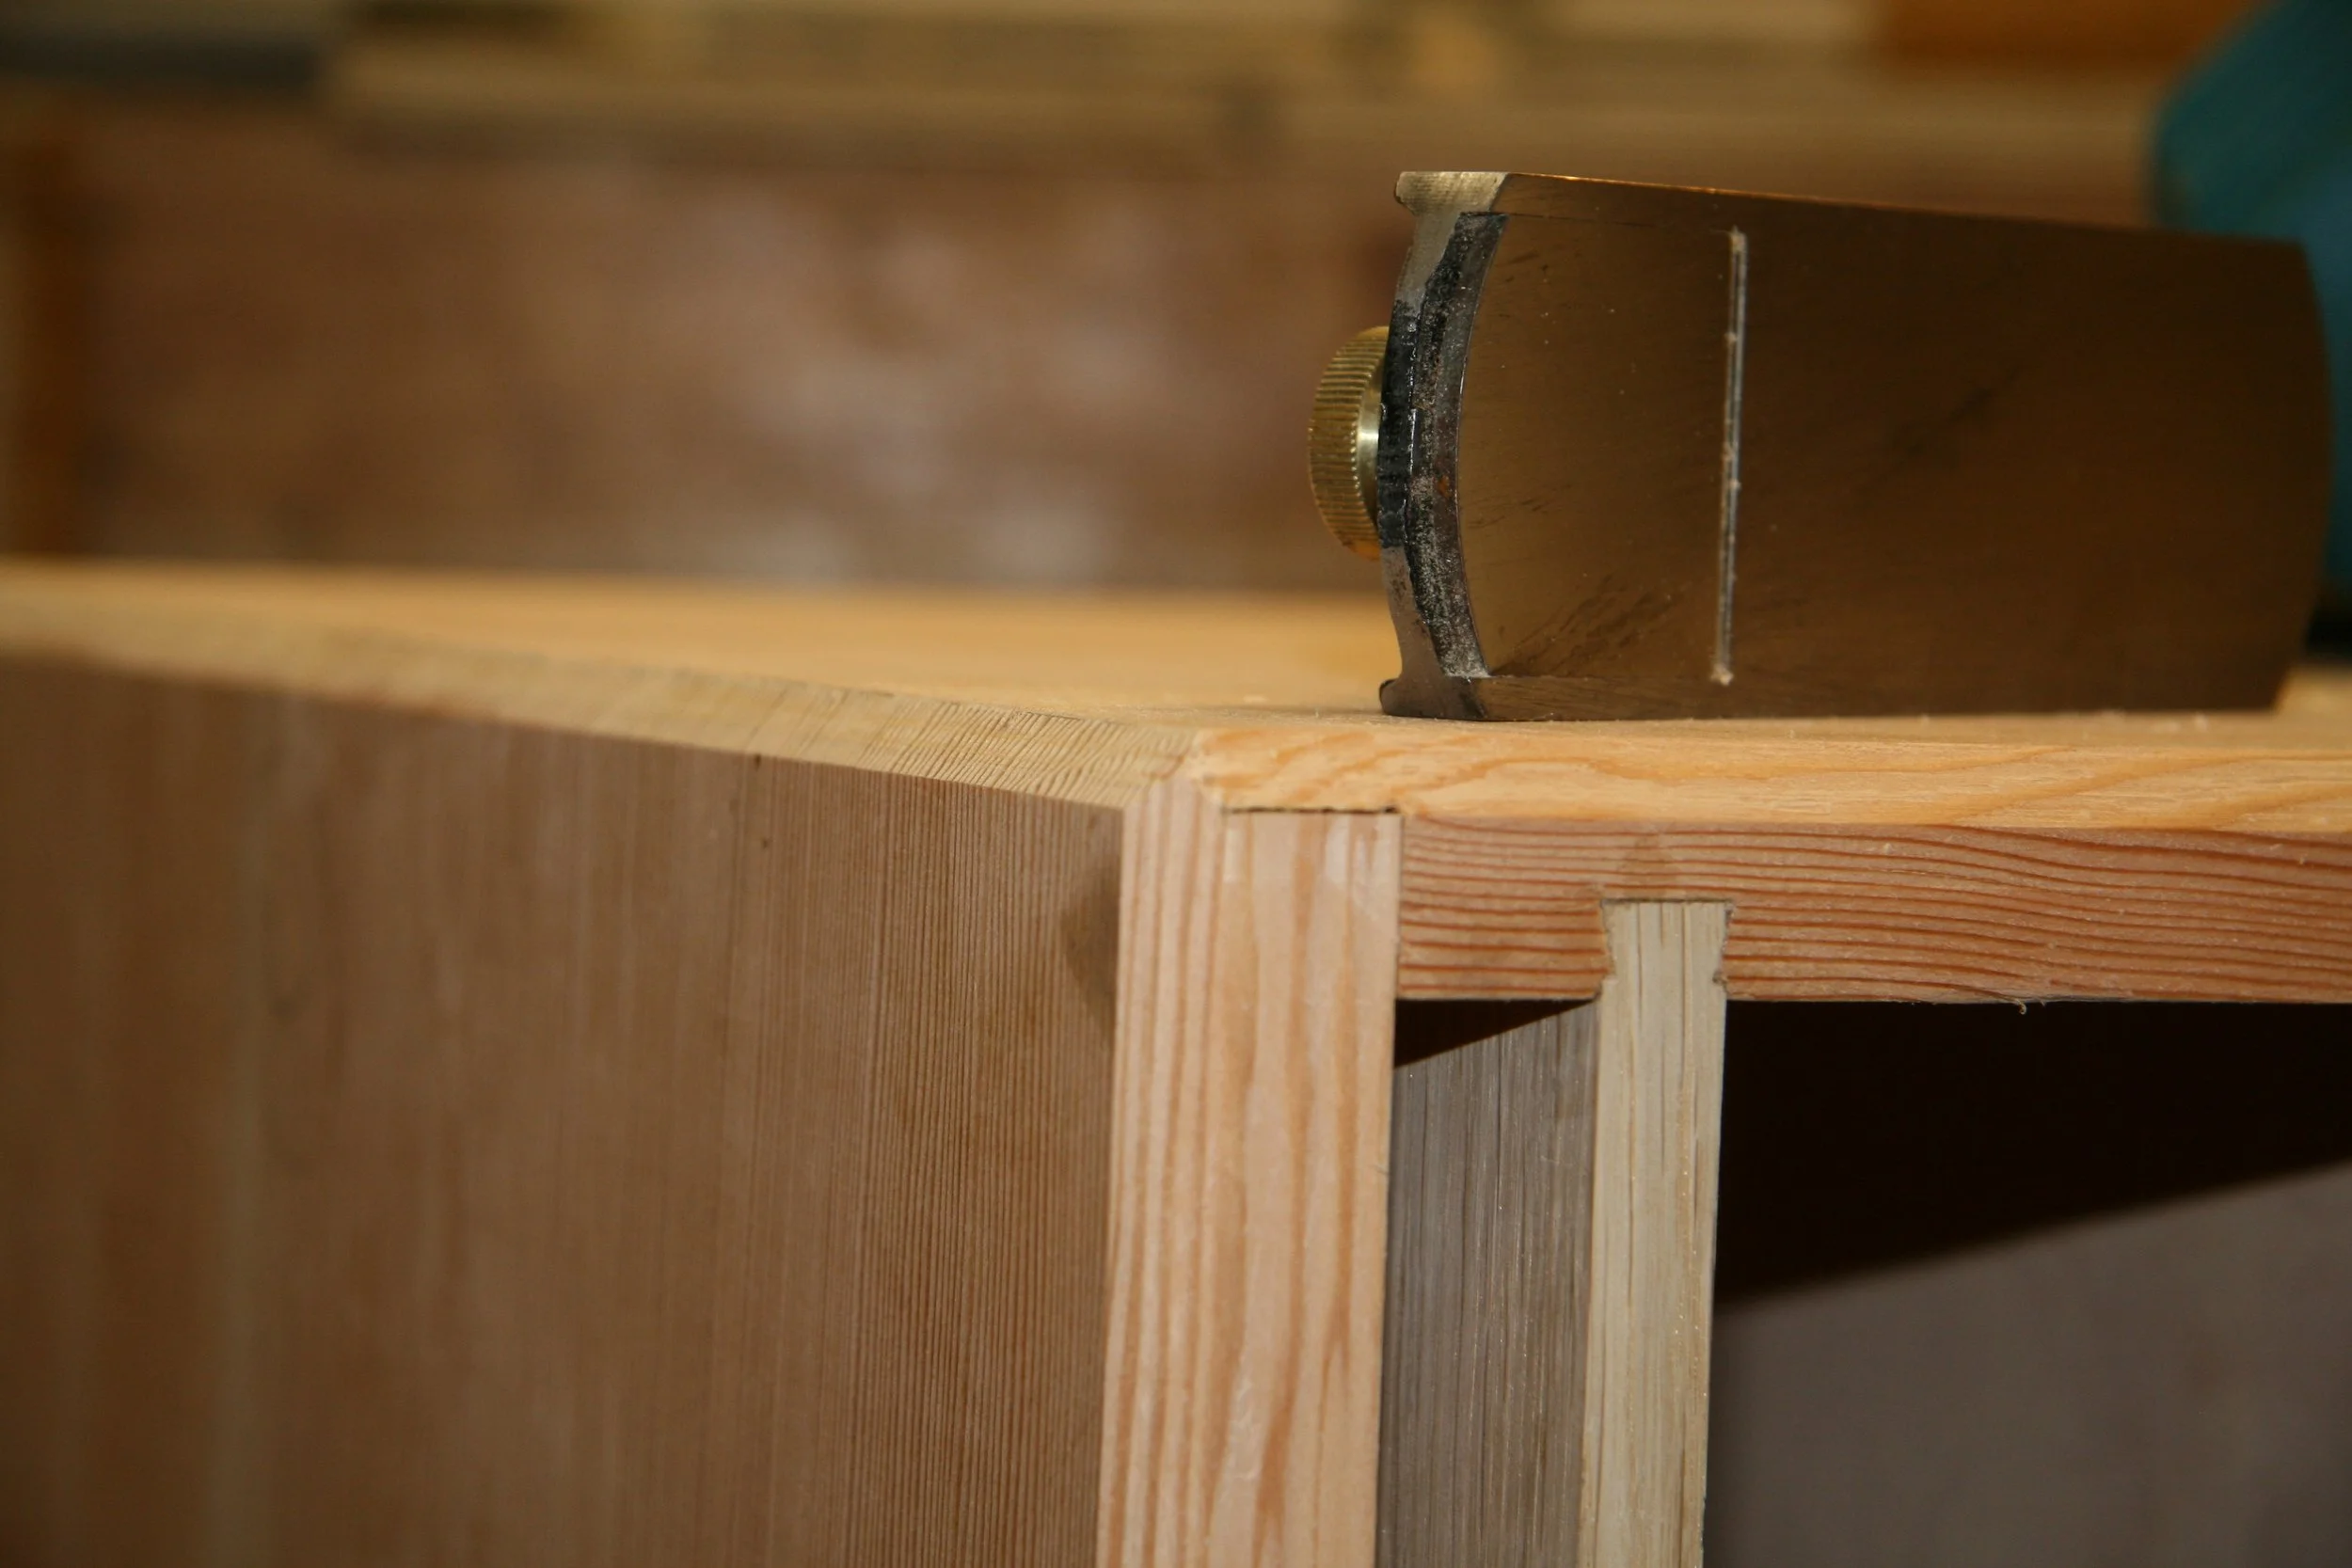
Cleaning up the case bottom. This view clearly shows how the case was "stiched together" with dovetail joints. Unfortunately, these will all be hidden by the time the piece is finished.

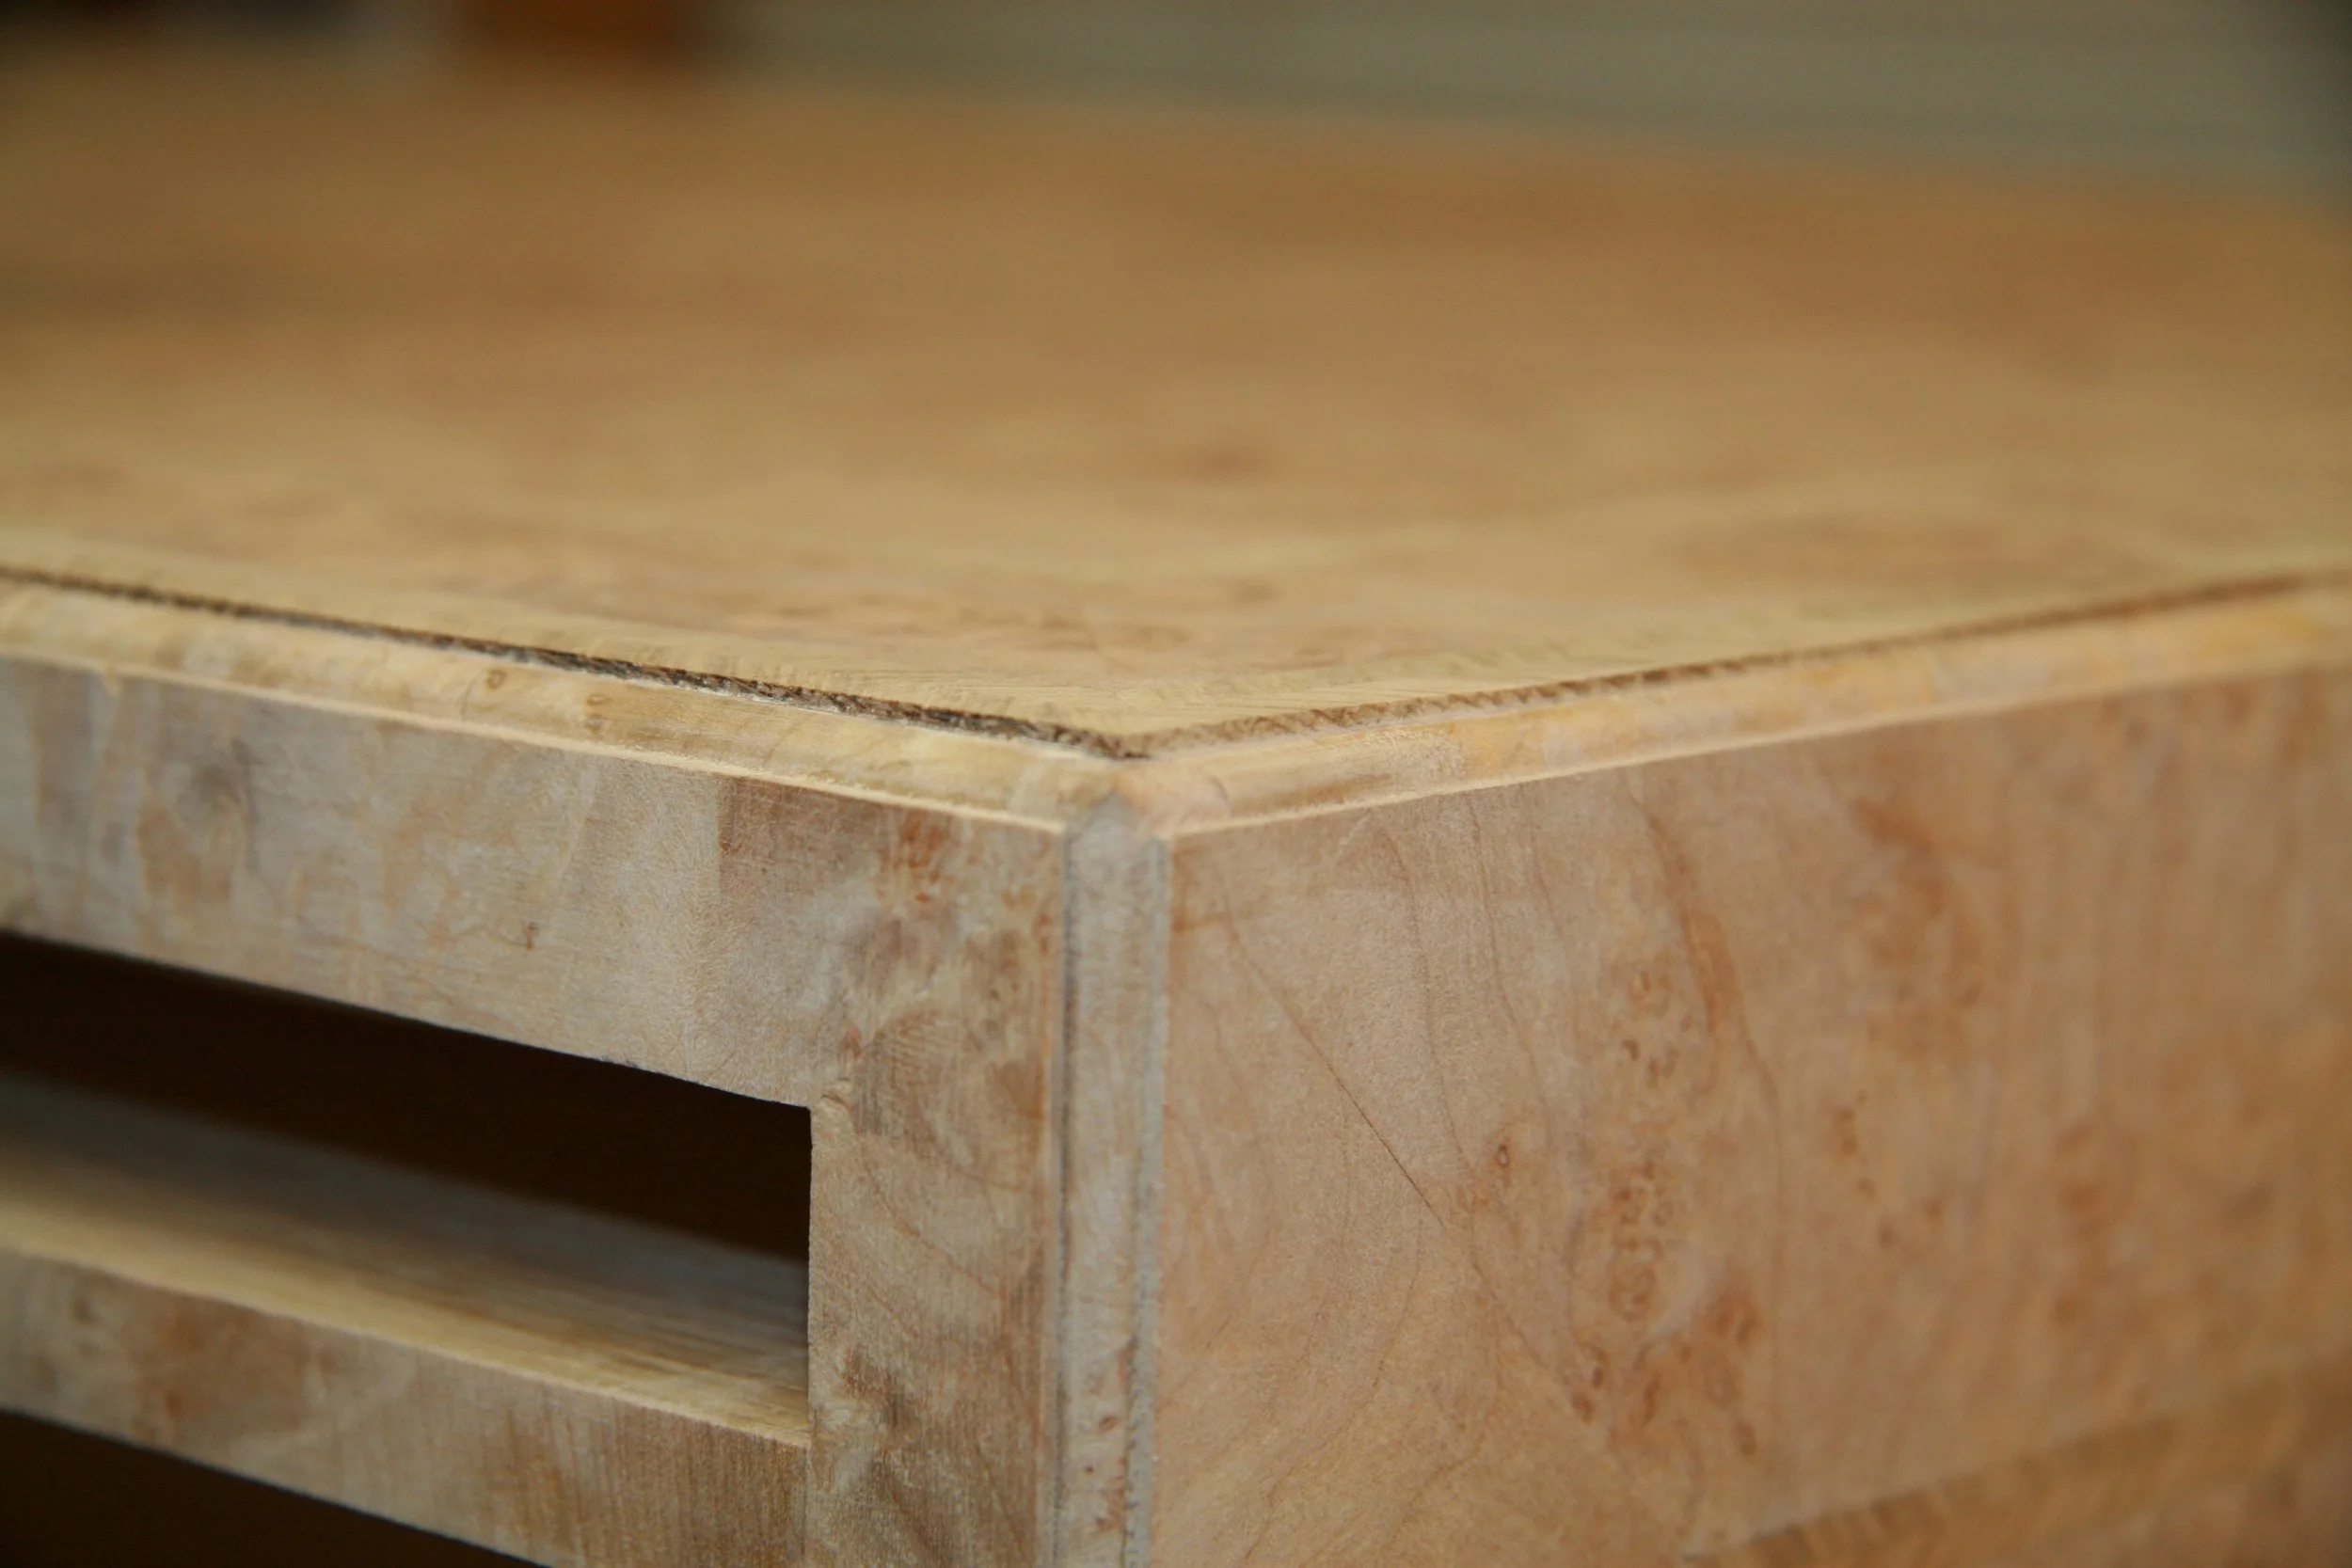
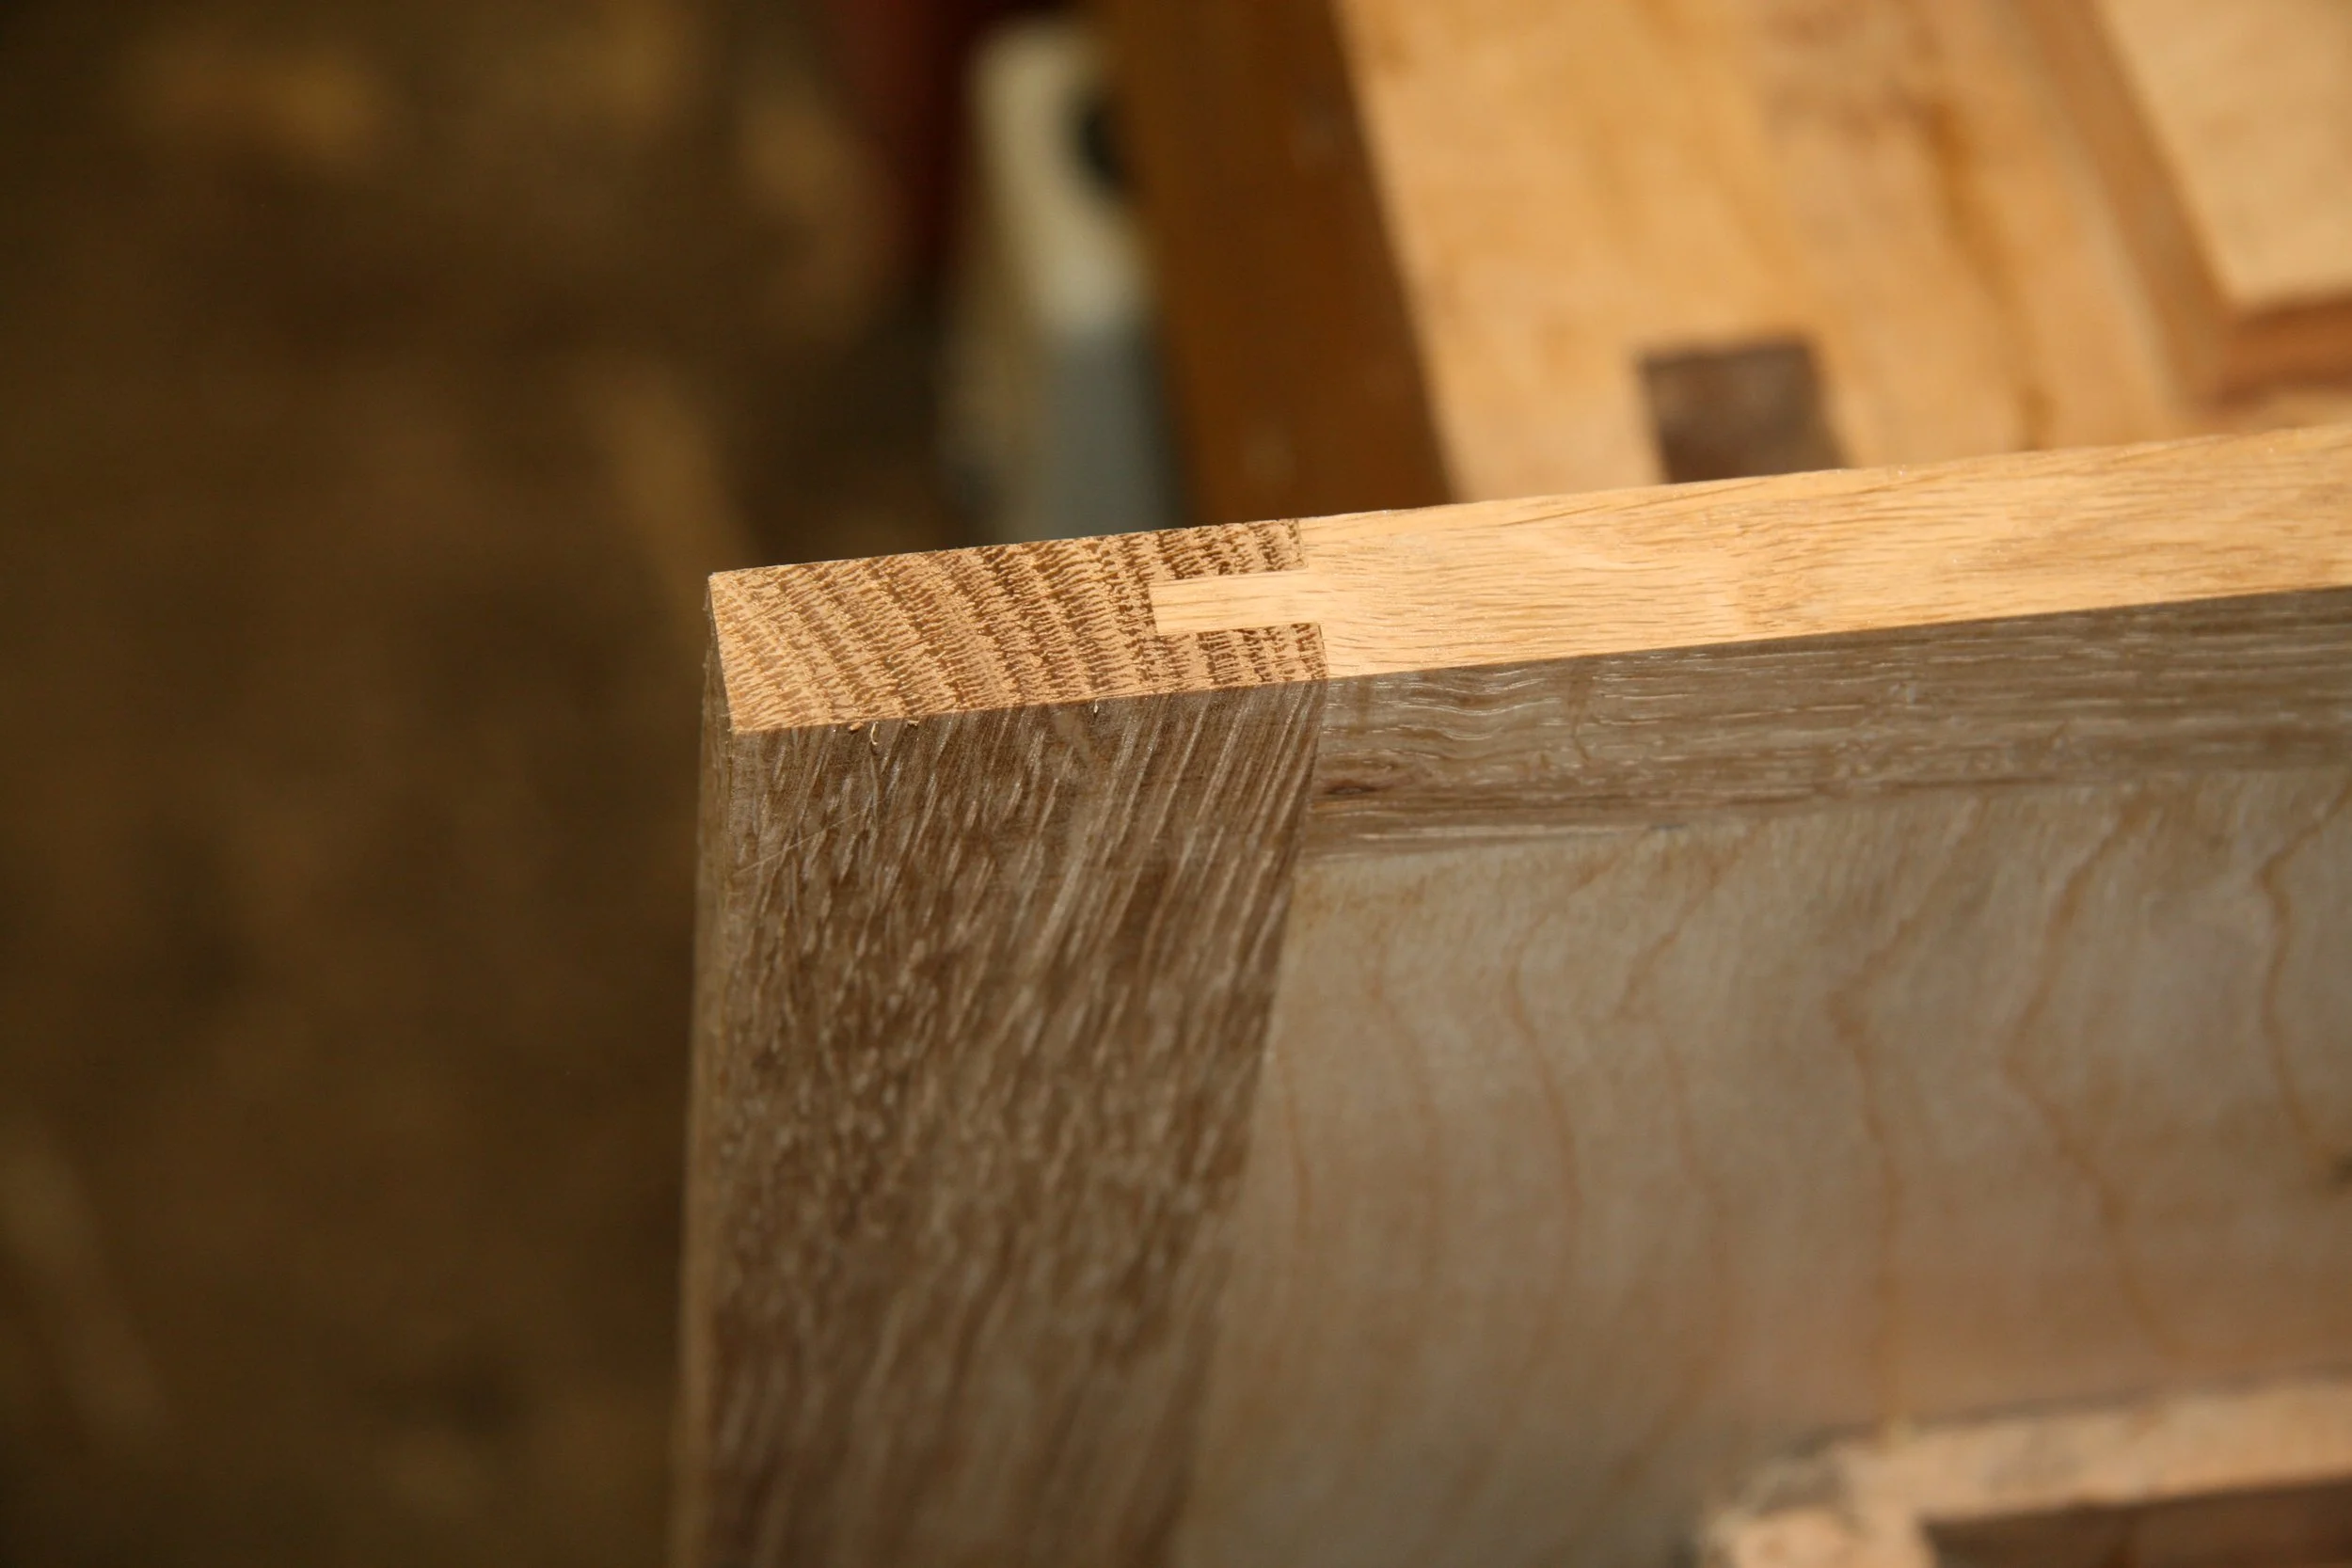
A view of the case top corner. The double lapped dovetails that hold the case corners together are almost invisible at this point. The dividers are held in with sliding dovetails, locking the entire assembly in place. Even if the glue were to fail, the carcass would hold together like a Chinese puzzle.
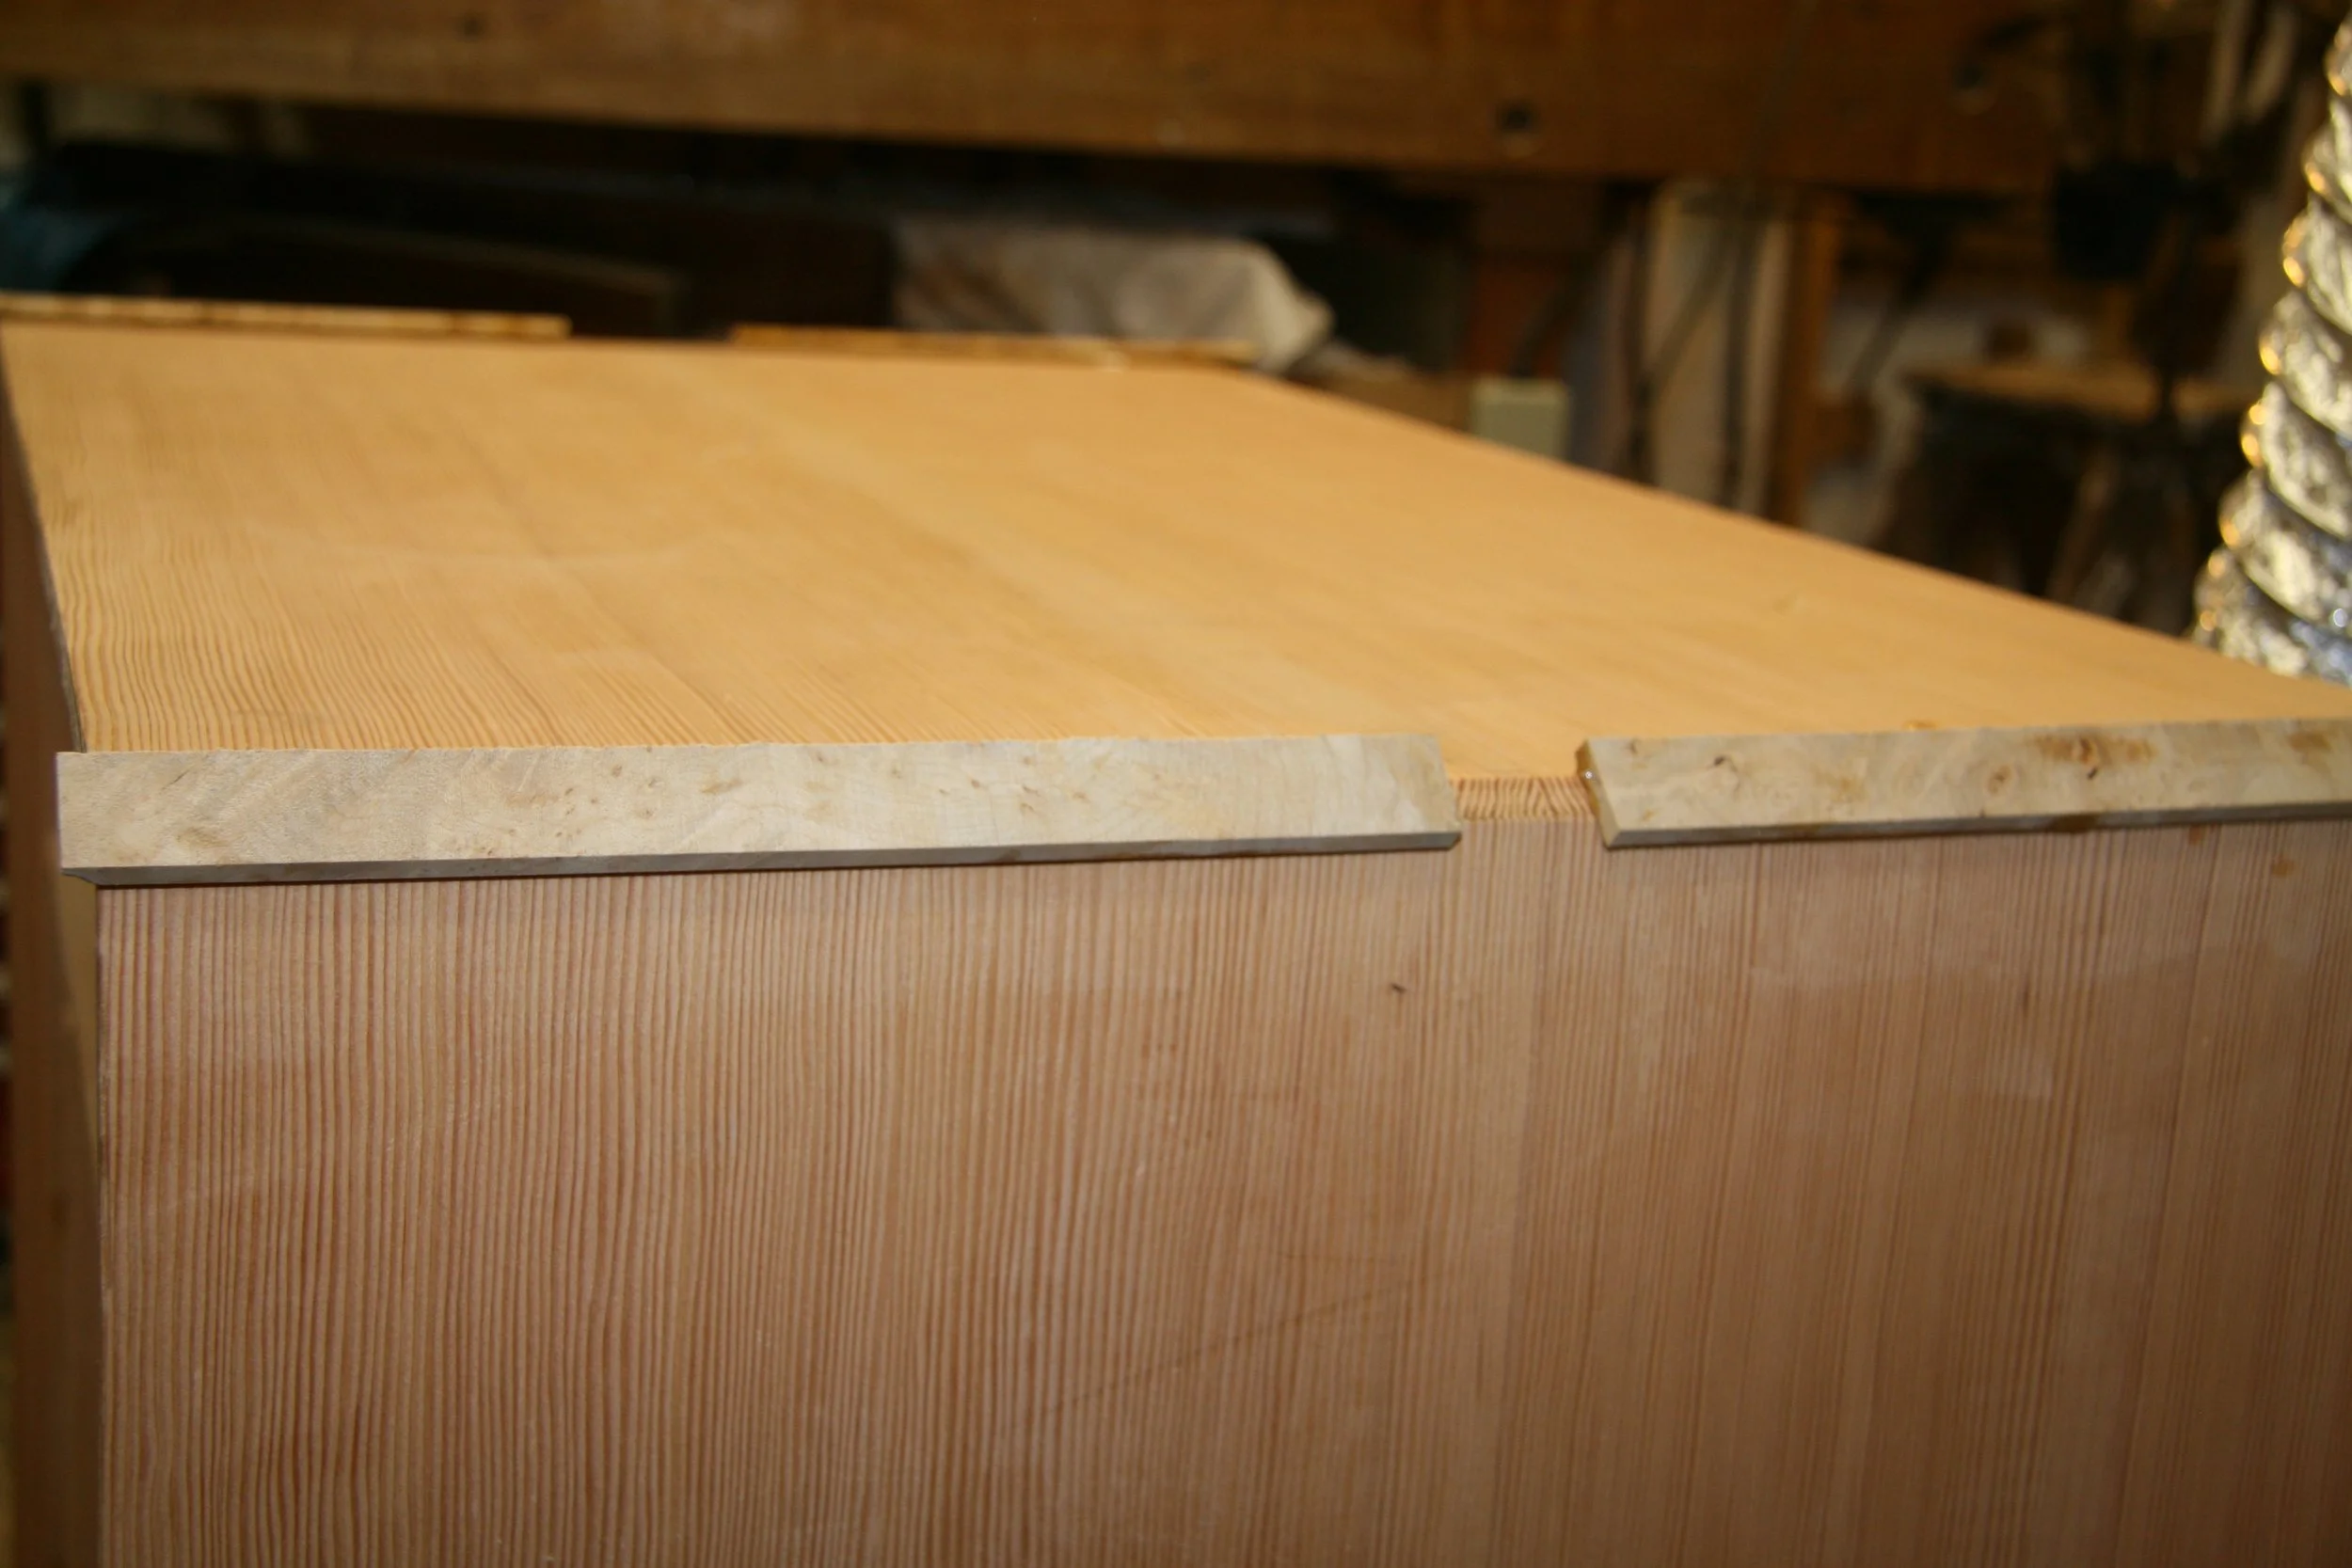
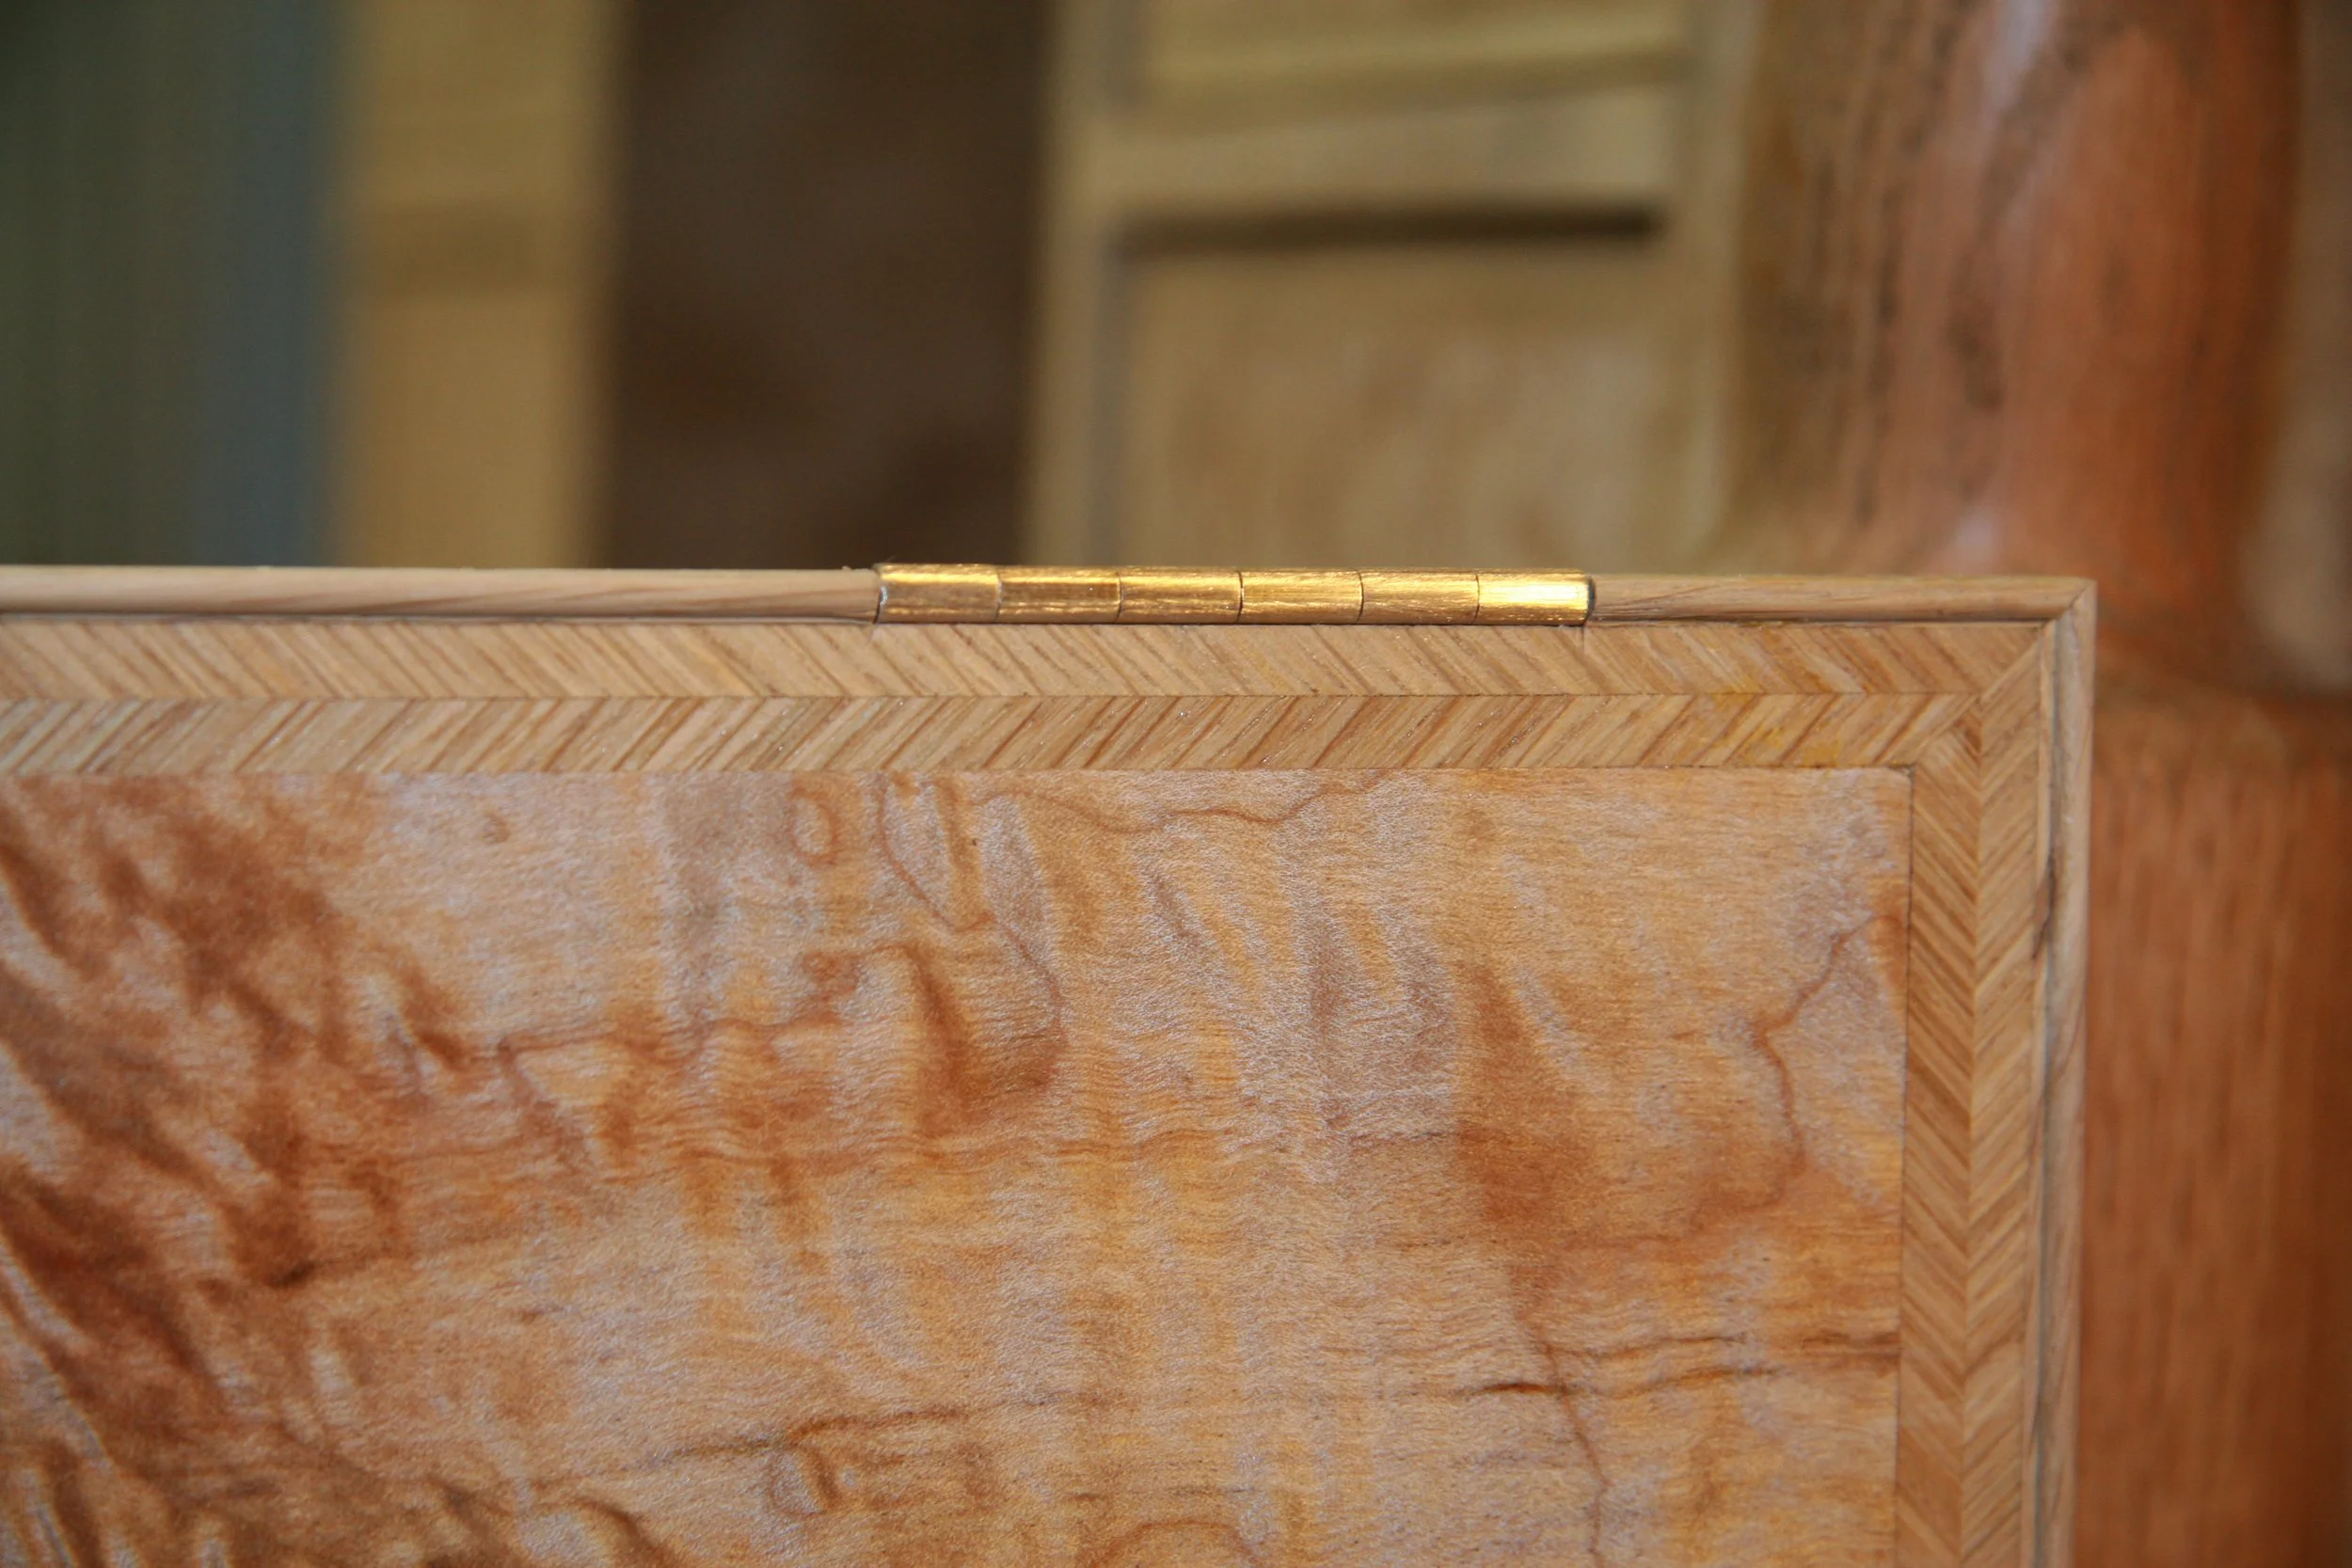
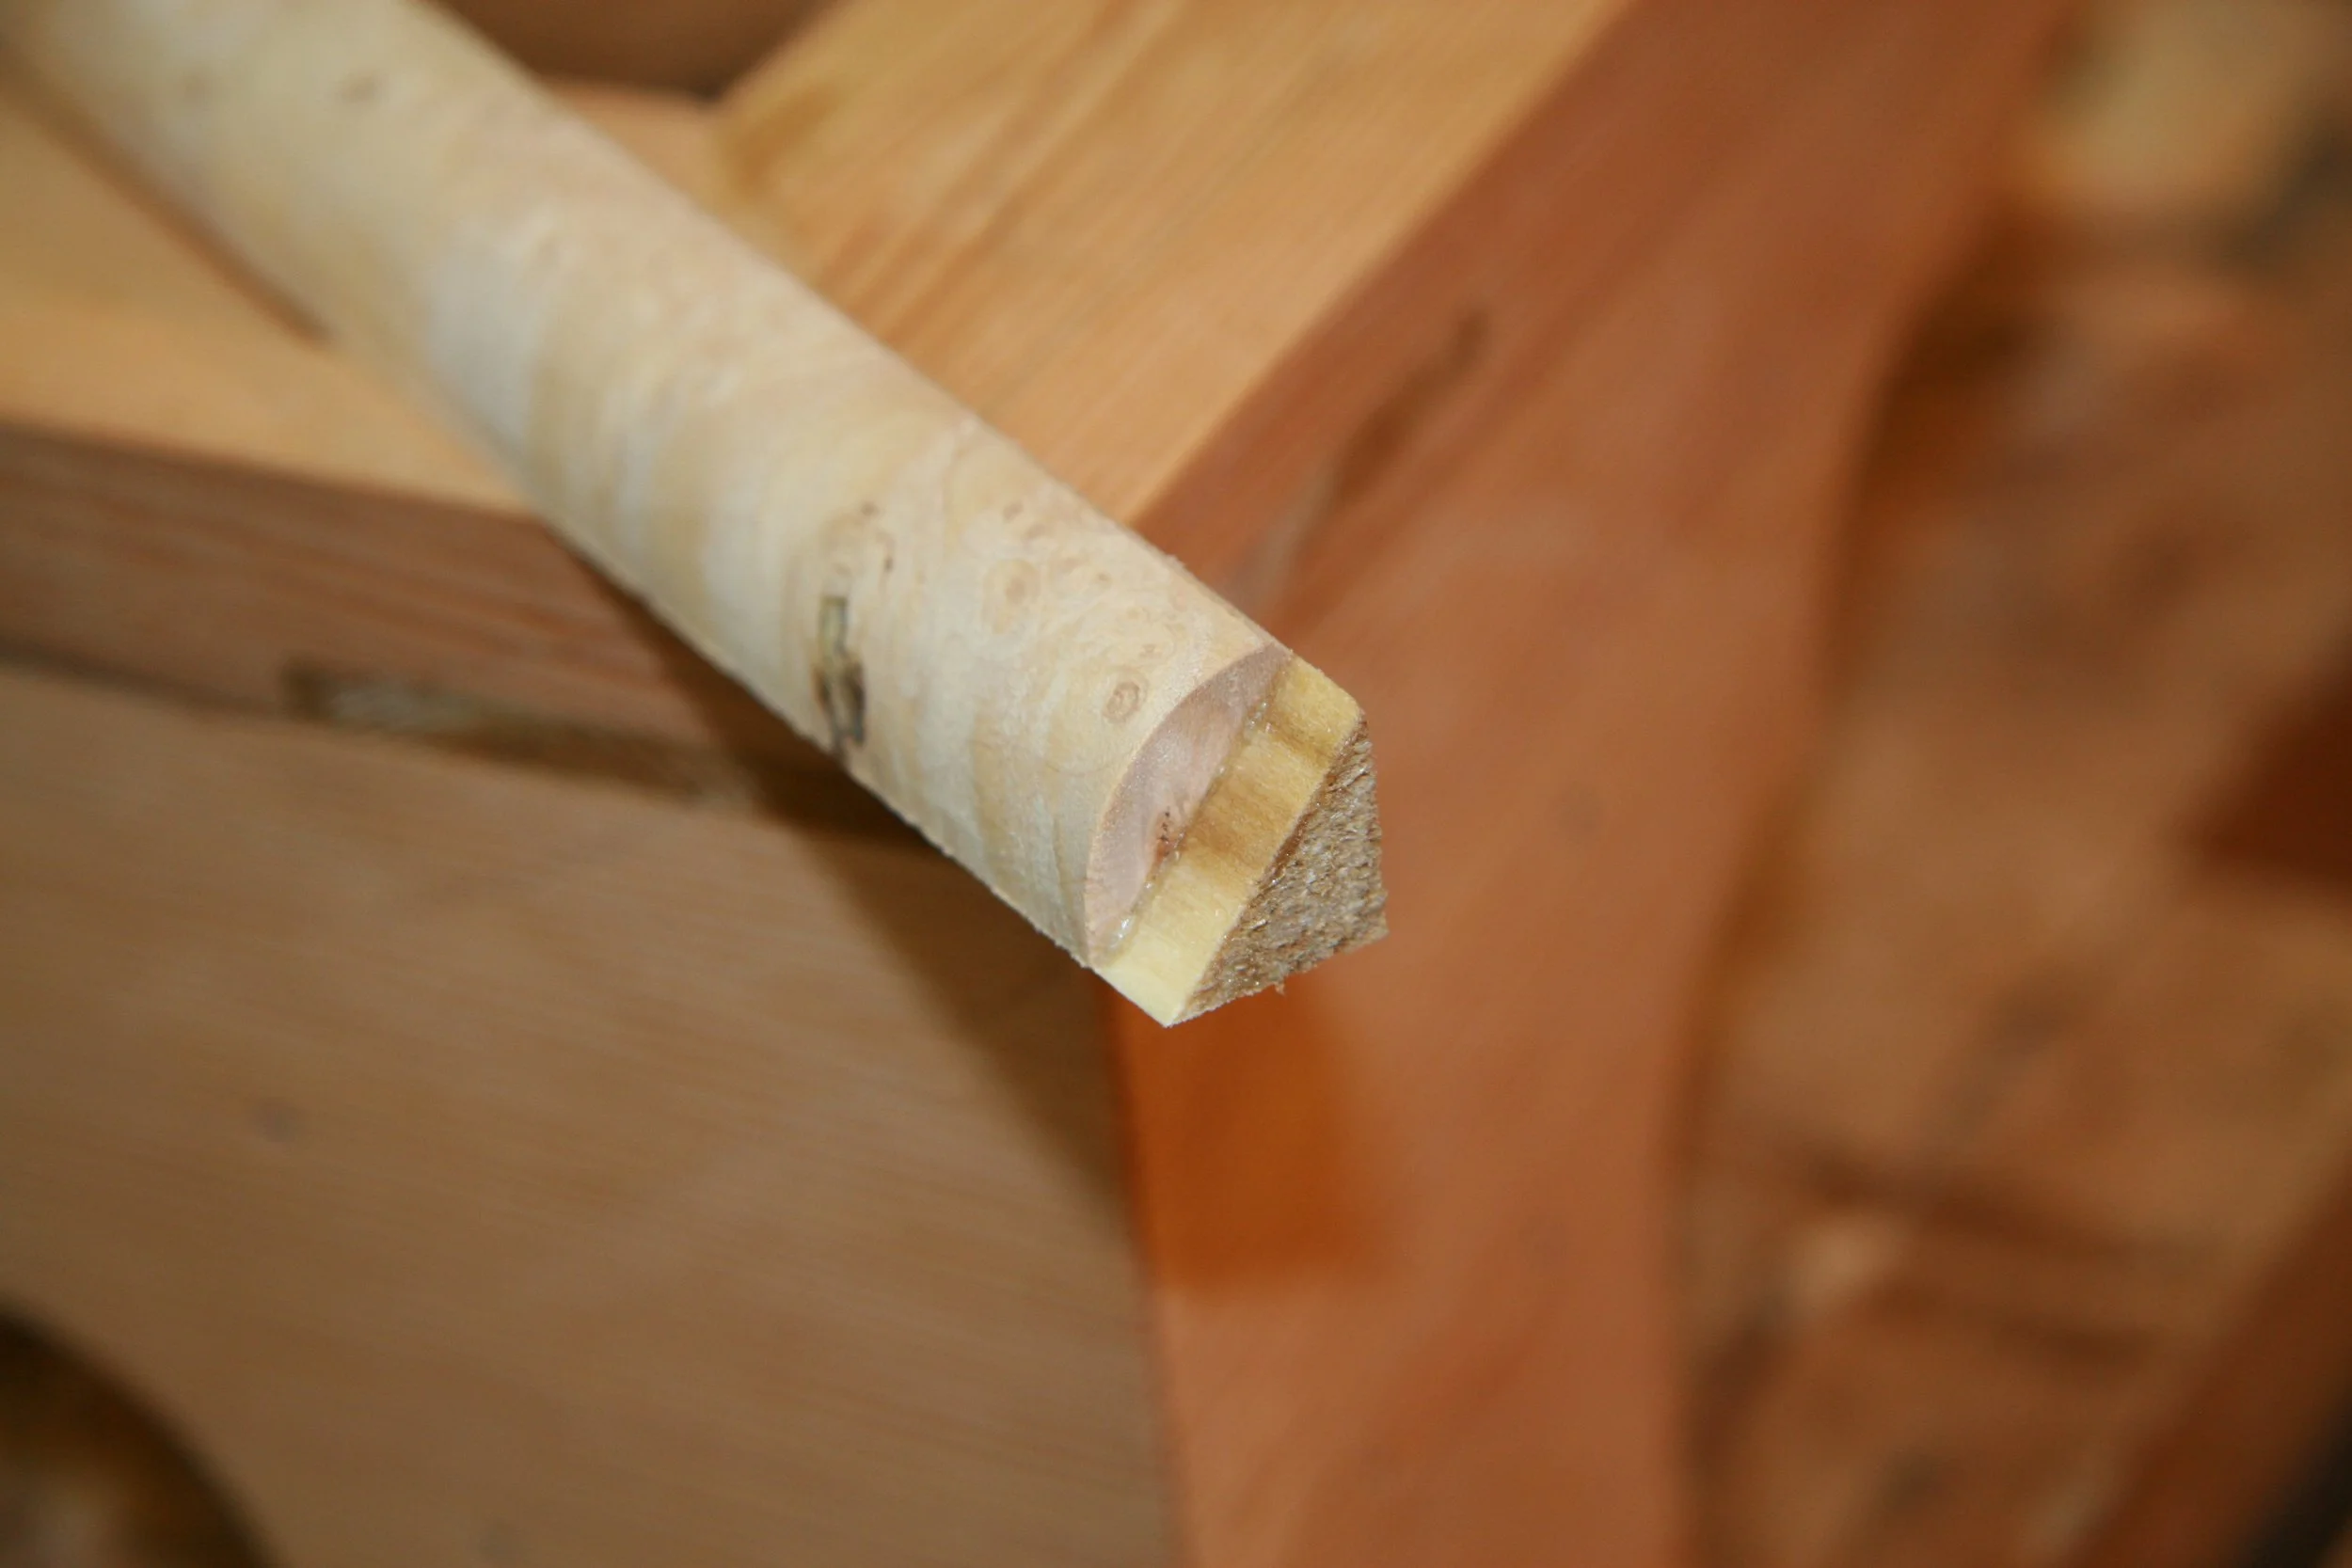
A chamfer is cut to make room for maple burlwood strips that will be applied to the edges. This will be visible later when the corners are moulded, and is discussed in detail in later photos.
Next step for the embedded edge mouldings is to glue strips of burl maple onto the chamfer. Hot hide glue was used and every other piece was glued in first. After the glue on these set, pieces were cut to fit in between and glued-in. This allowed for very tight, almost invisible seams between the strips. This trick was learned from the craftsman at the Hay's shop in Colonial Williamsburg.
This shows how the maple glue-up for the embedded cross grain mouldings comes together from three sides.
Trimming the maple strips on the edge flush.
The case ready for application of the face veneer. The maple that was inlaid for the embedded cross grain mouldings will get covered with veneer. When the veneering is done, a moulding is cut into the case corners, revealing this wood.
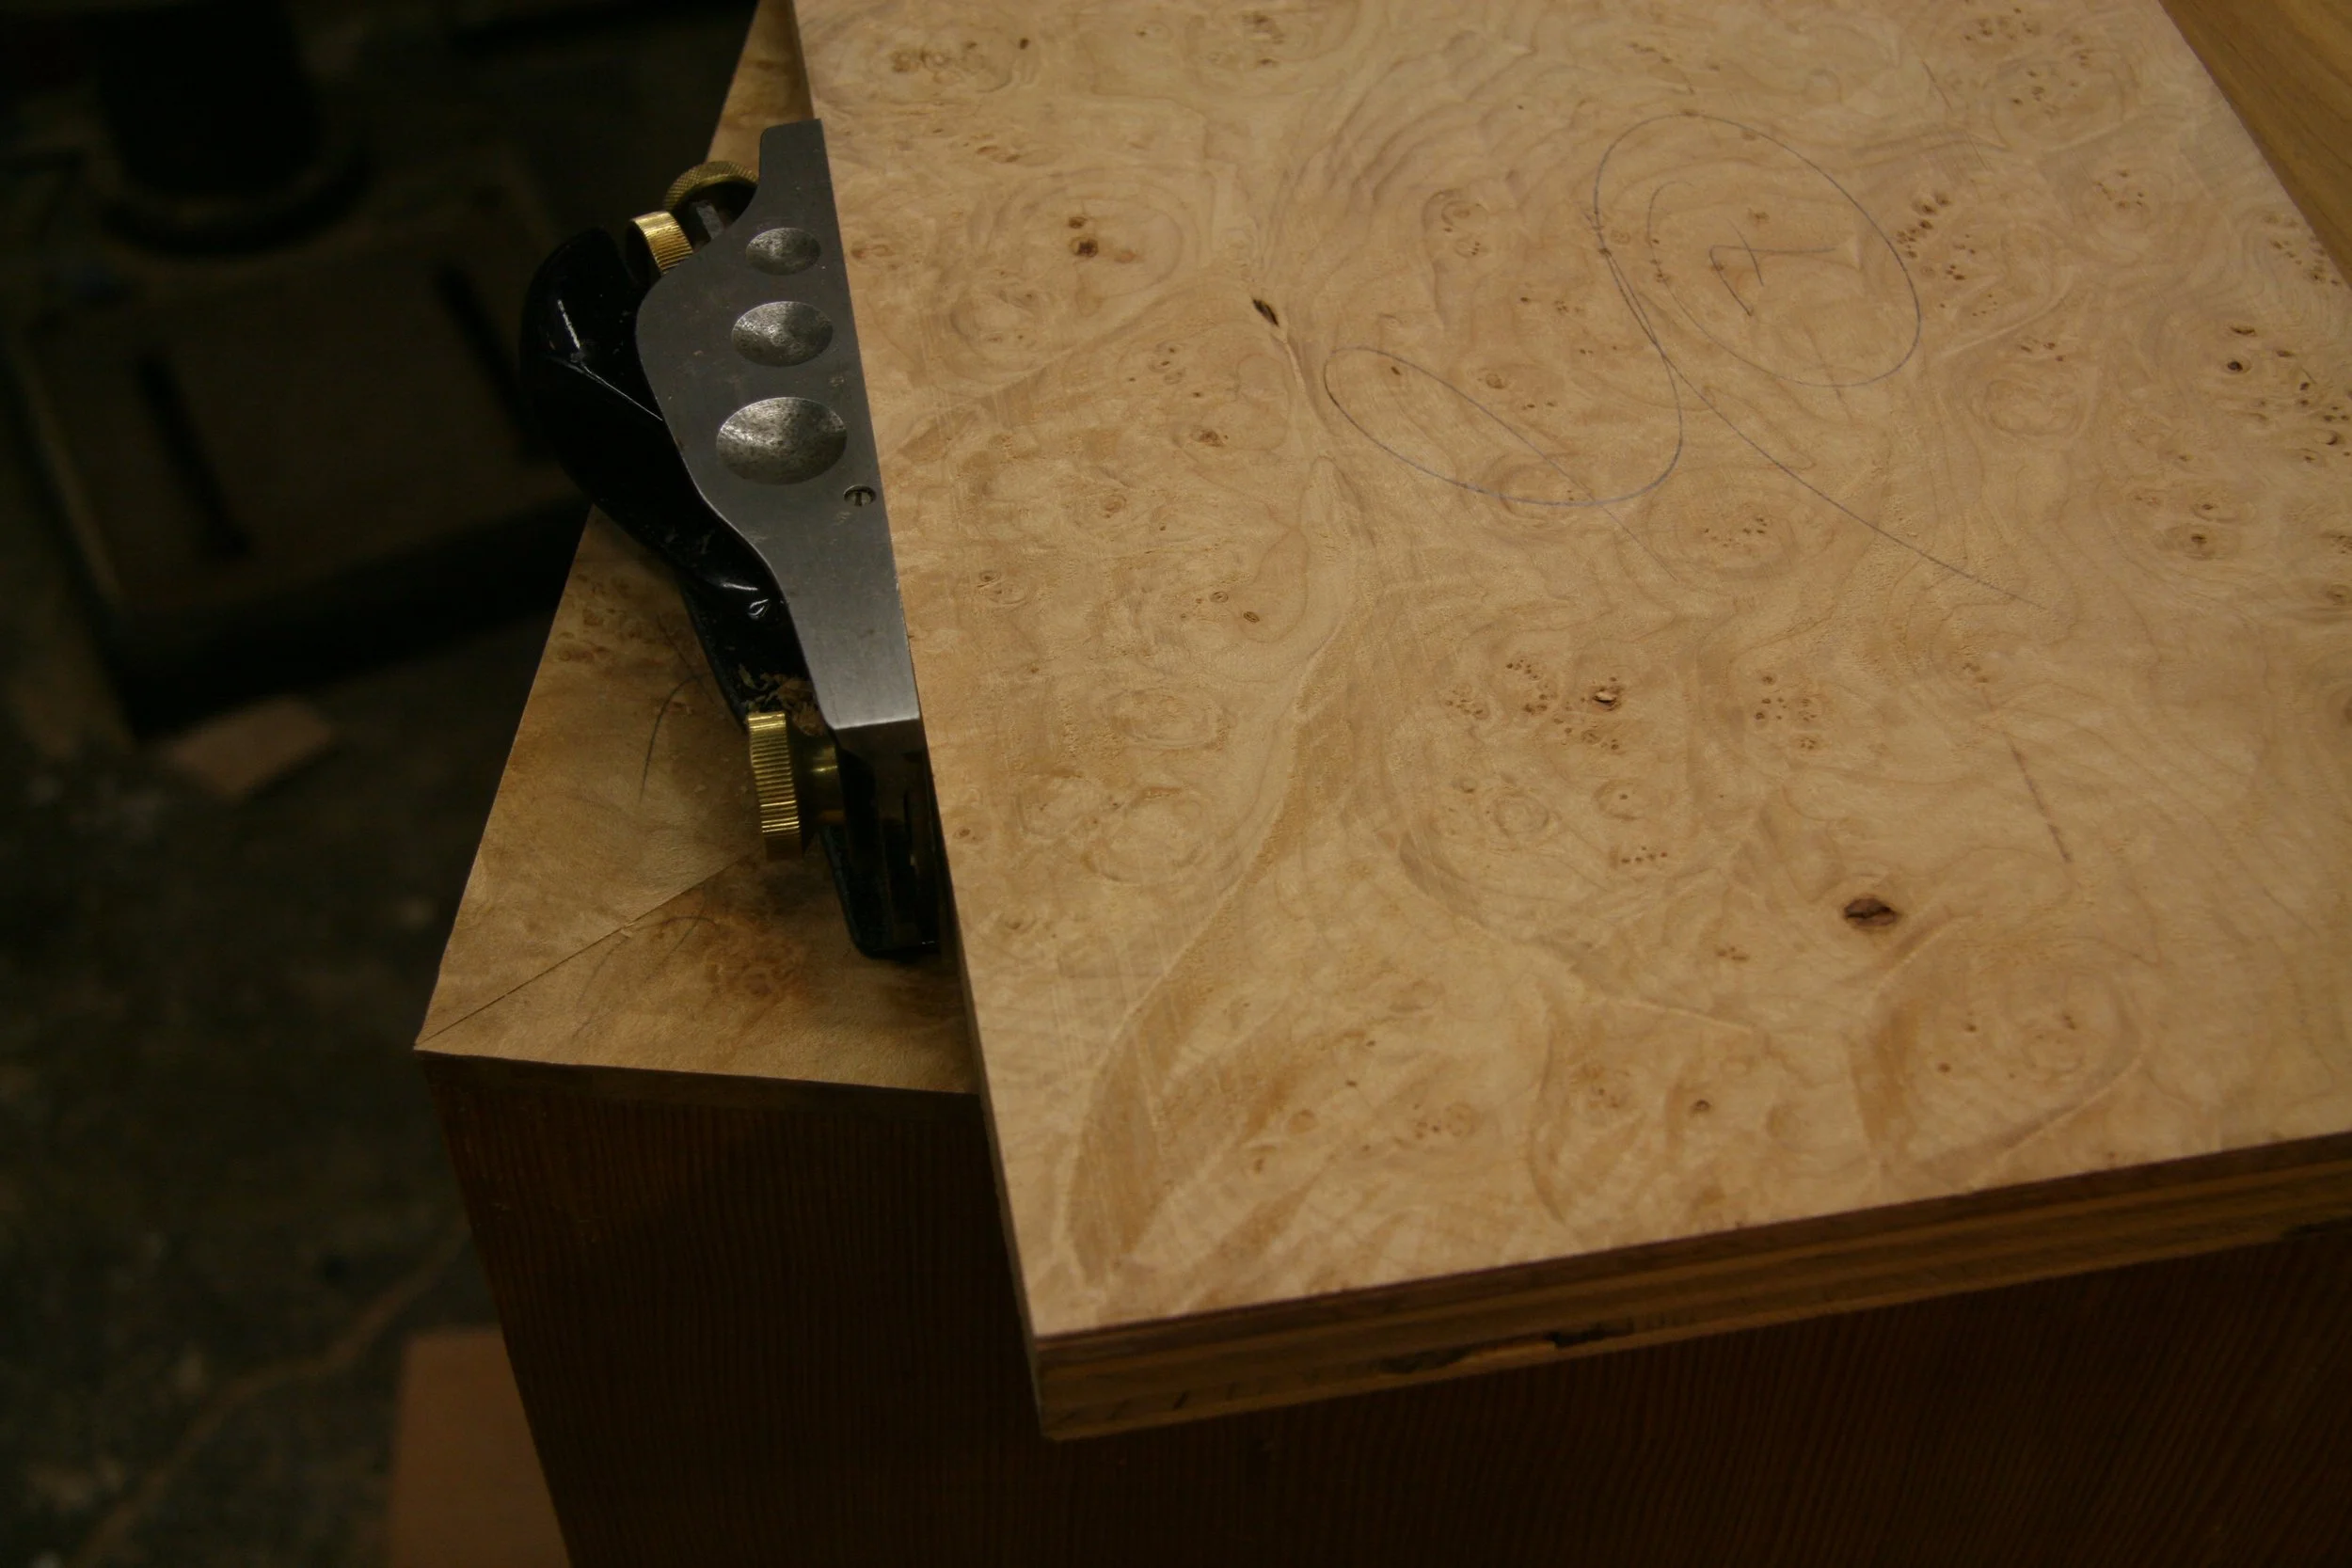
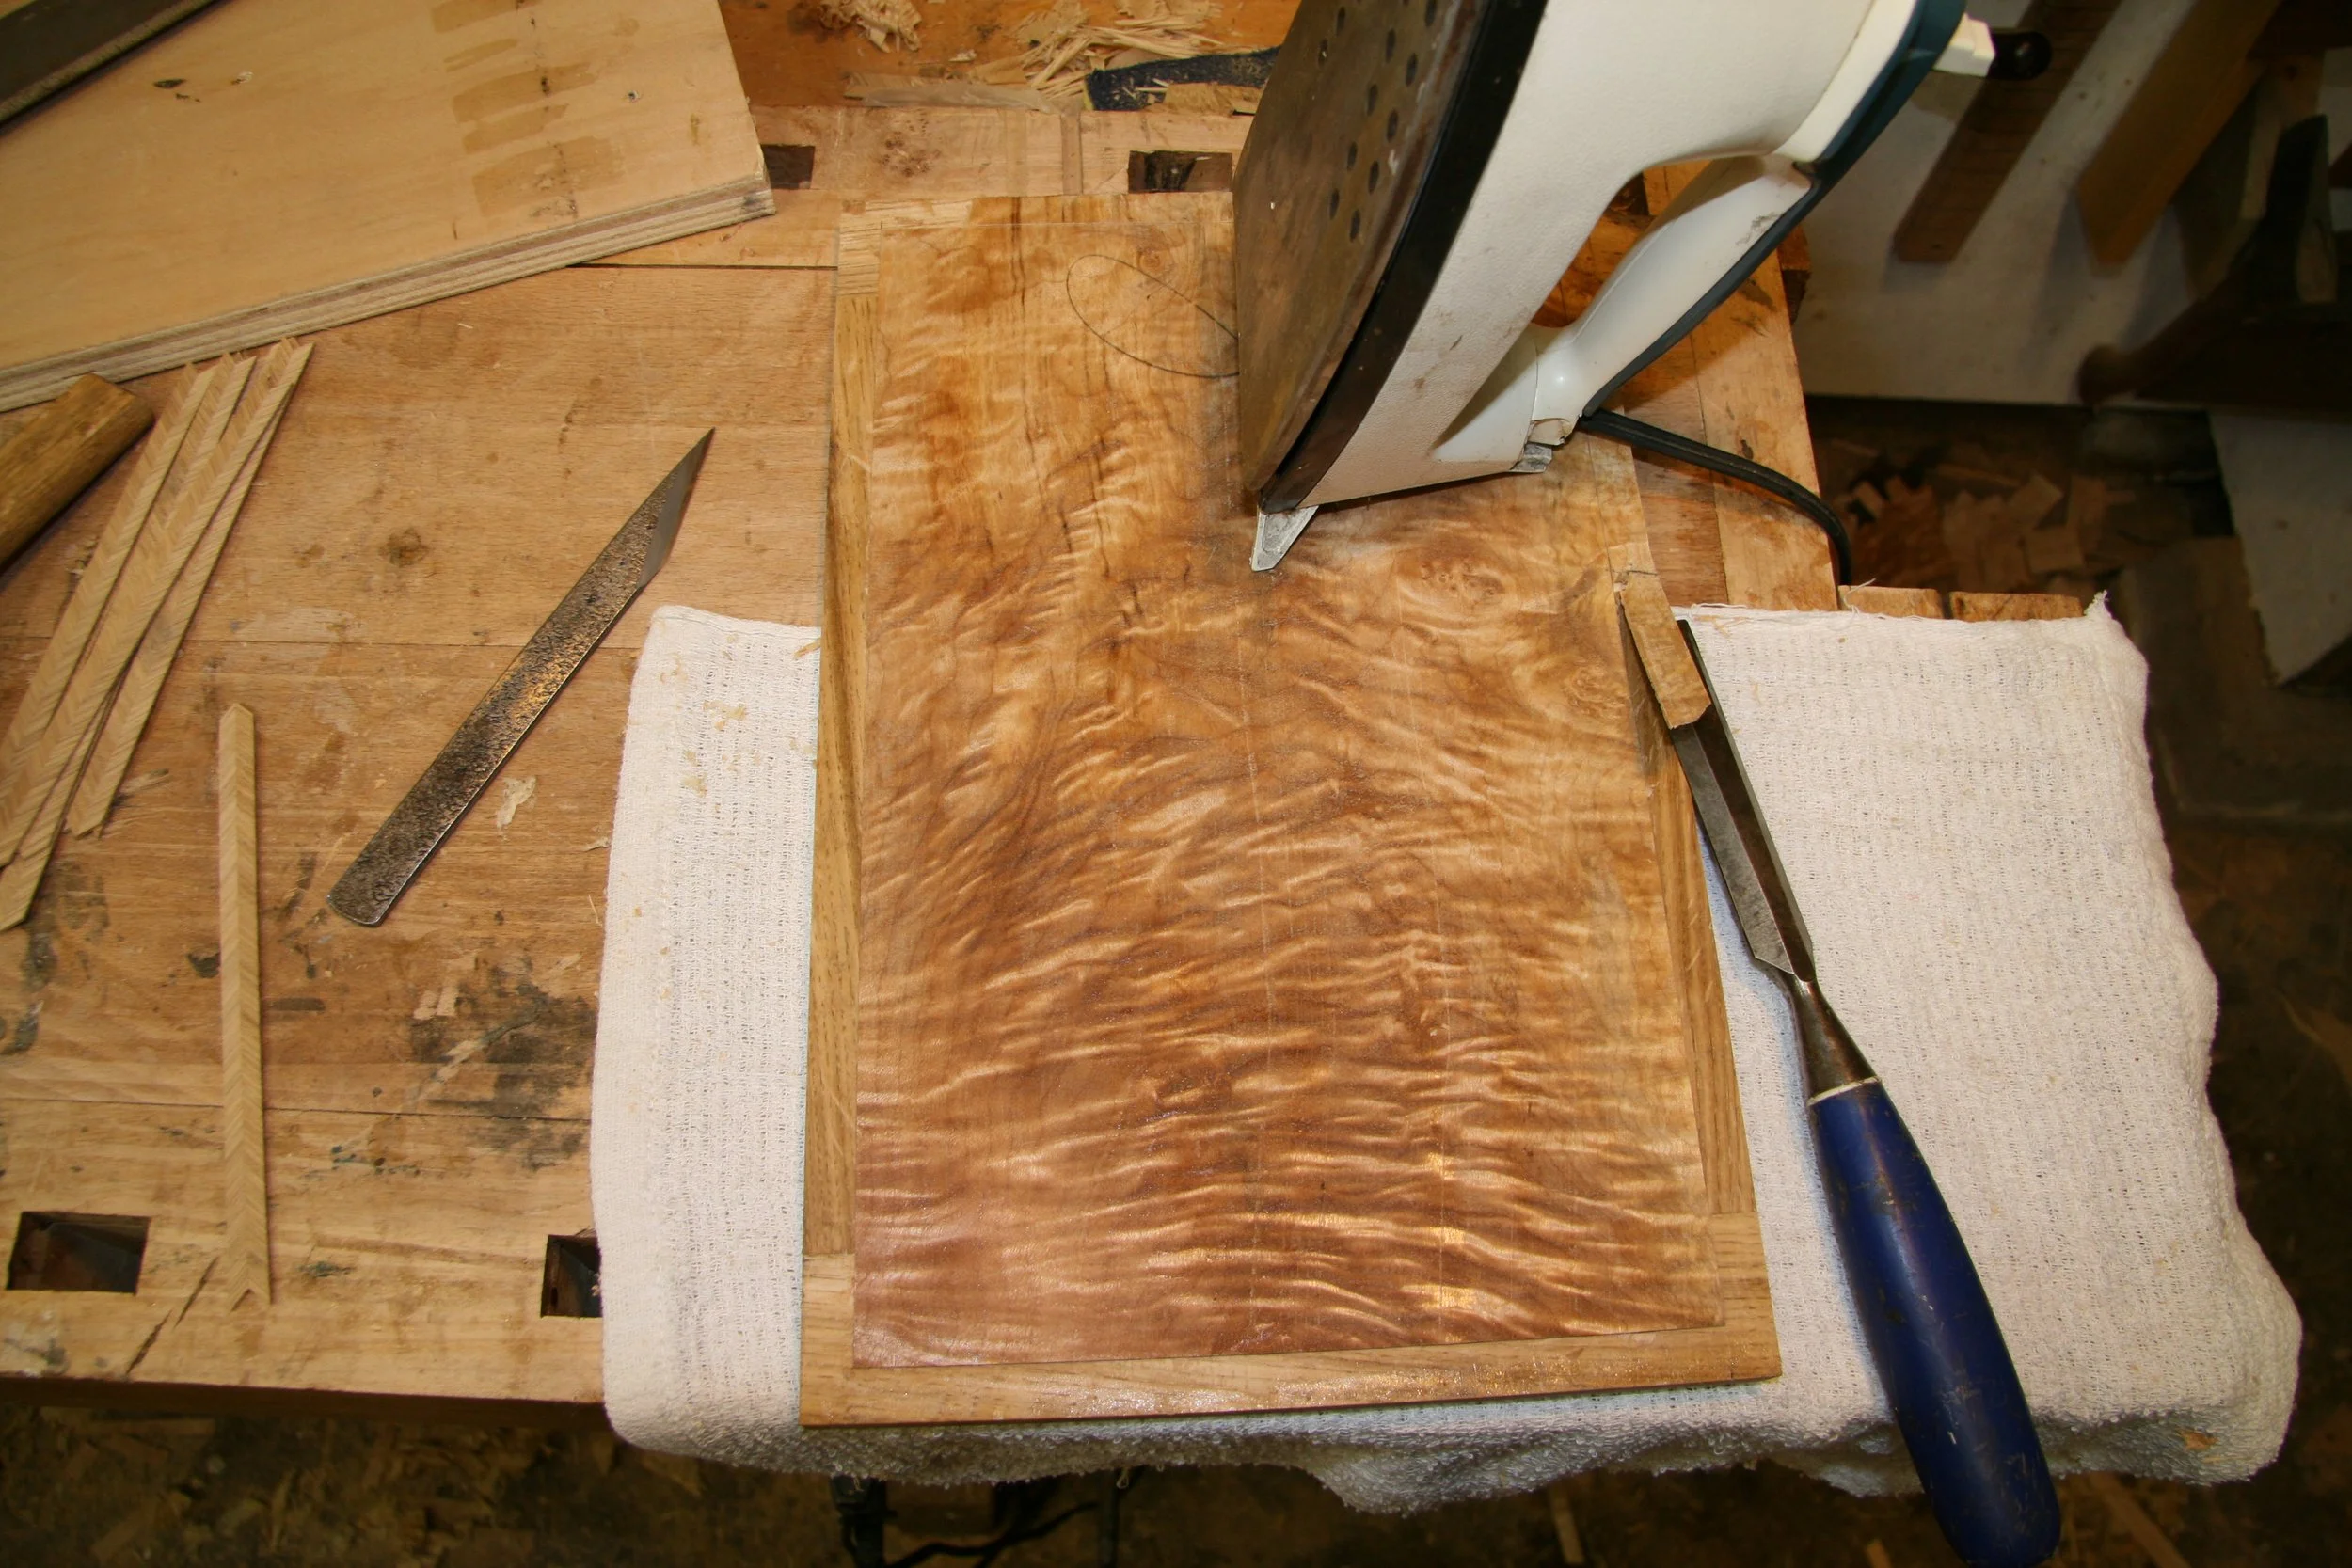
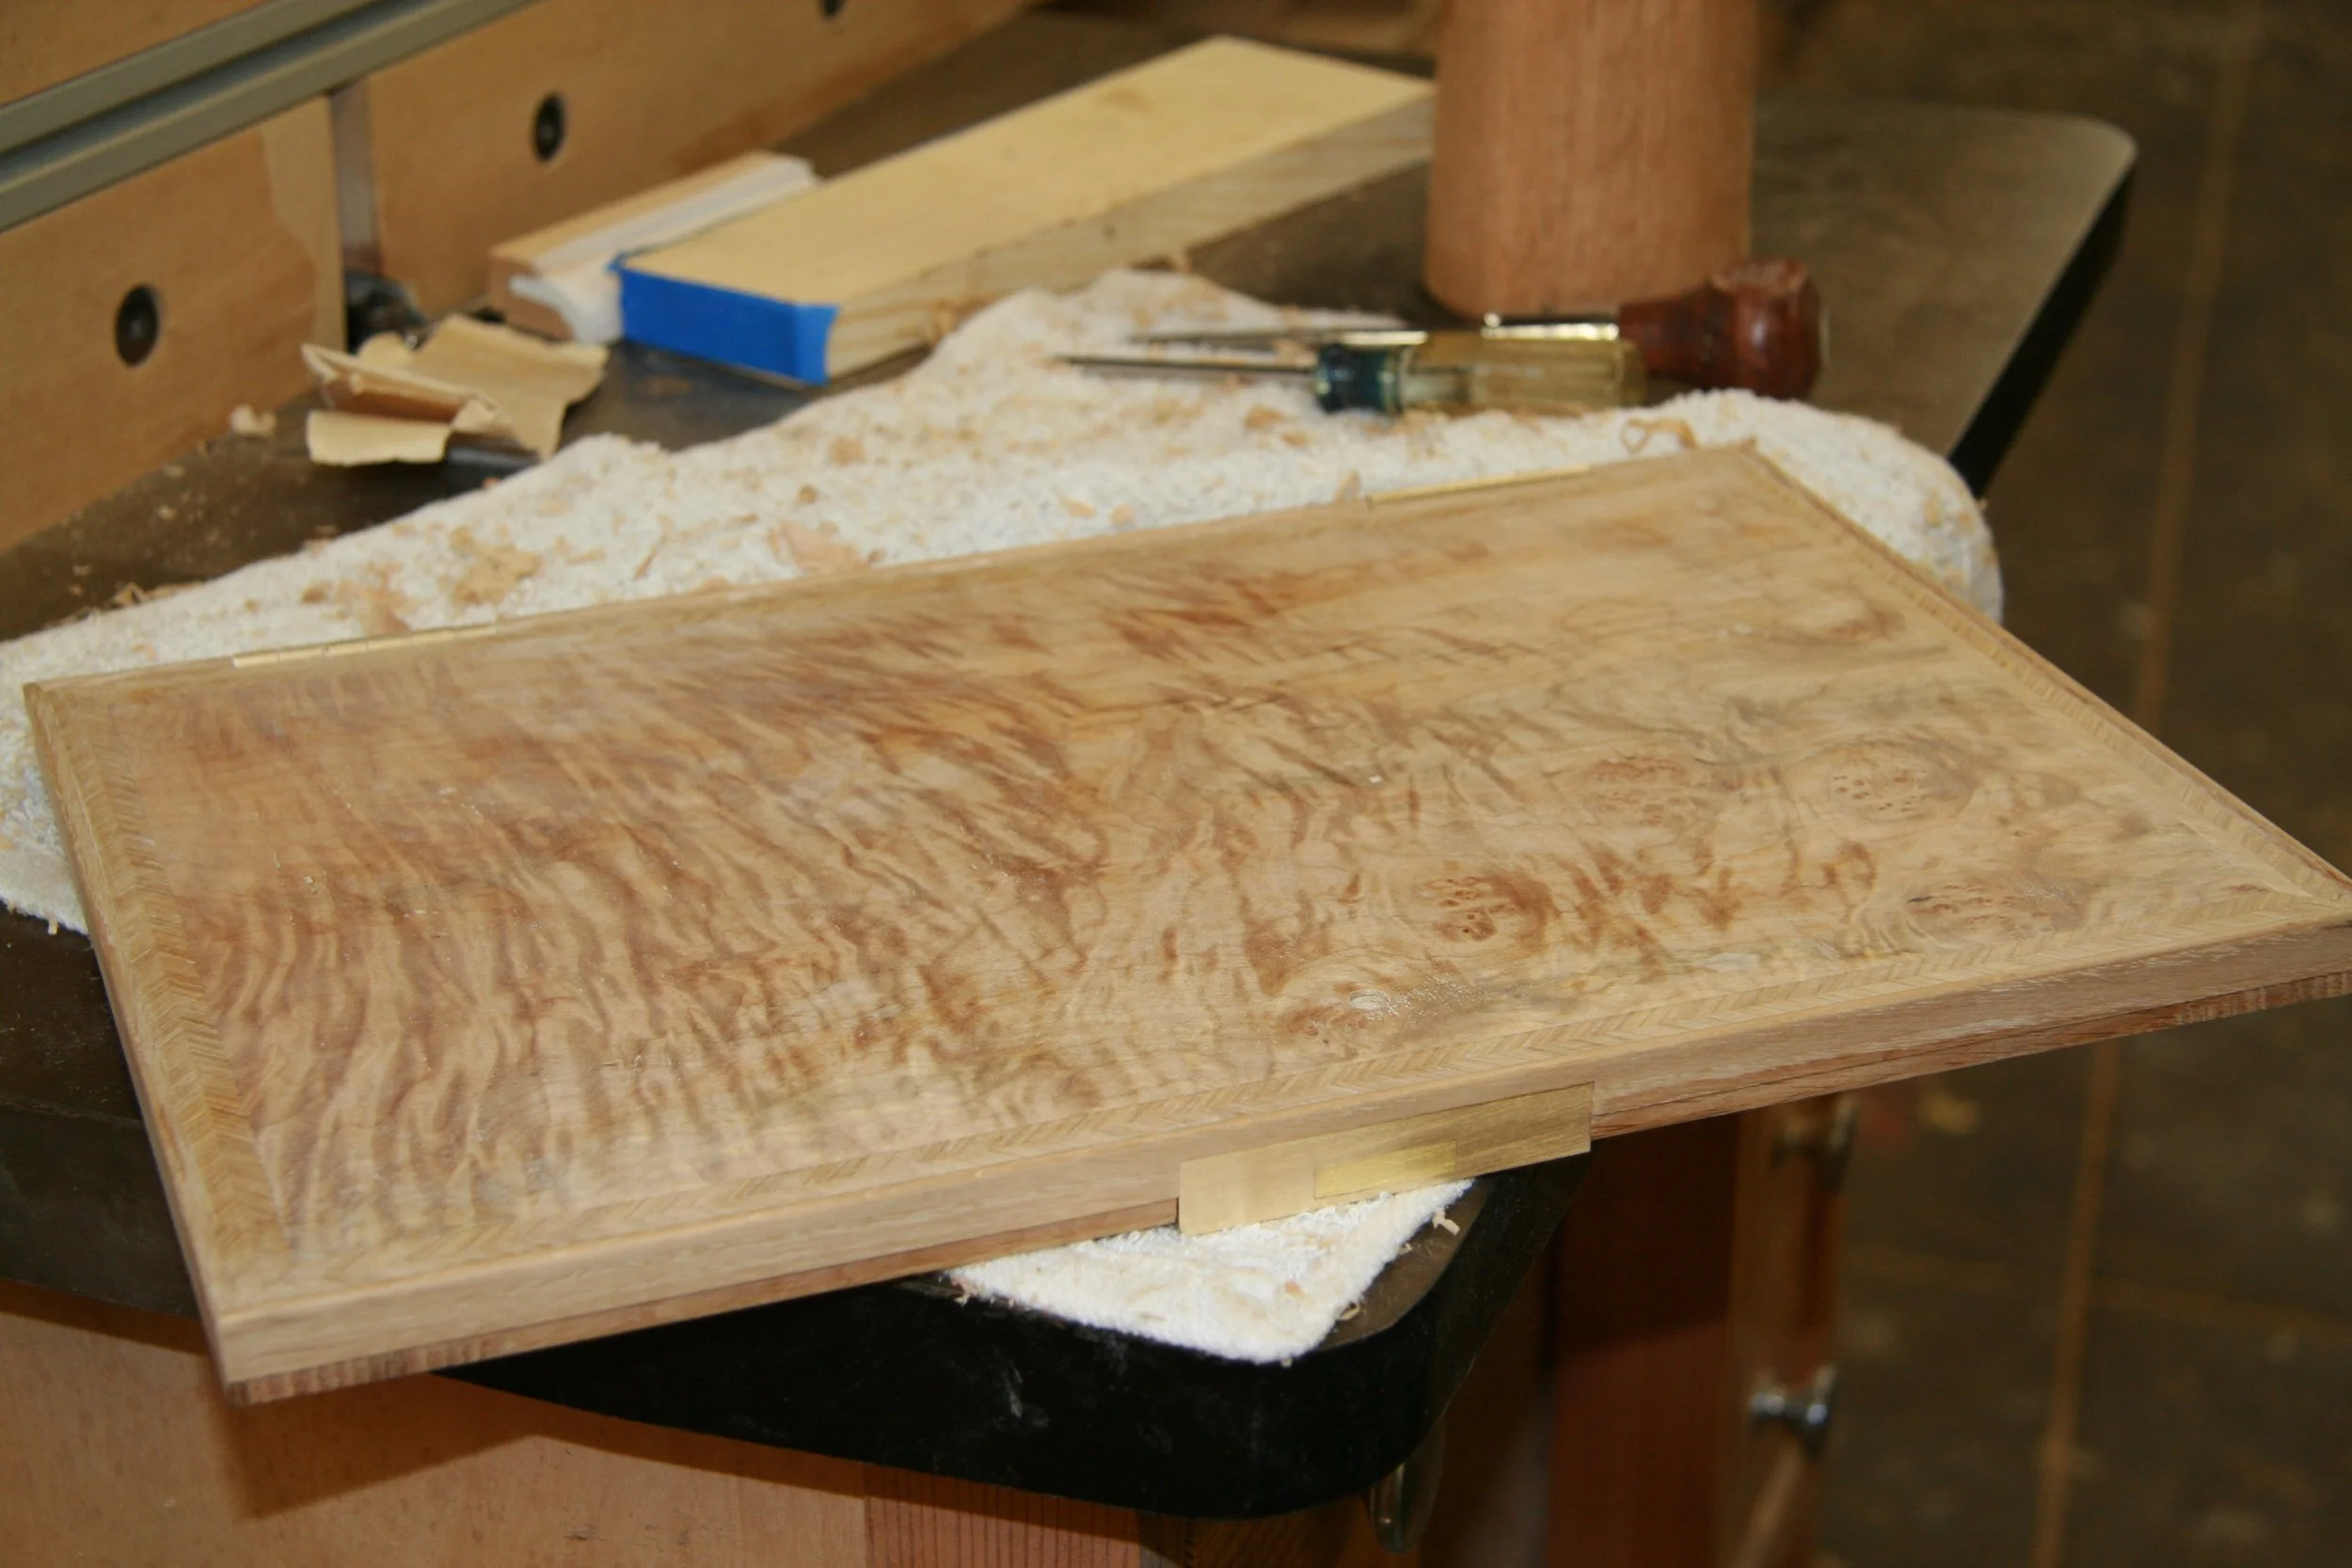
Cleaning up the edges of the veneer quarter foil before gluing it down to the desk top.

The veneered quarter-foil on the desk top surface after glue up. It was applied without a press, using hot hide glue and a squeegee like tool called a "veneer hammer". The next step will be to apply the two part banding that will go all the way to the edge.

The construction of the oak herring bone part of the banding starts with slicing thin strips from a piece of straight grained oak.

Two strips are glued together with the grain in alternating directions. This makes the herring bone pattern.
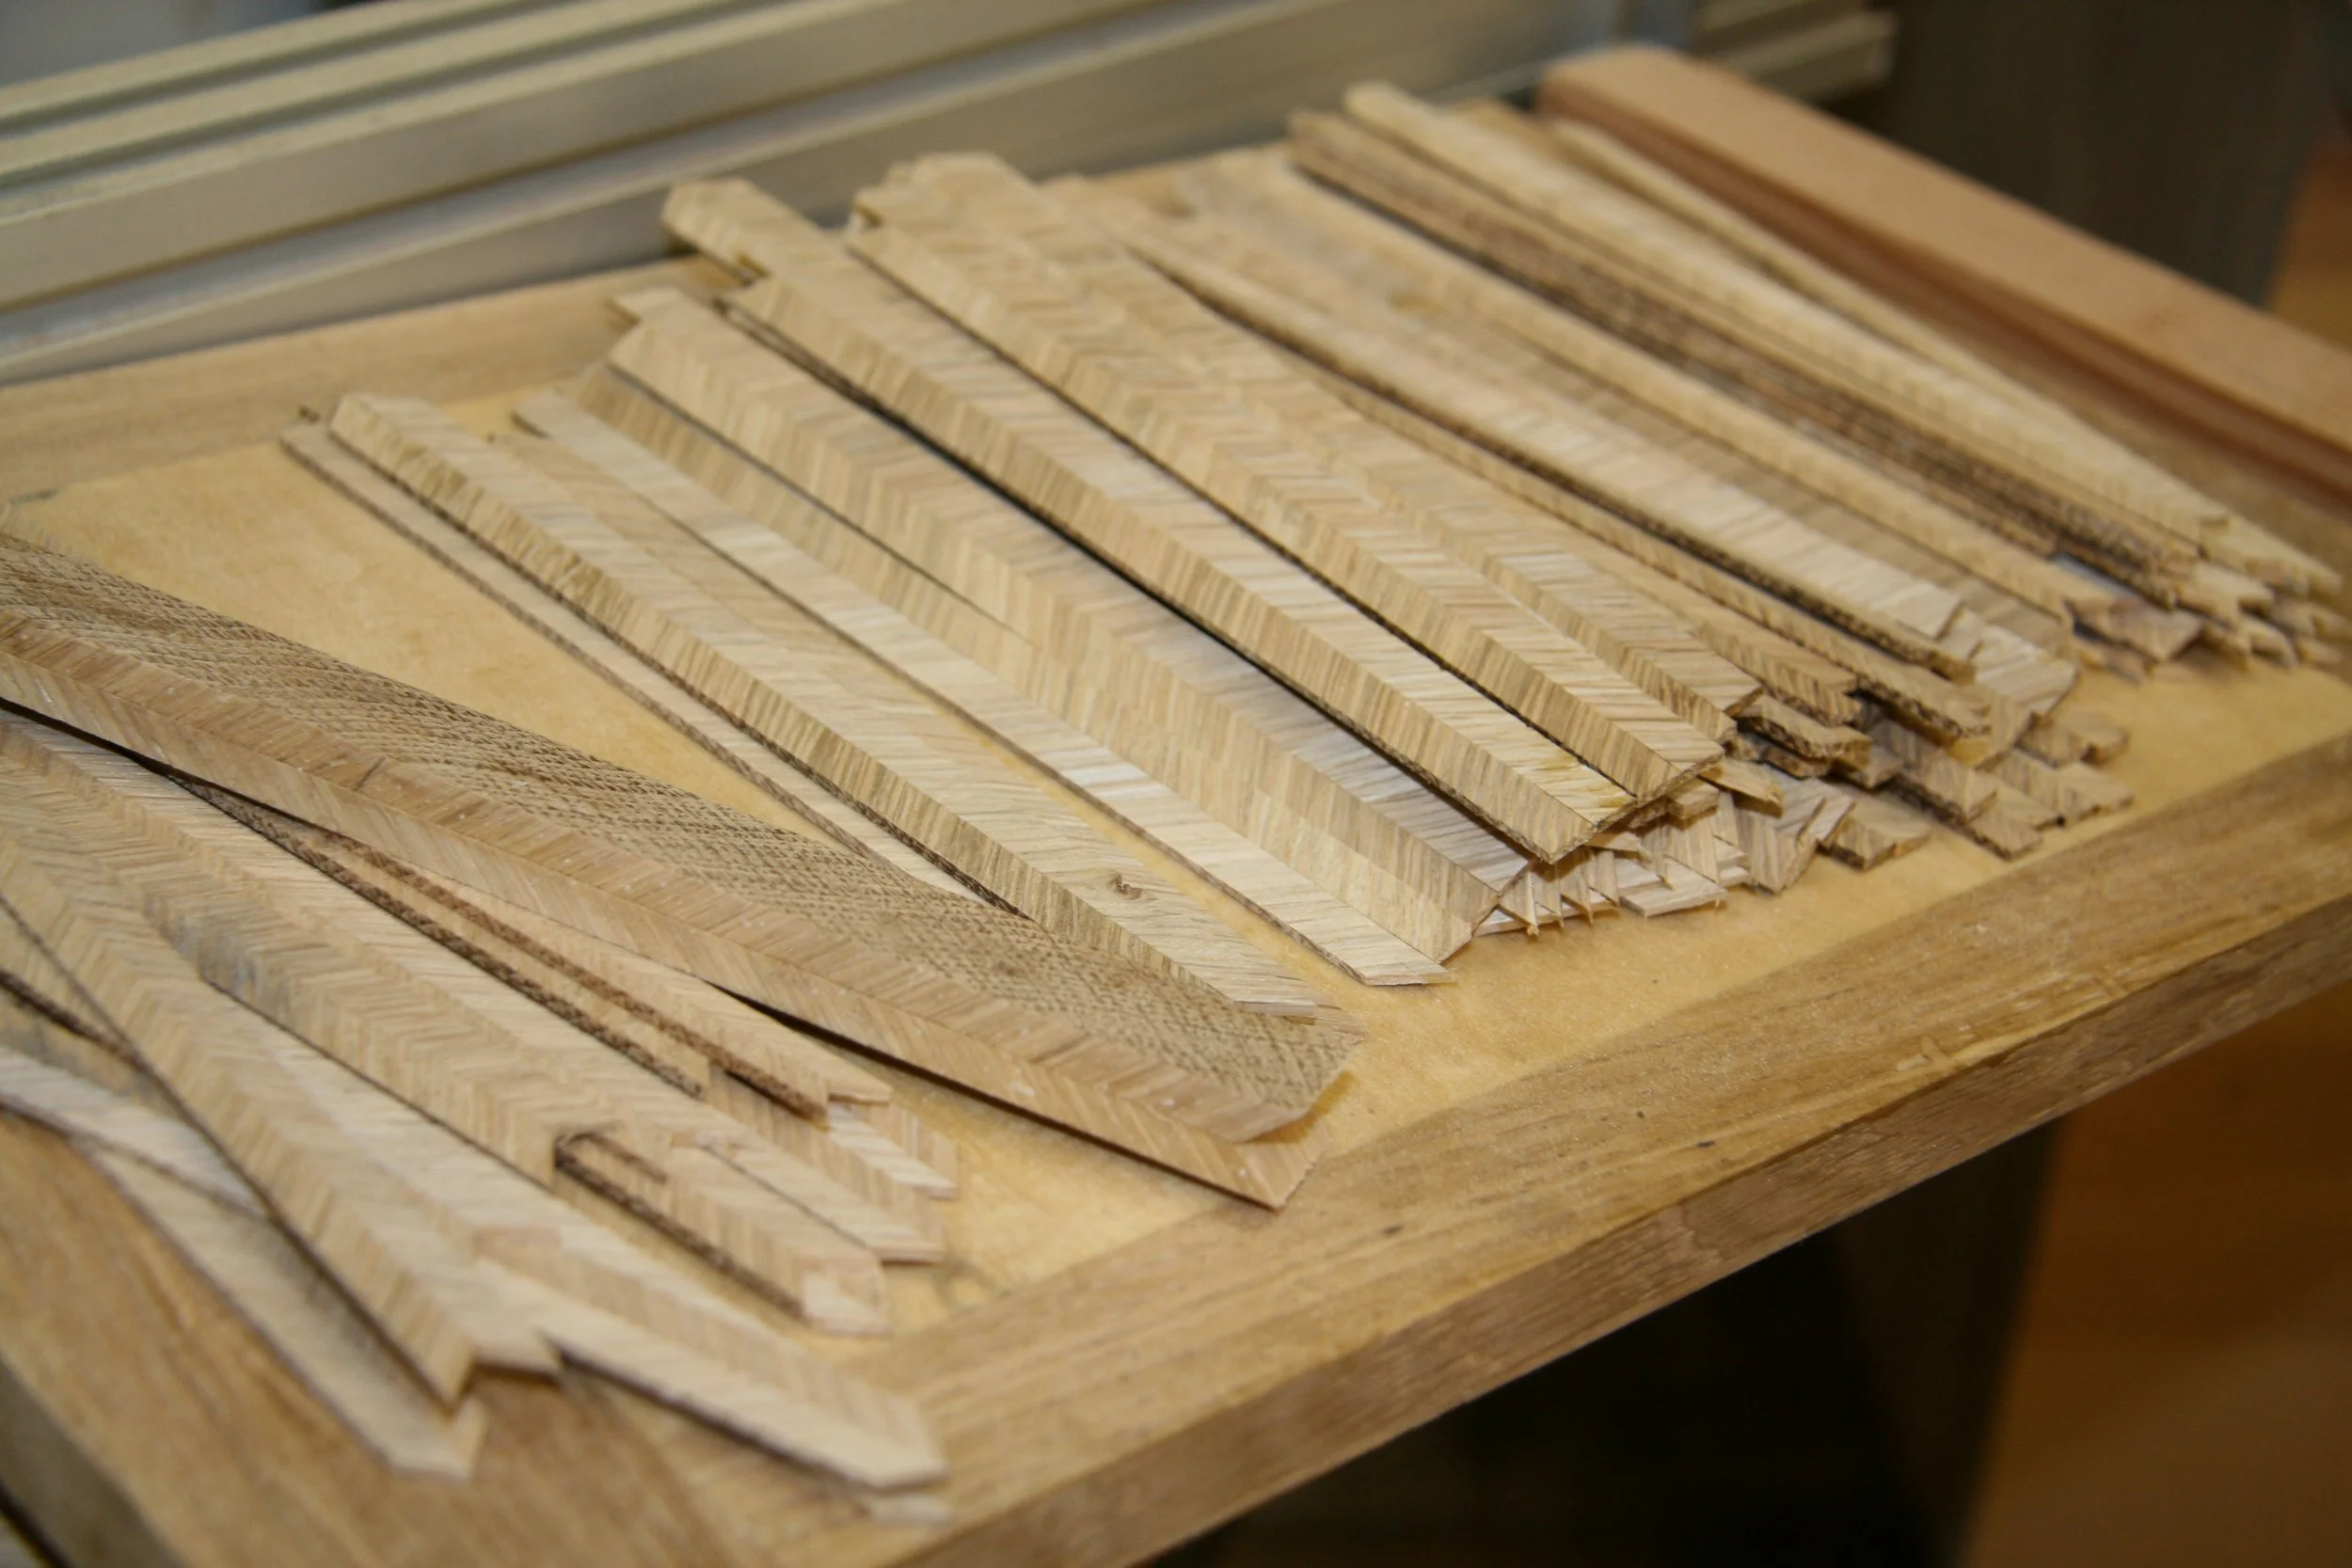
A stack of newly made herring bone banding ready to be glued down.
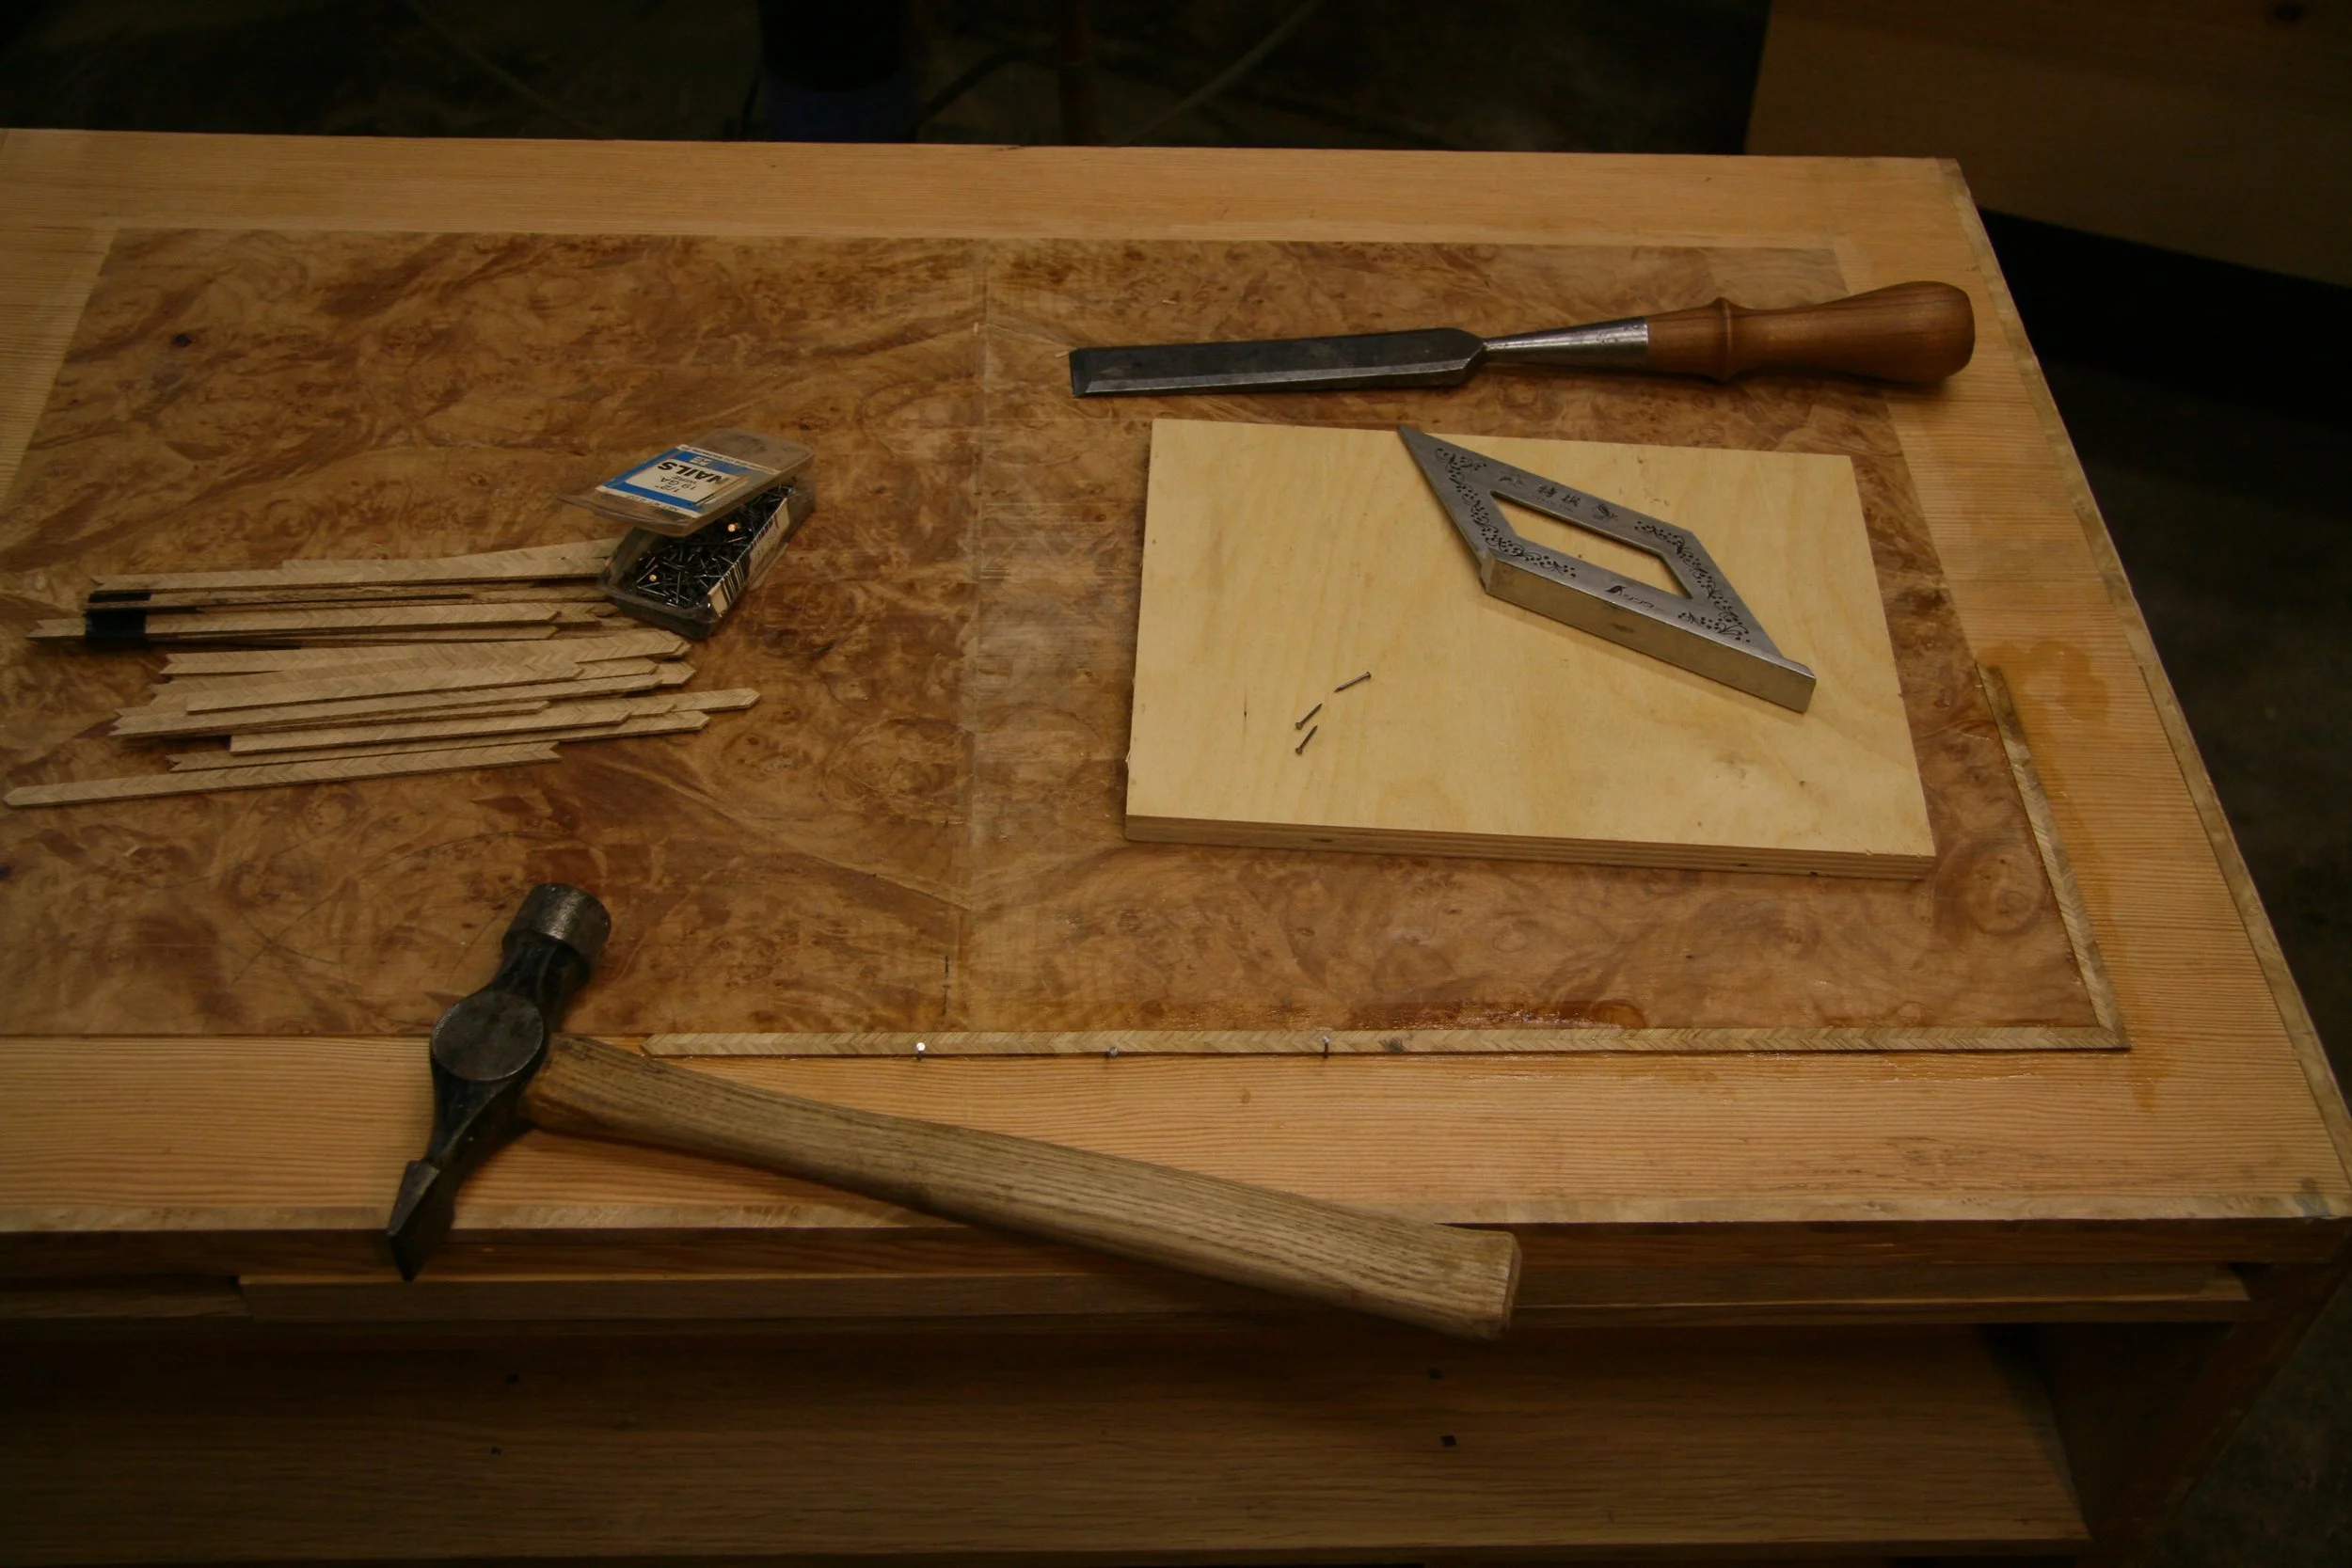
Gluing in the herring bone banding. The nails are temporary and only used to hold it in place while the glue cools and sets, which is fairly quick.
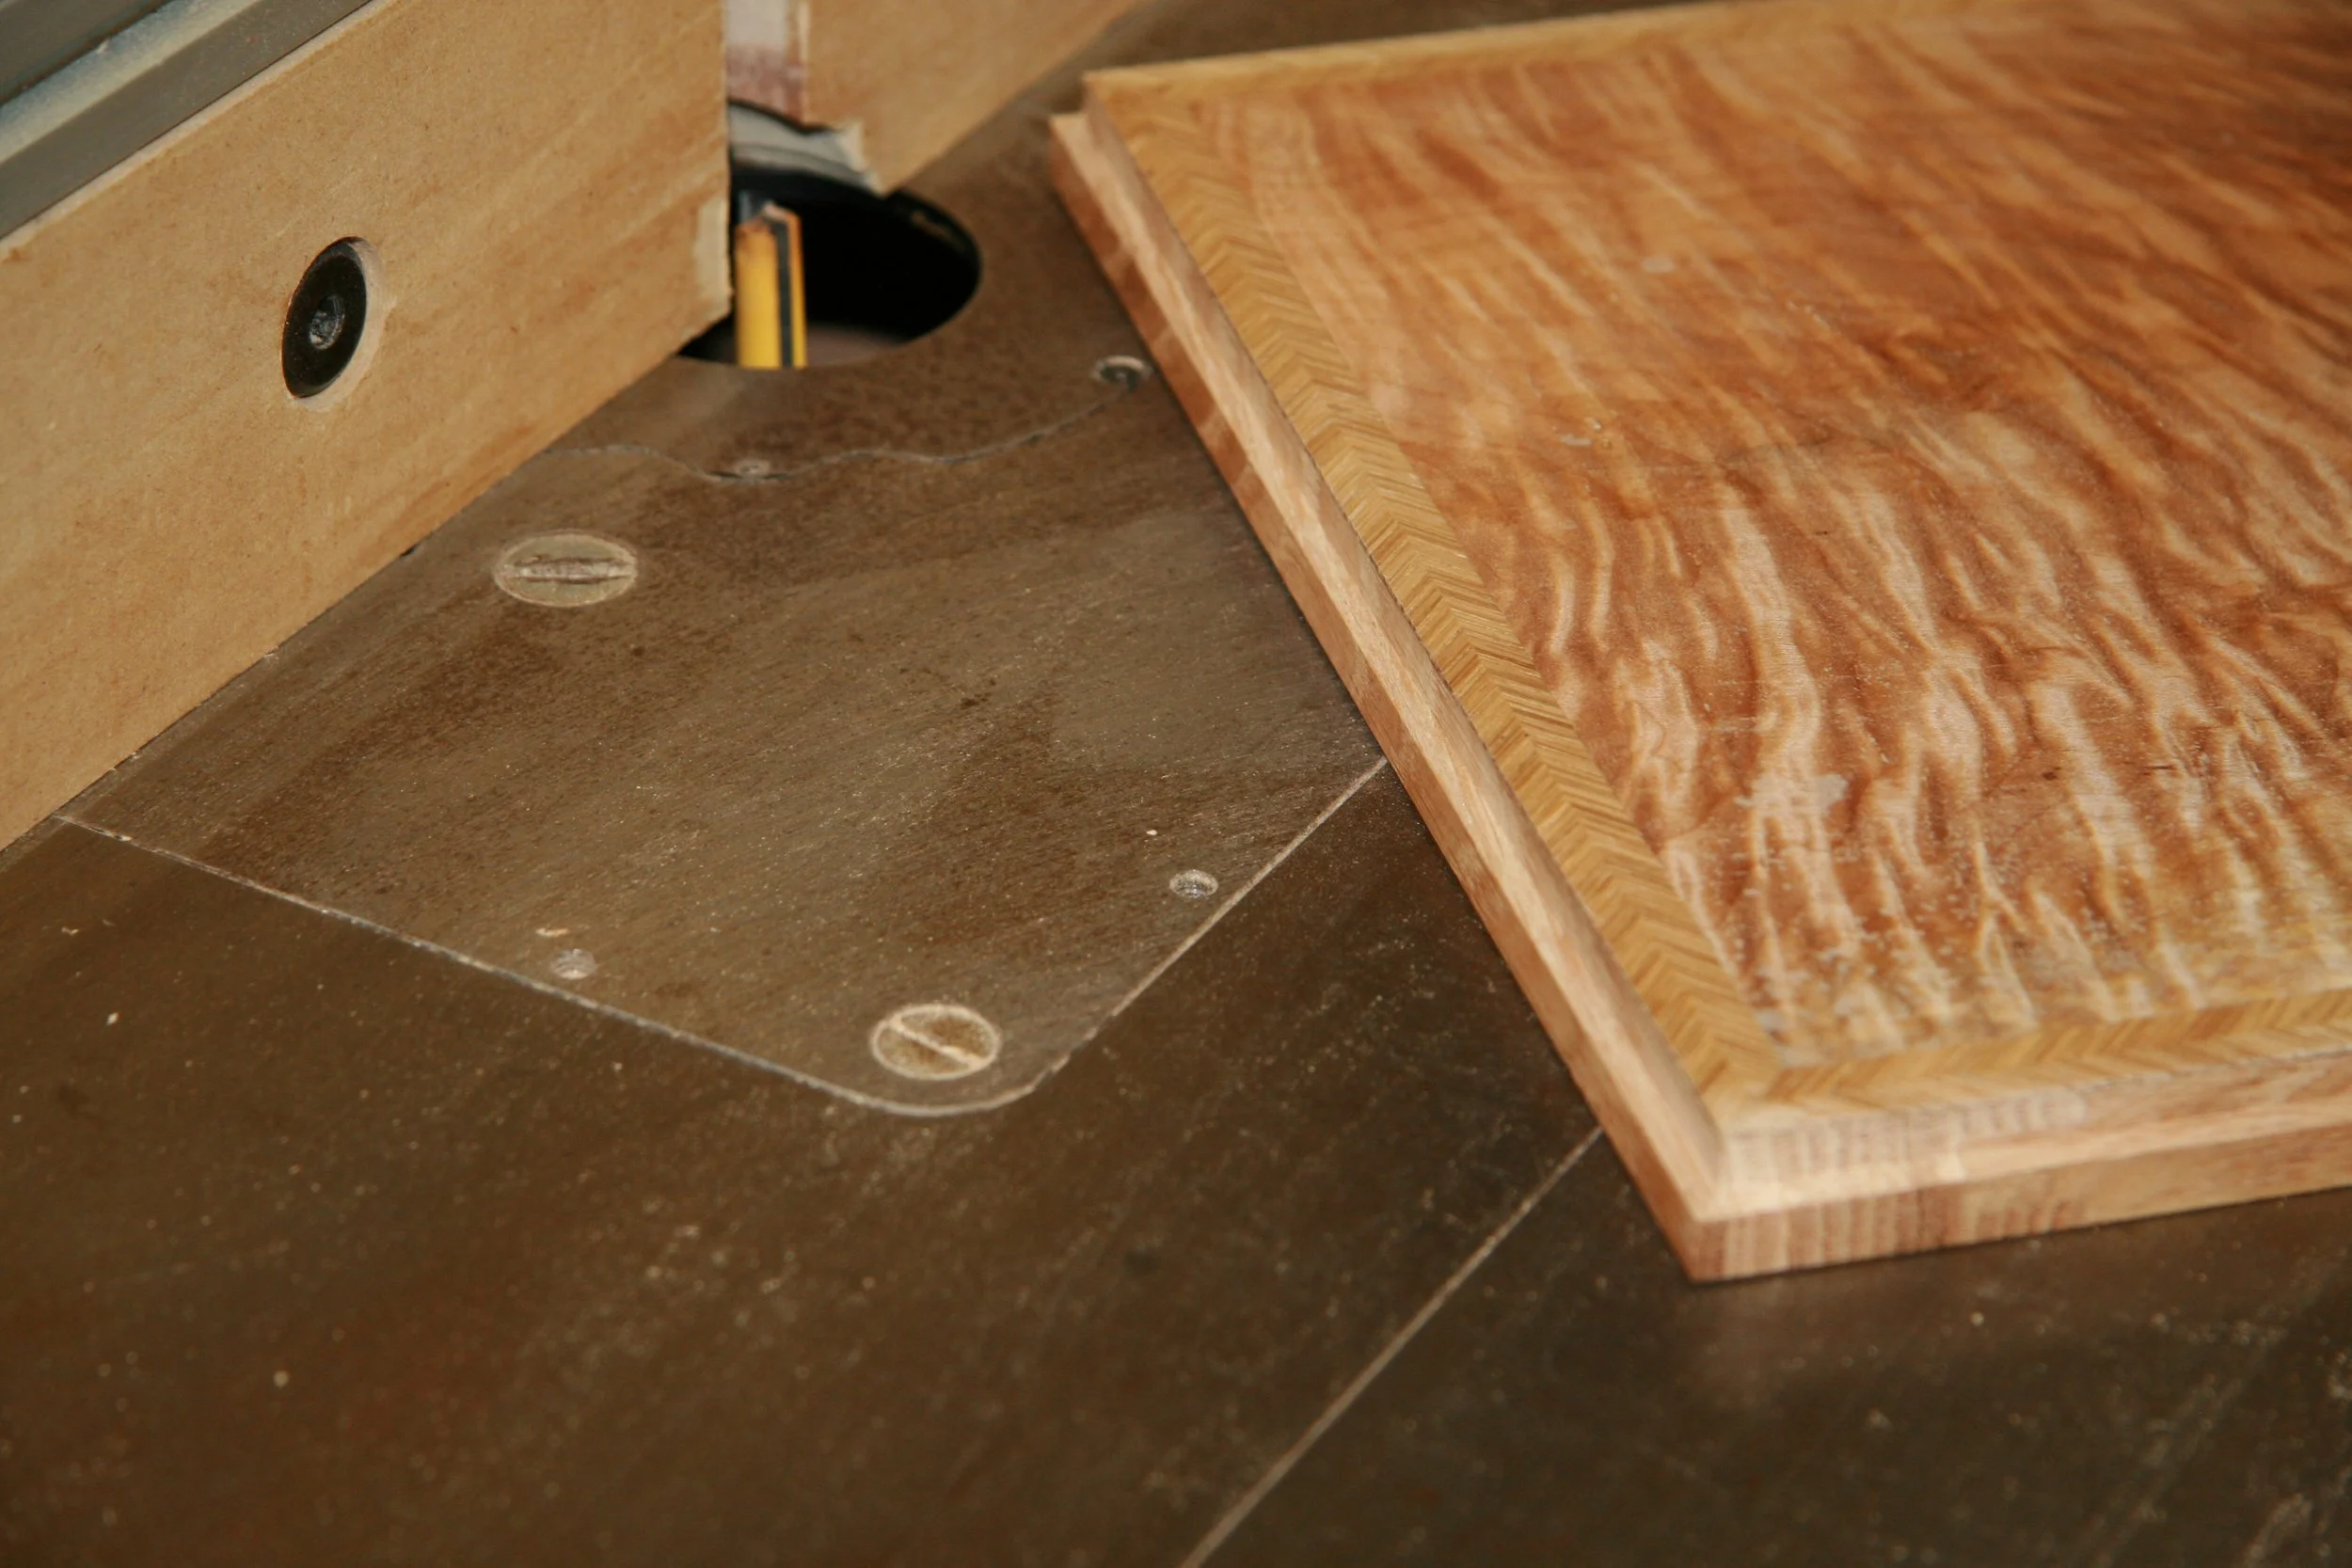
Gluing in the rest of the edge banding. Hammer veneering made this a quick process. Much faster and easier than attempting to do this with a veneer press, as is commonly attempted.

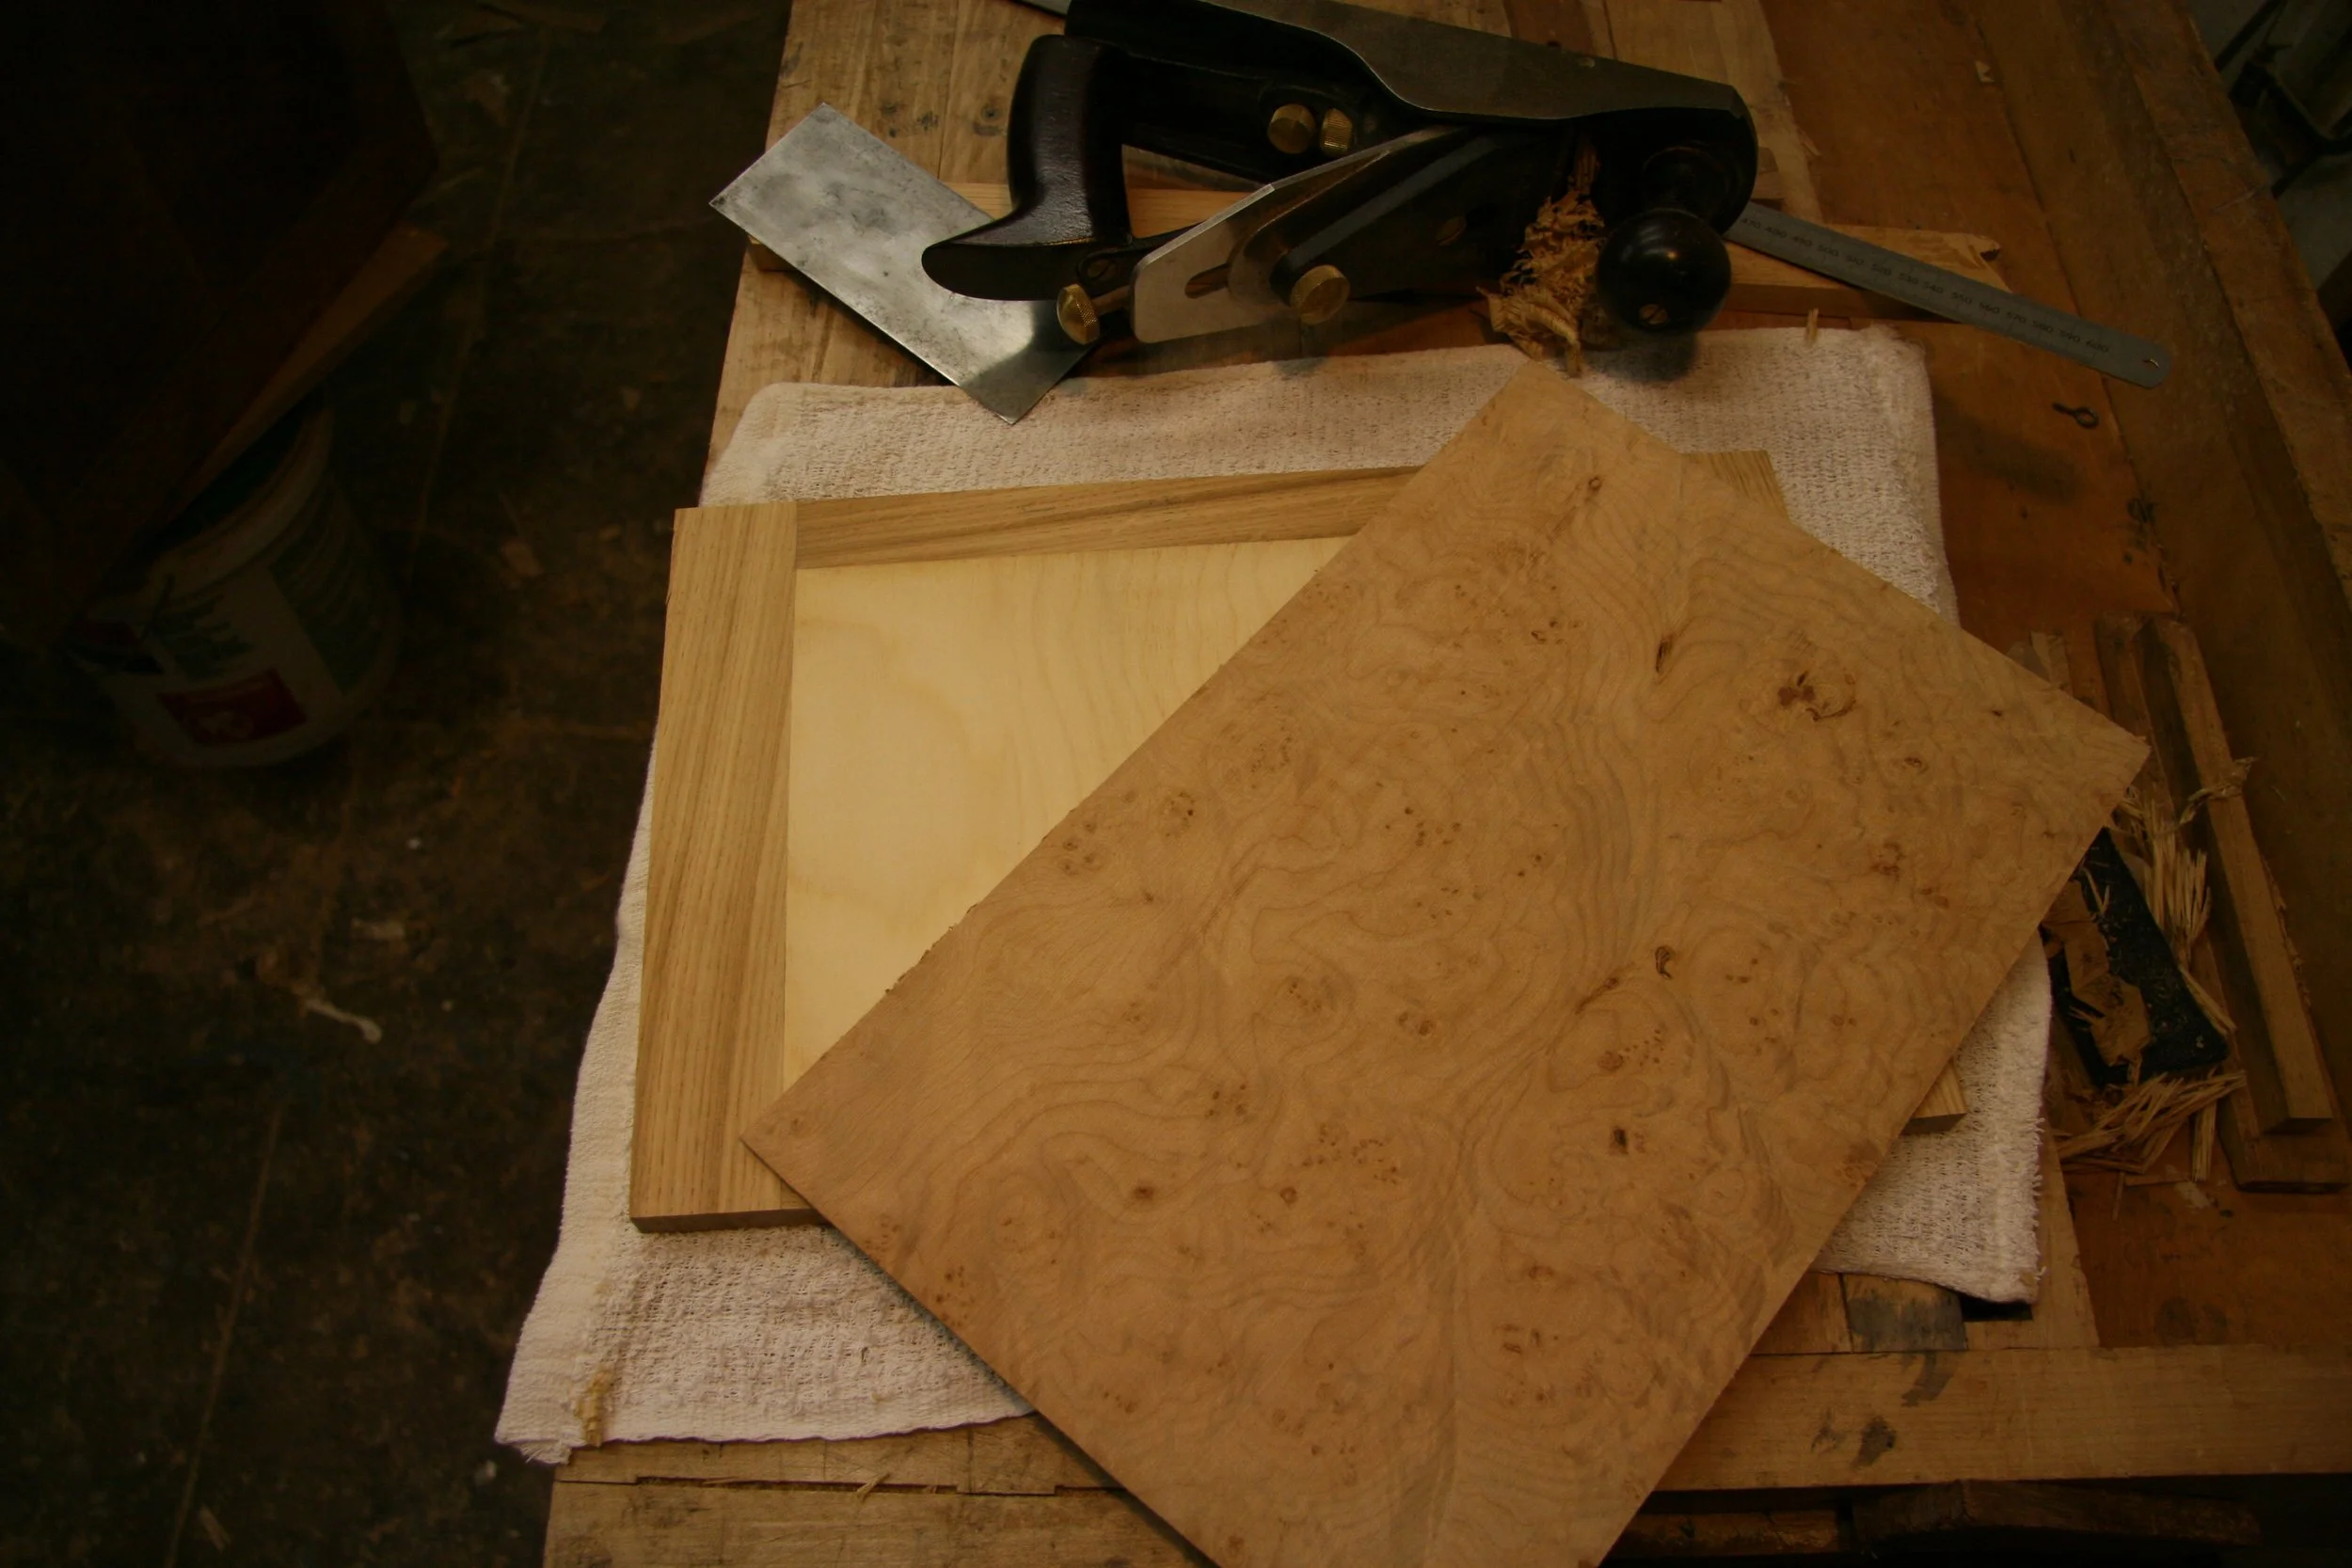
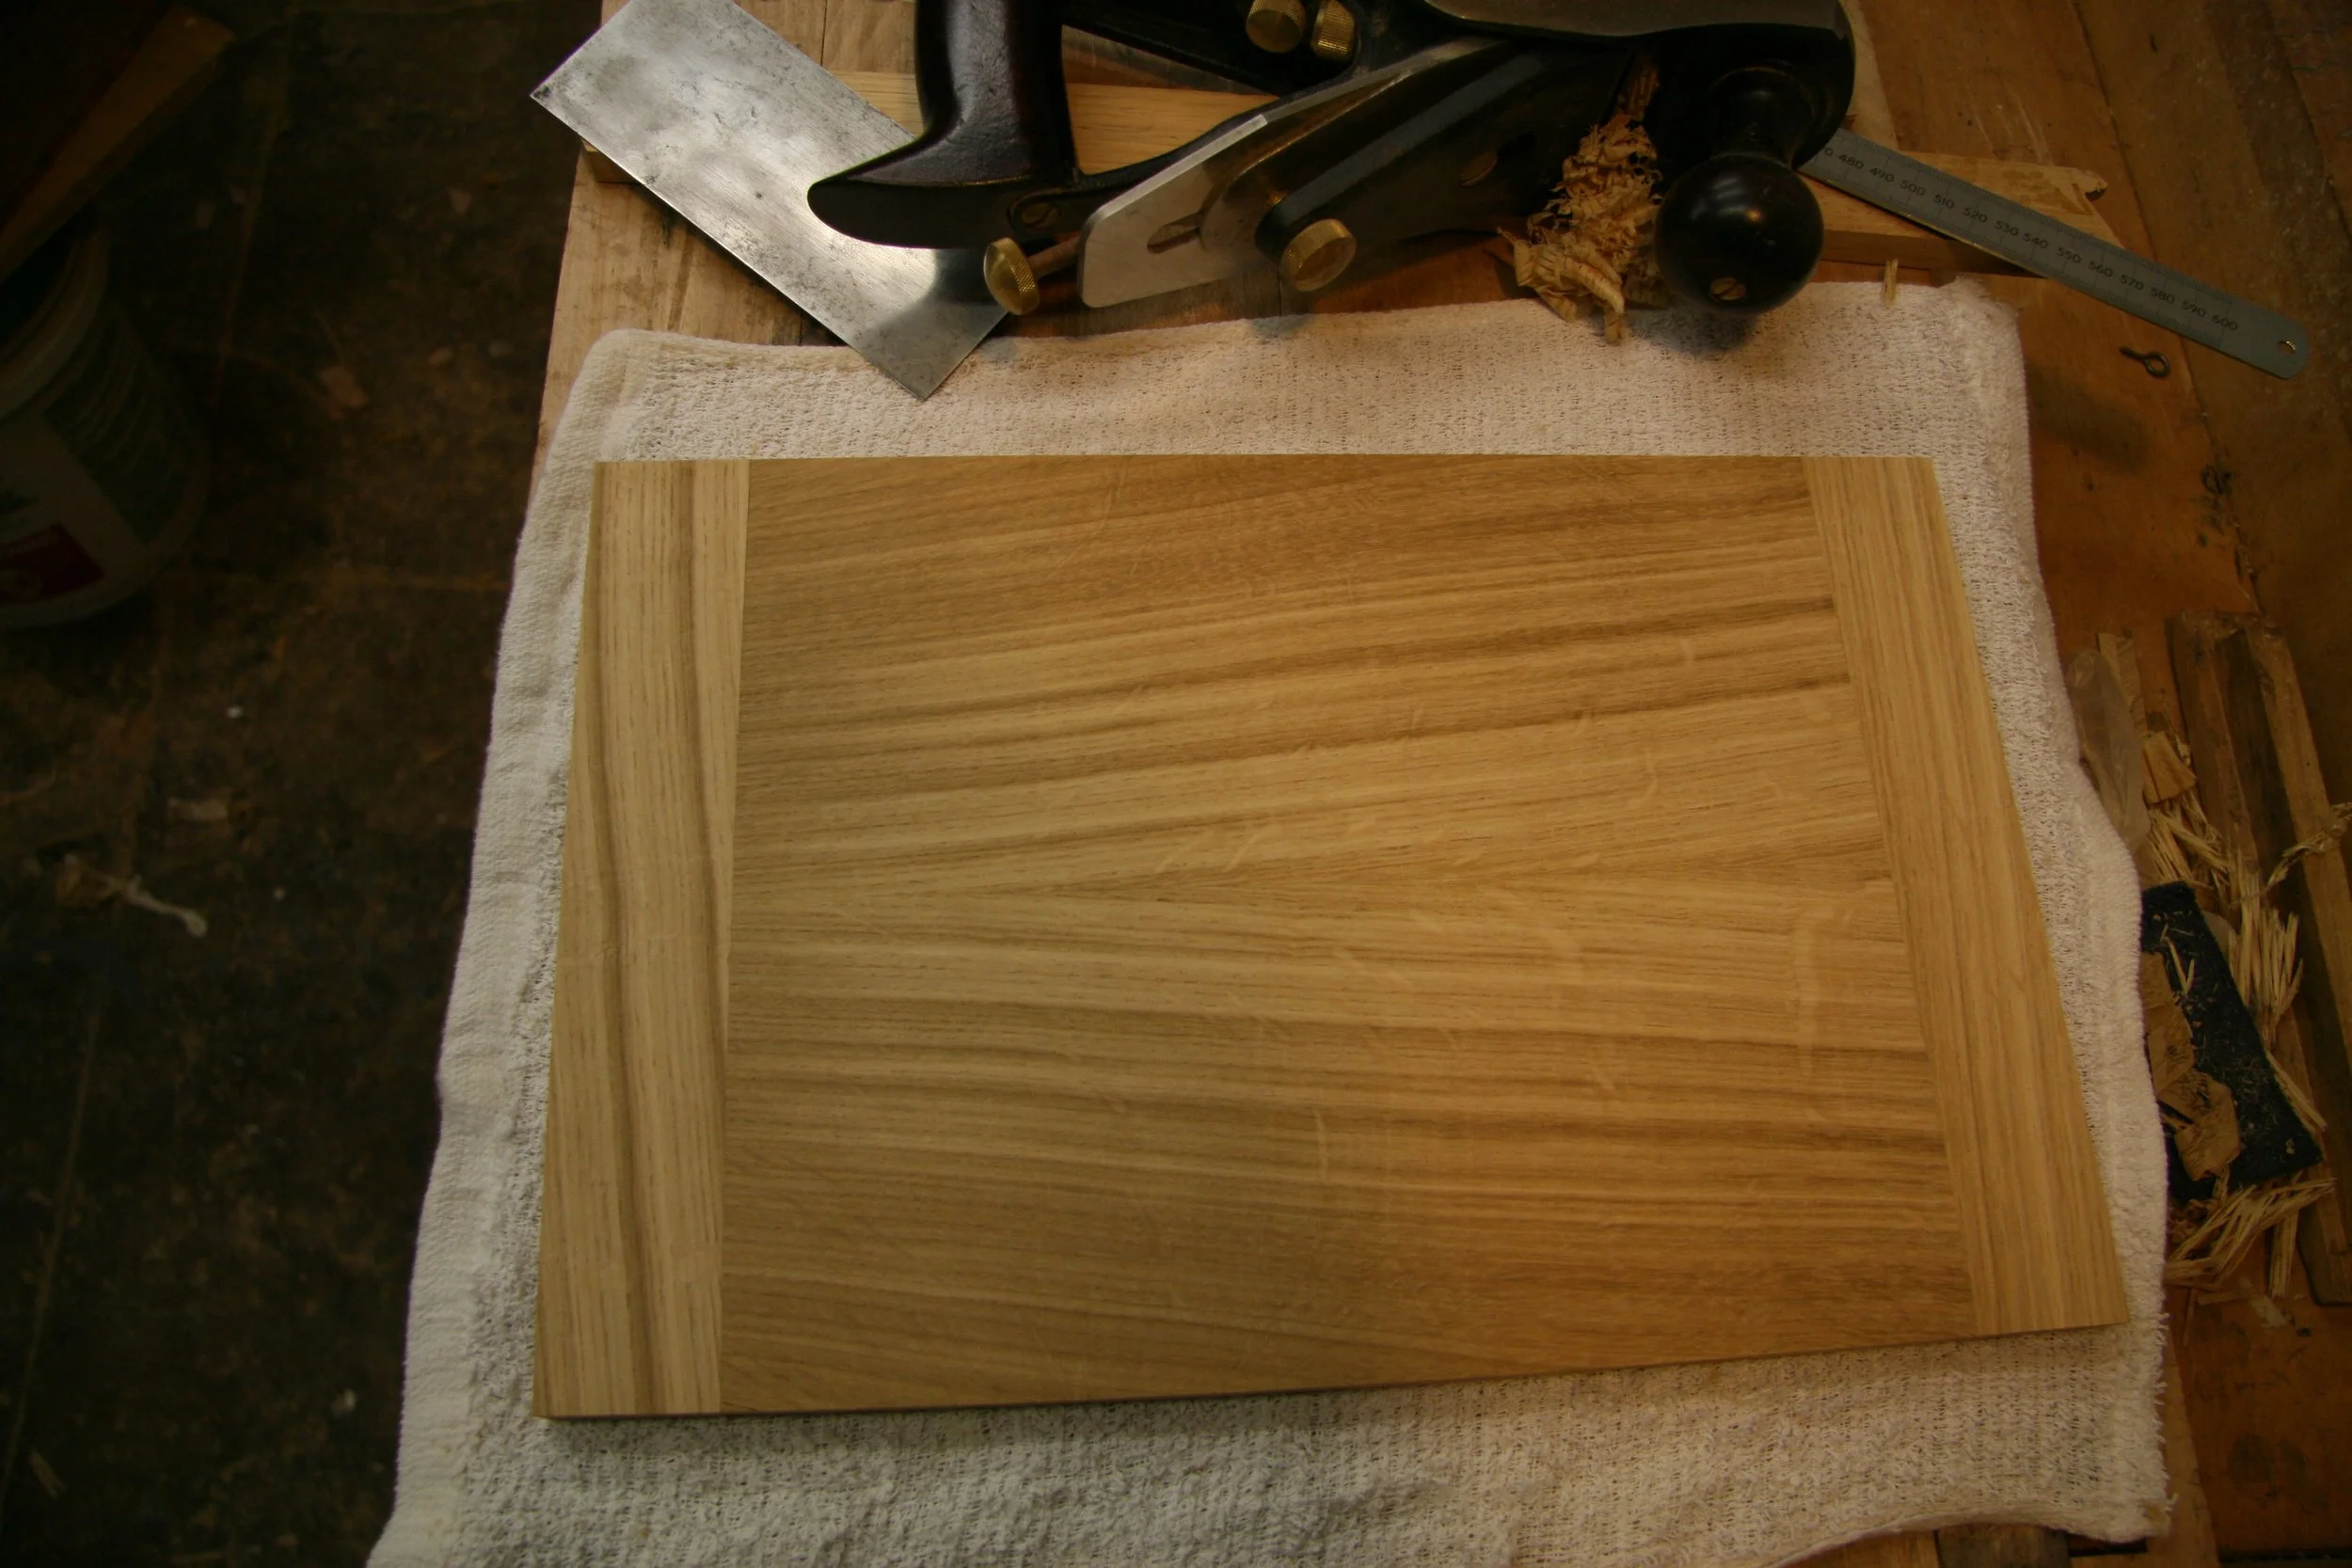
Cleaning up the newly veneered desk top surface. Since the veneer is thick, it behaves more like solid wood so a plane could be used. A specialty plane from HNT Gordon in Australia worked perfectly for this job. Very little sandpaper was used in building this project.
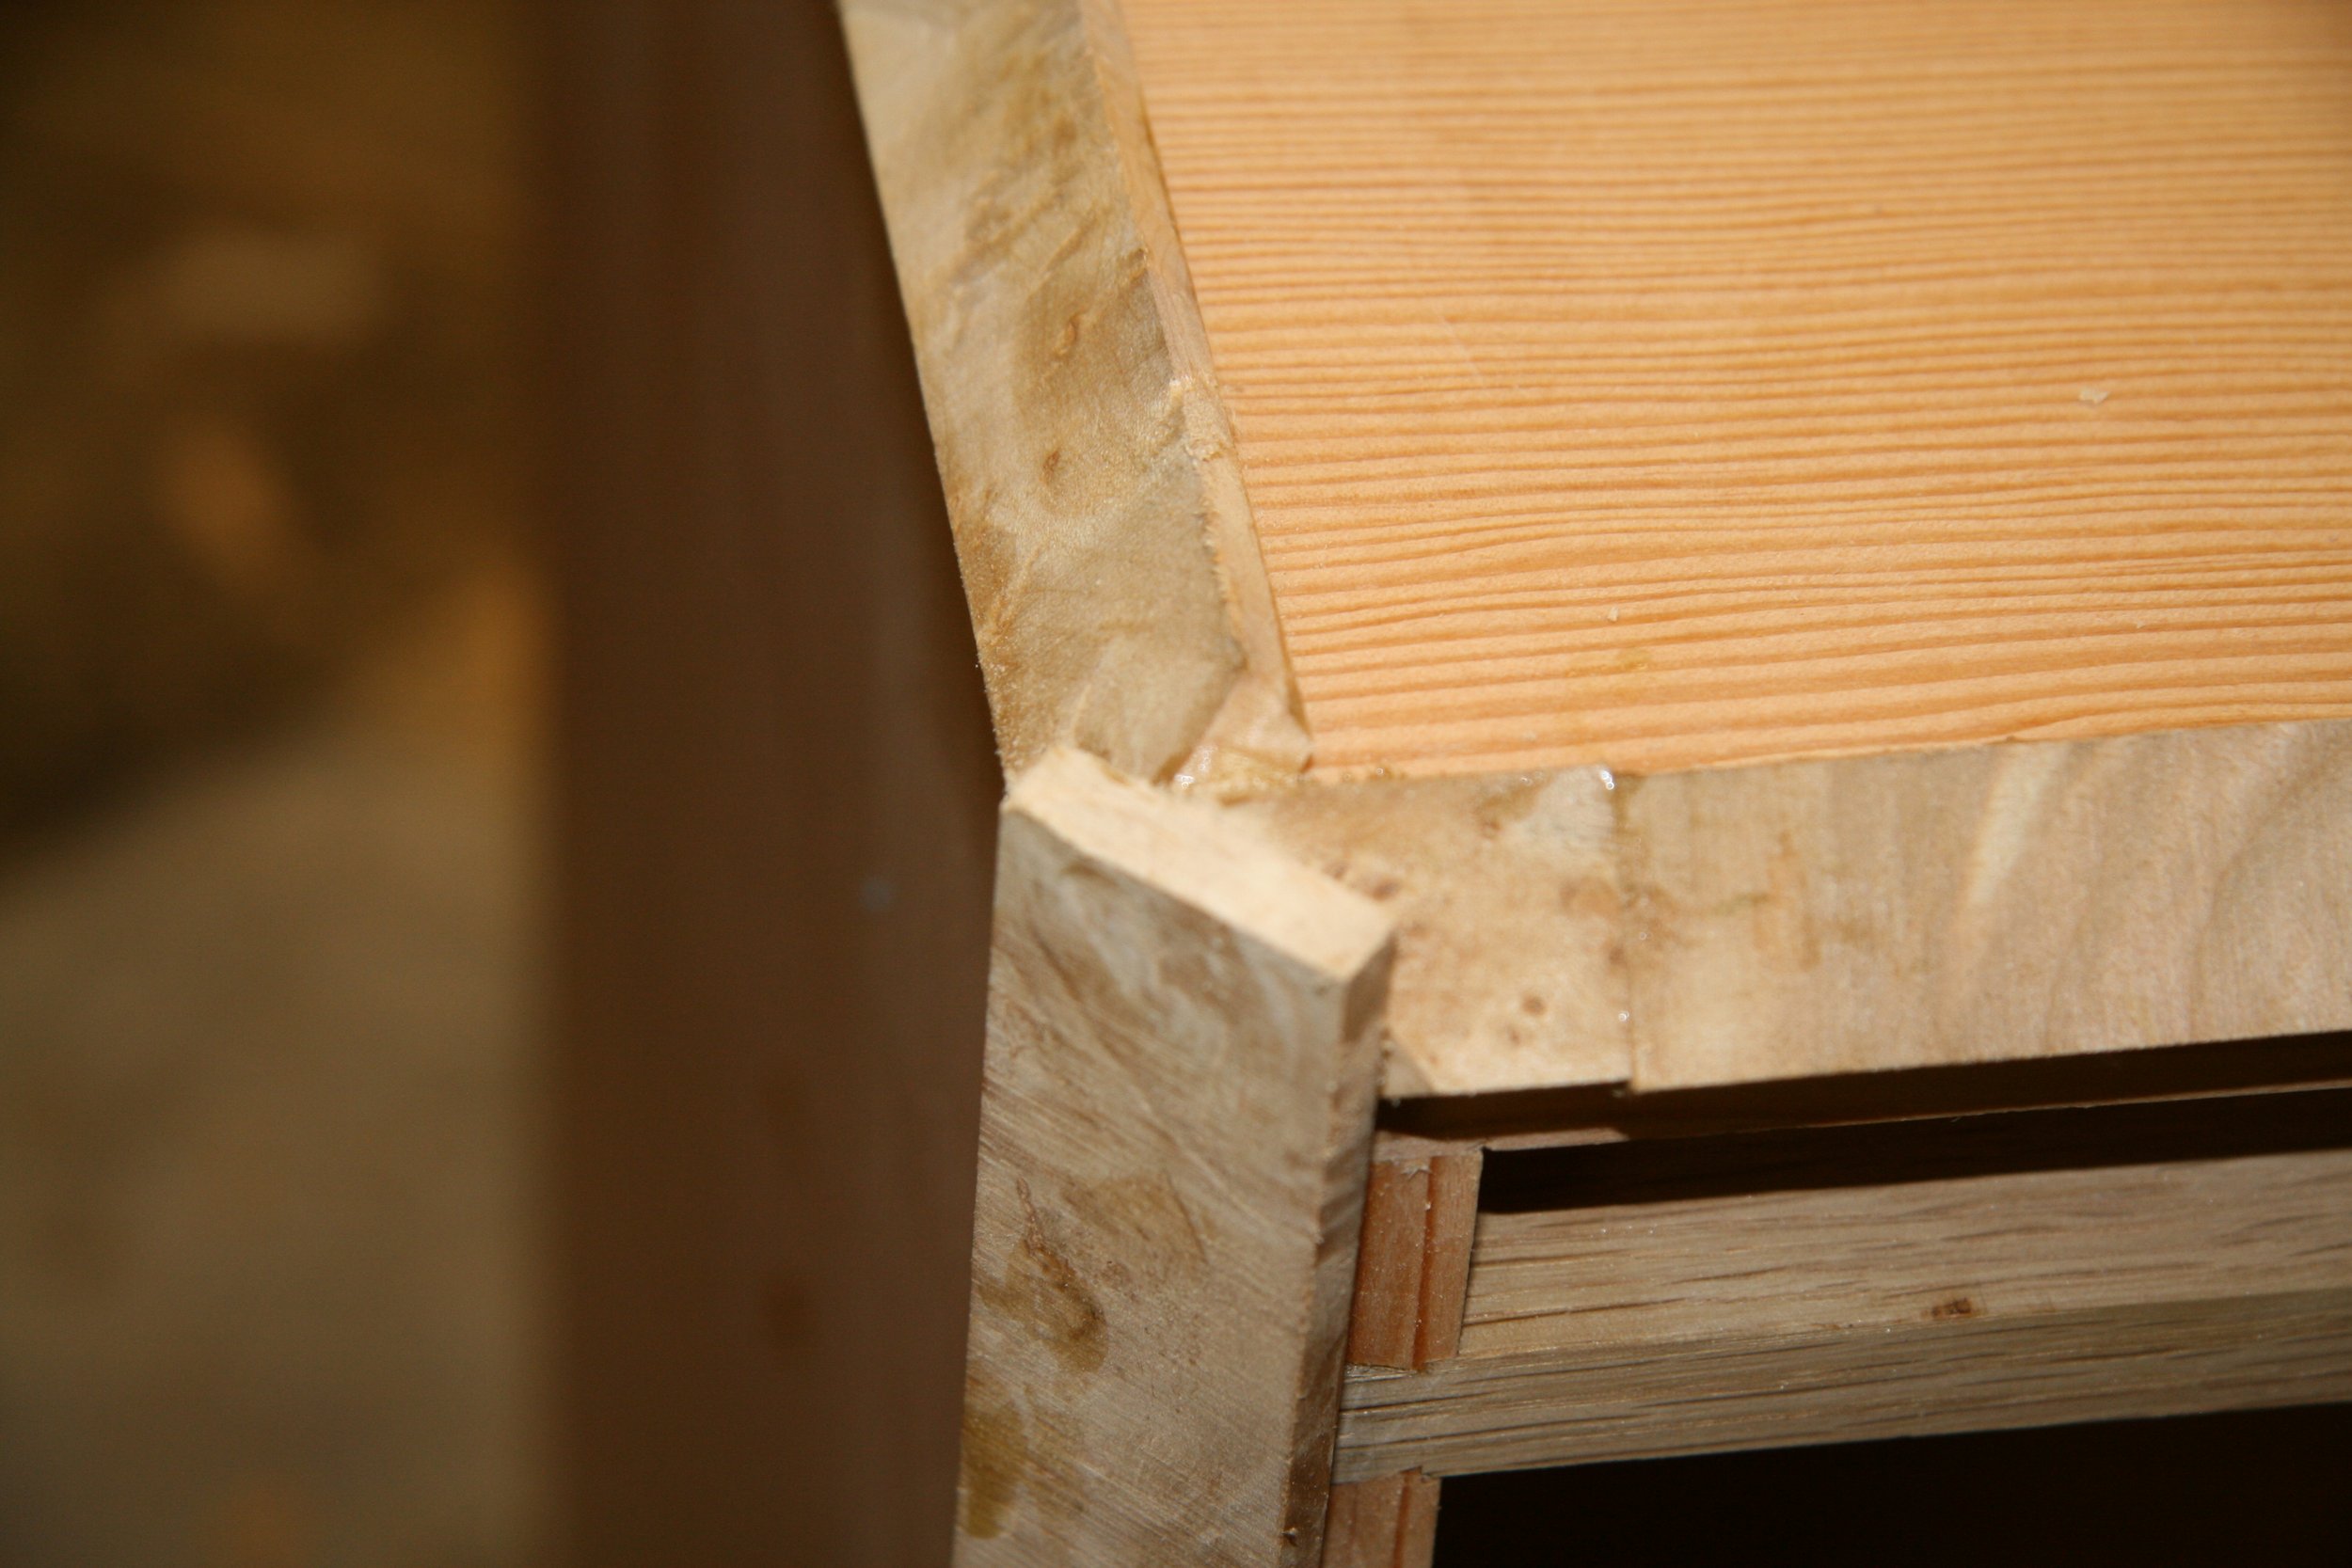
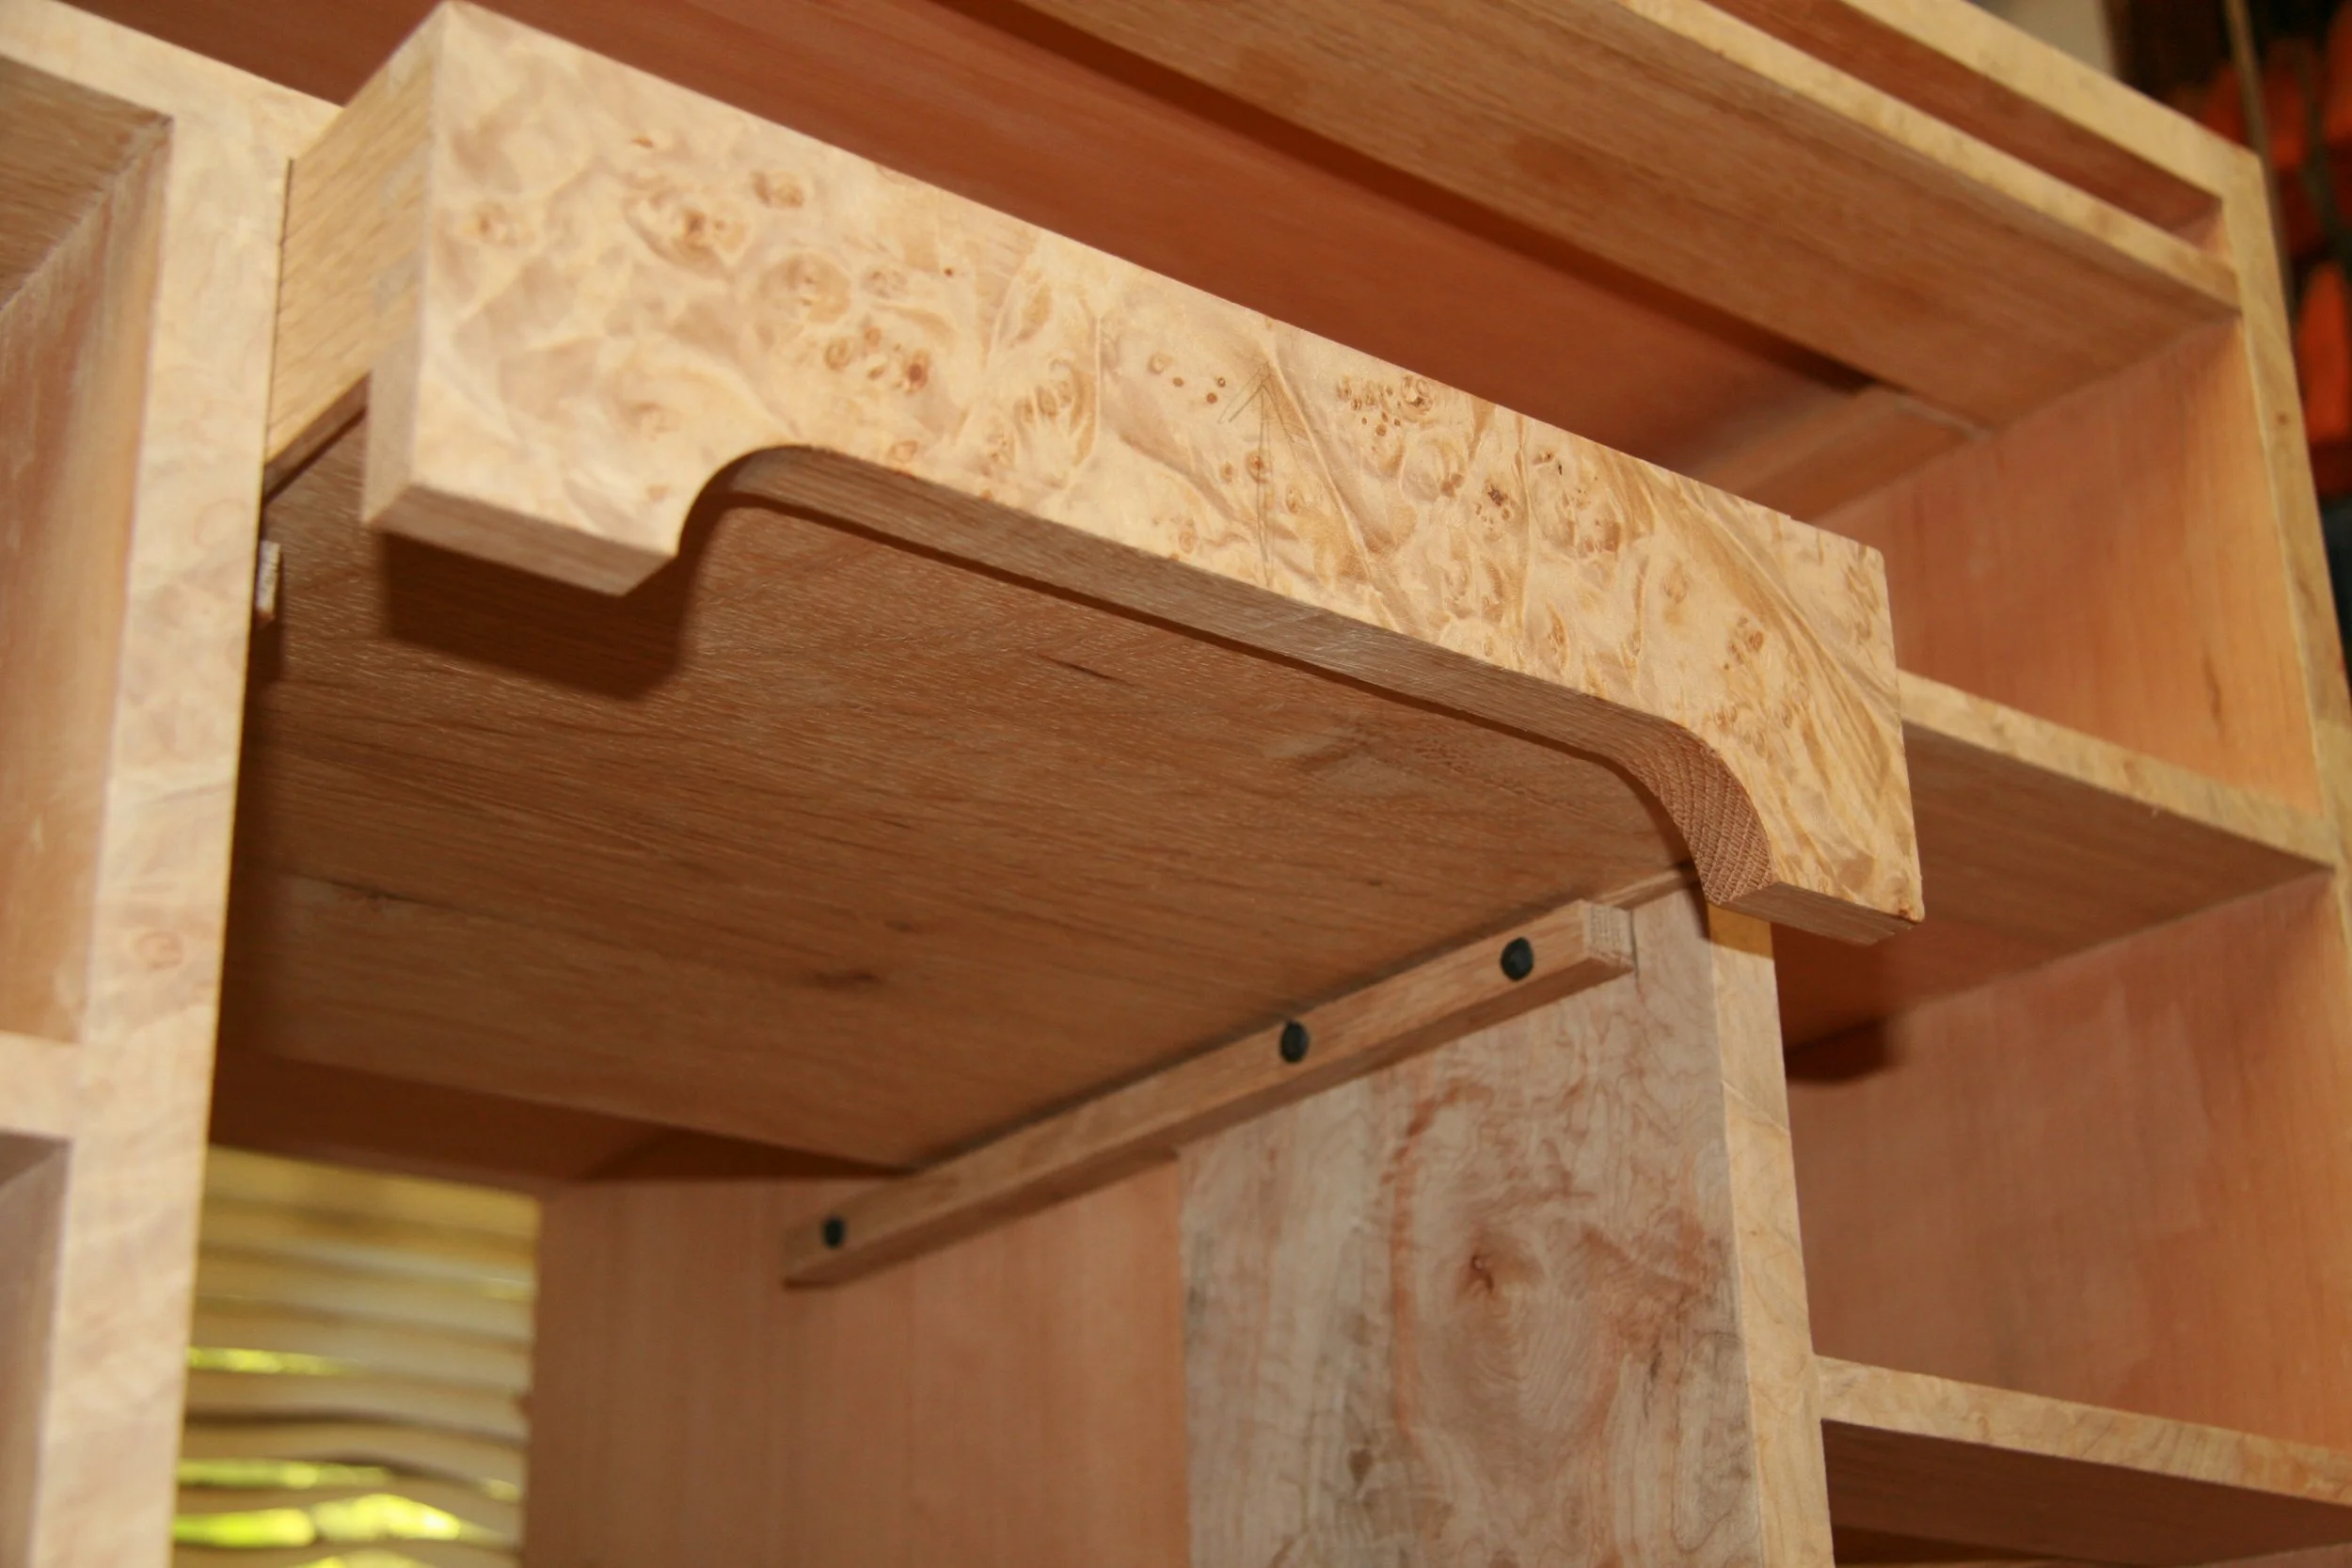
The edges are rounded over with the moulding profile. This helps to protect them from damage. After the edge moulding is routed, the burlwood strips that were glued on underneath become exposed, giving the illusion that the desk is made from solid burlwood.
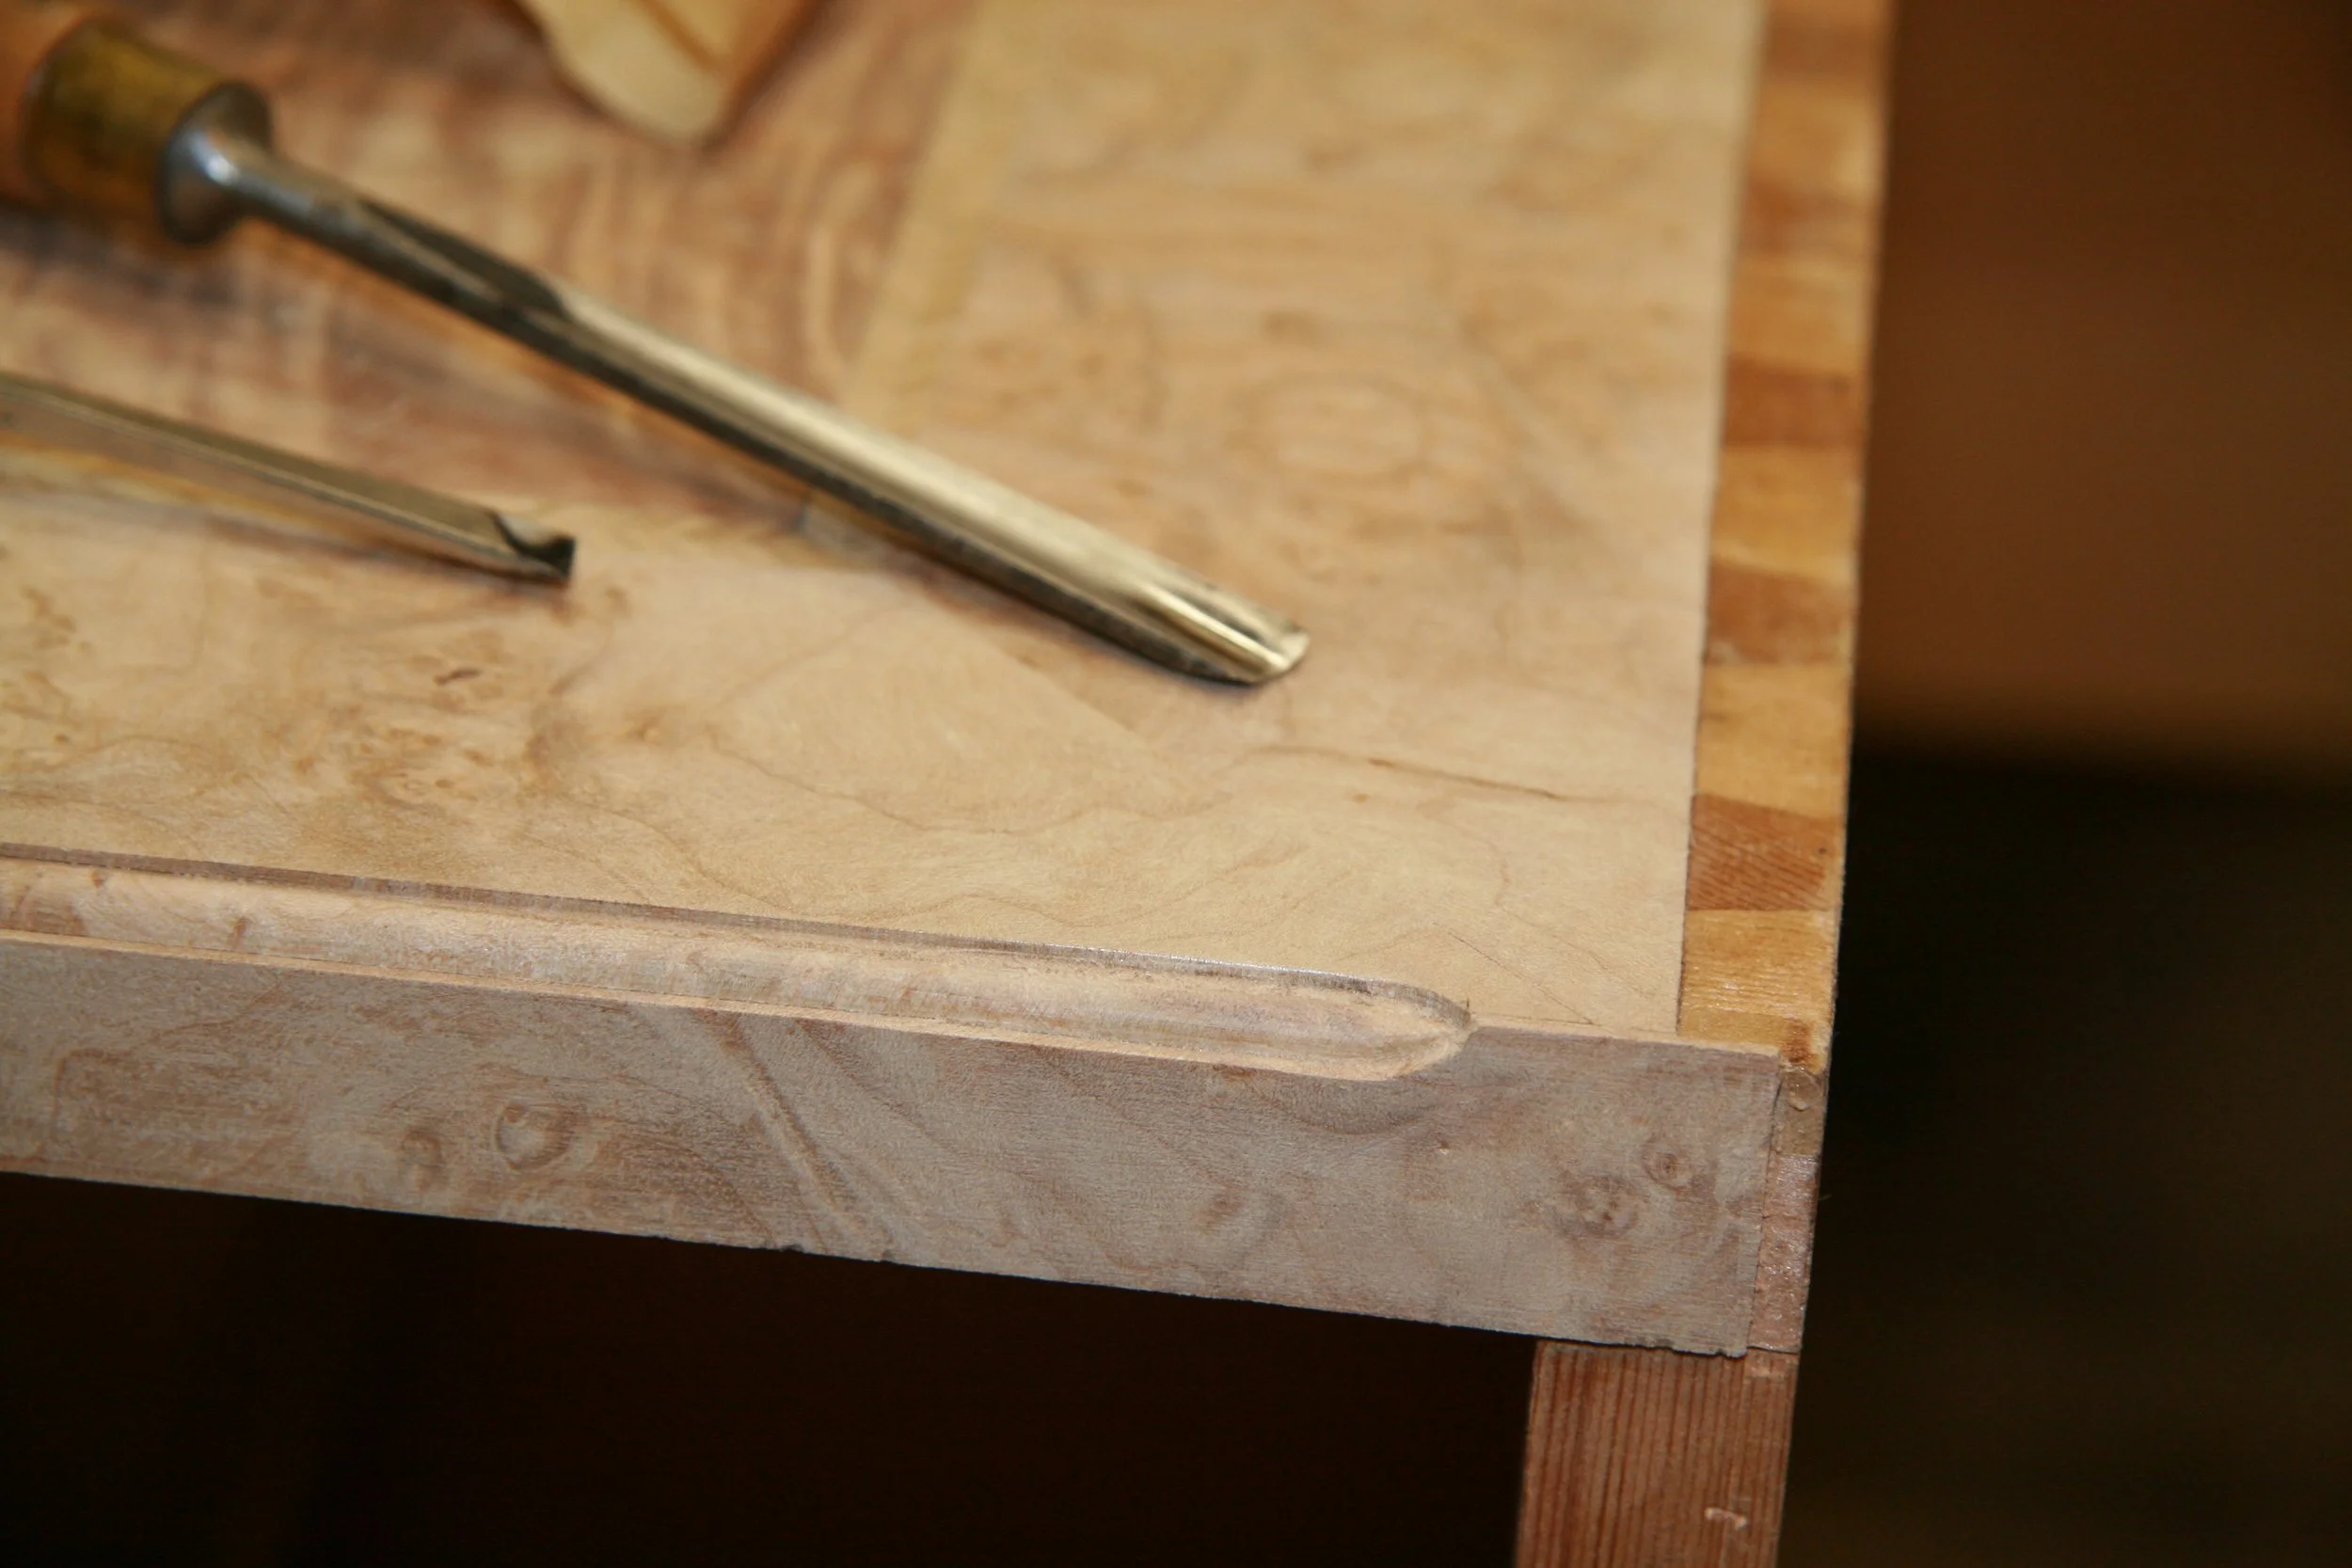
The detail of the moulded edge near the bottom, where it will meet the bracket feet. The veneer will be trimmed later when the bracket foot assembly is fitted.
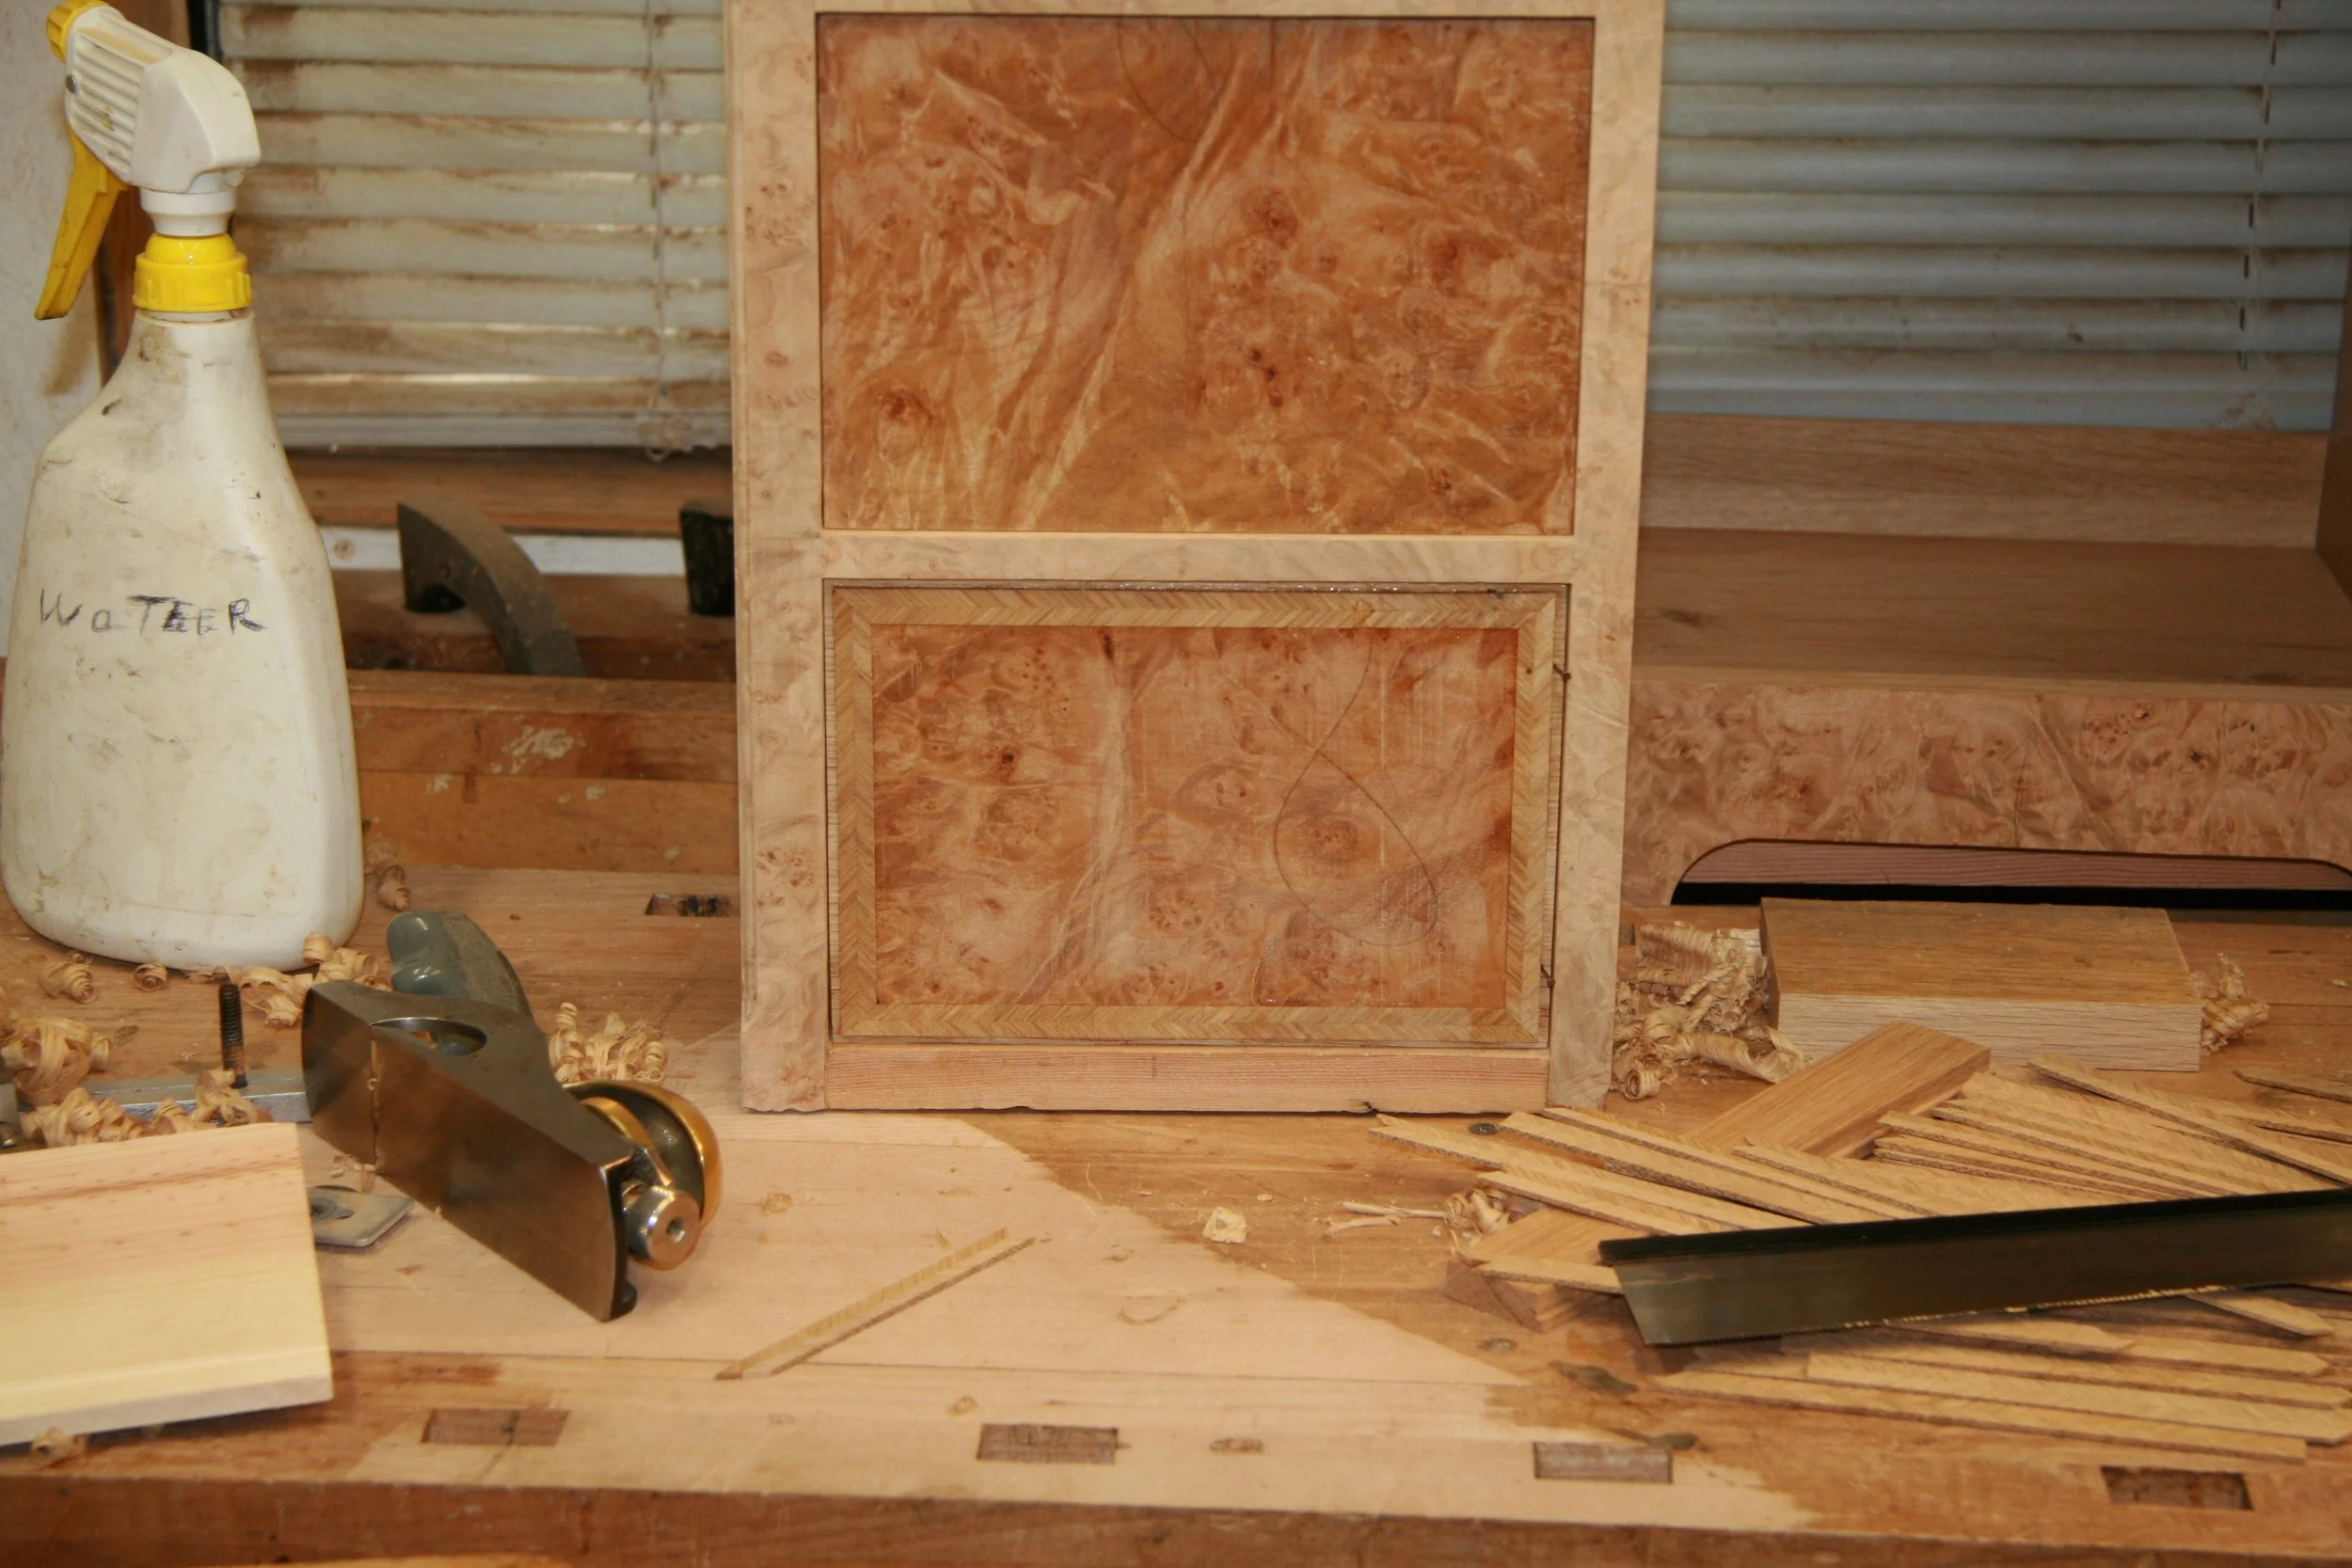
The cupboard door within the kneehole area was built up from a piece of plywood. Period originals that were studied applied veneer directly onto a solid wood backing. This practice has proven problematic, and it was decided to not reproduce it. Instead, some hardwood plywood was wrapped with Oak edging making it appear as if it has been glued up from solid wood. Deviations from period practices where made where the old techniques were proven to fail commonly.
The cupboard door edge before the veneer was applied. This shows the solid wood edge banding wrapping the plywood core.
The back side of the cupboard door, showing the deceipt. Looks like solid wood with breadboard ends. The wood used to wrap the plywood edges was cut from the same stock as the veneer used for the back. This helped to make the seams on the door edges very hard to detect.
Hammer veneering the cupboard door front.
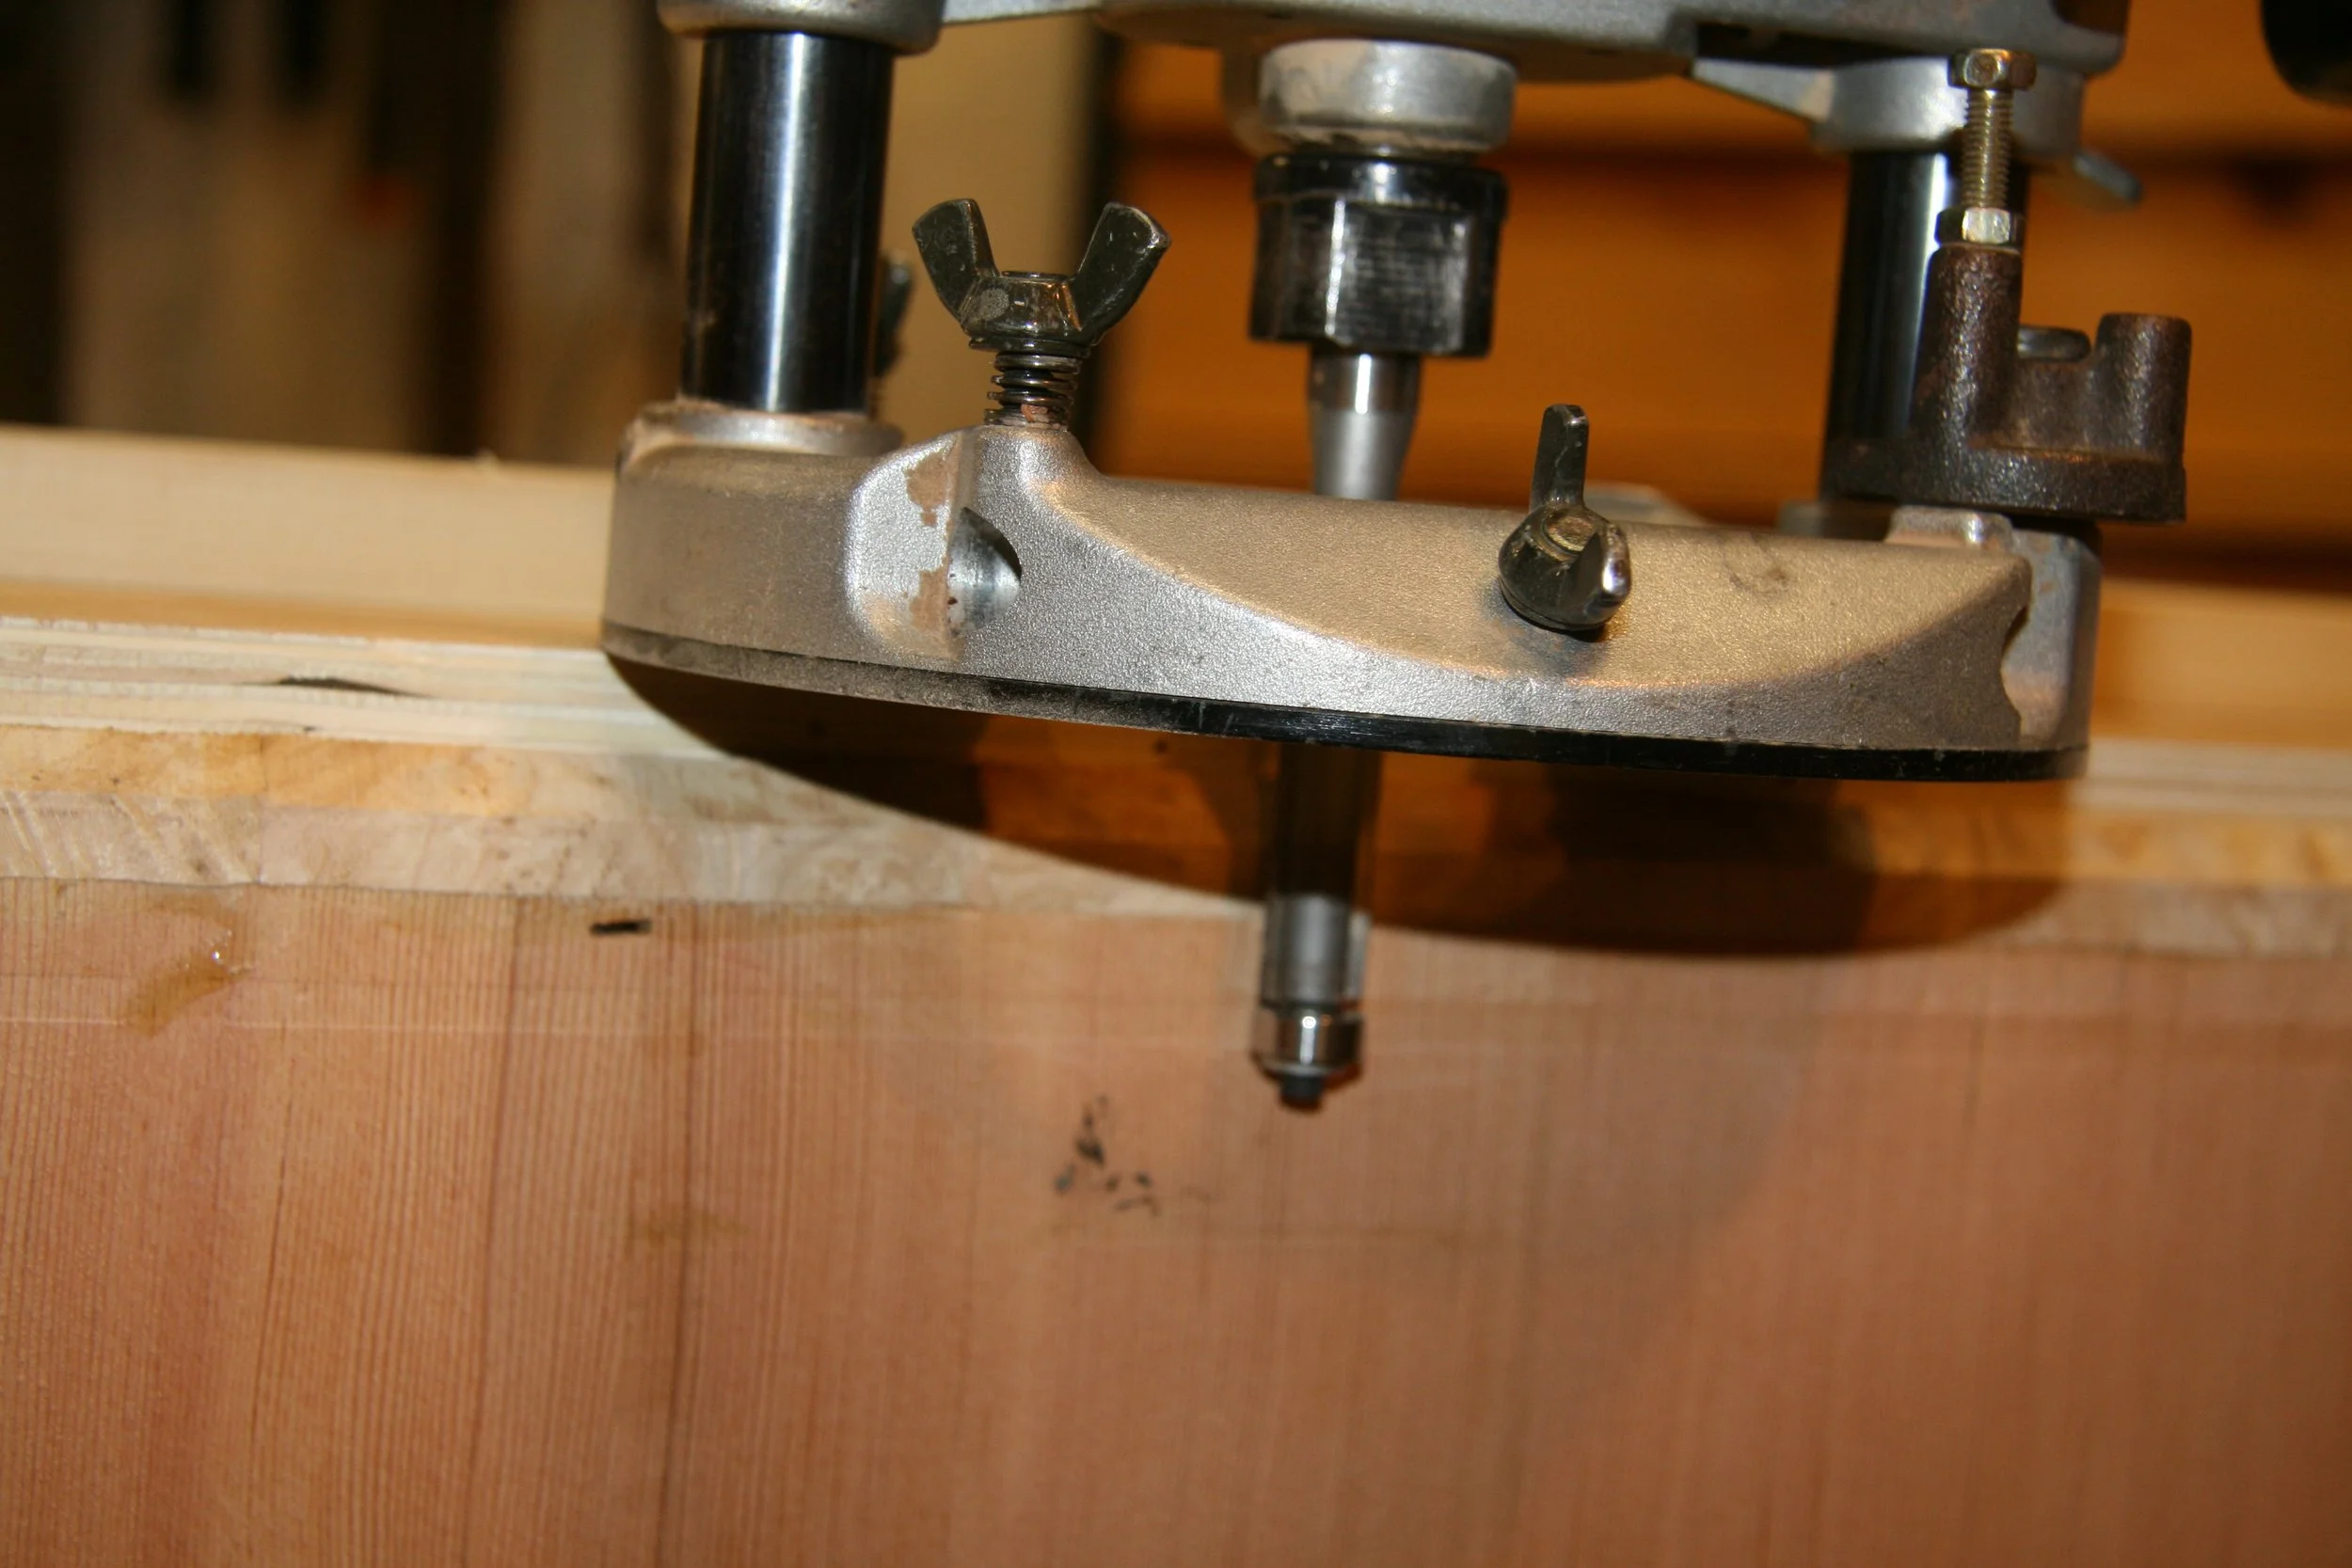
Routing a groove on the door edge. The "cockbead" moulding that protects the veneer from lifting will be glued into this rebate.

Gluing on the cock bead moulding.
The hinge knuckle is embedded in the cock-bead moulding.
The finished cupboard door.

Getting ready to make the drawers.
A detail showing one of the dovetail joints that are used to bind the drawer fronts to the drawer side.
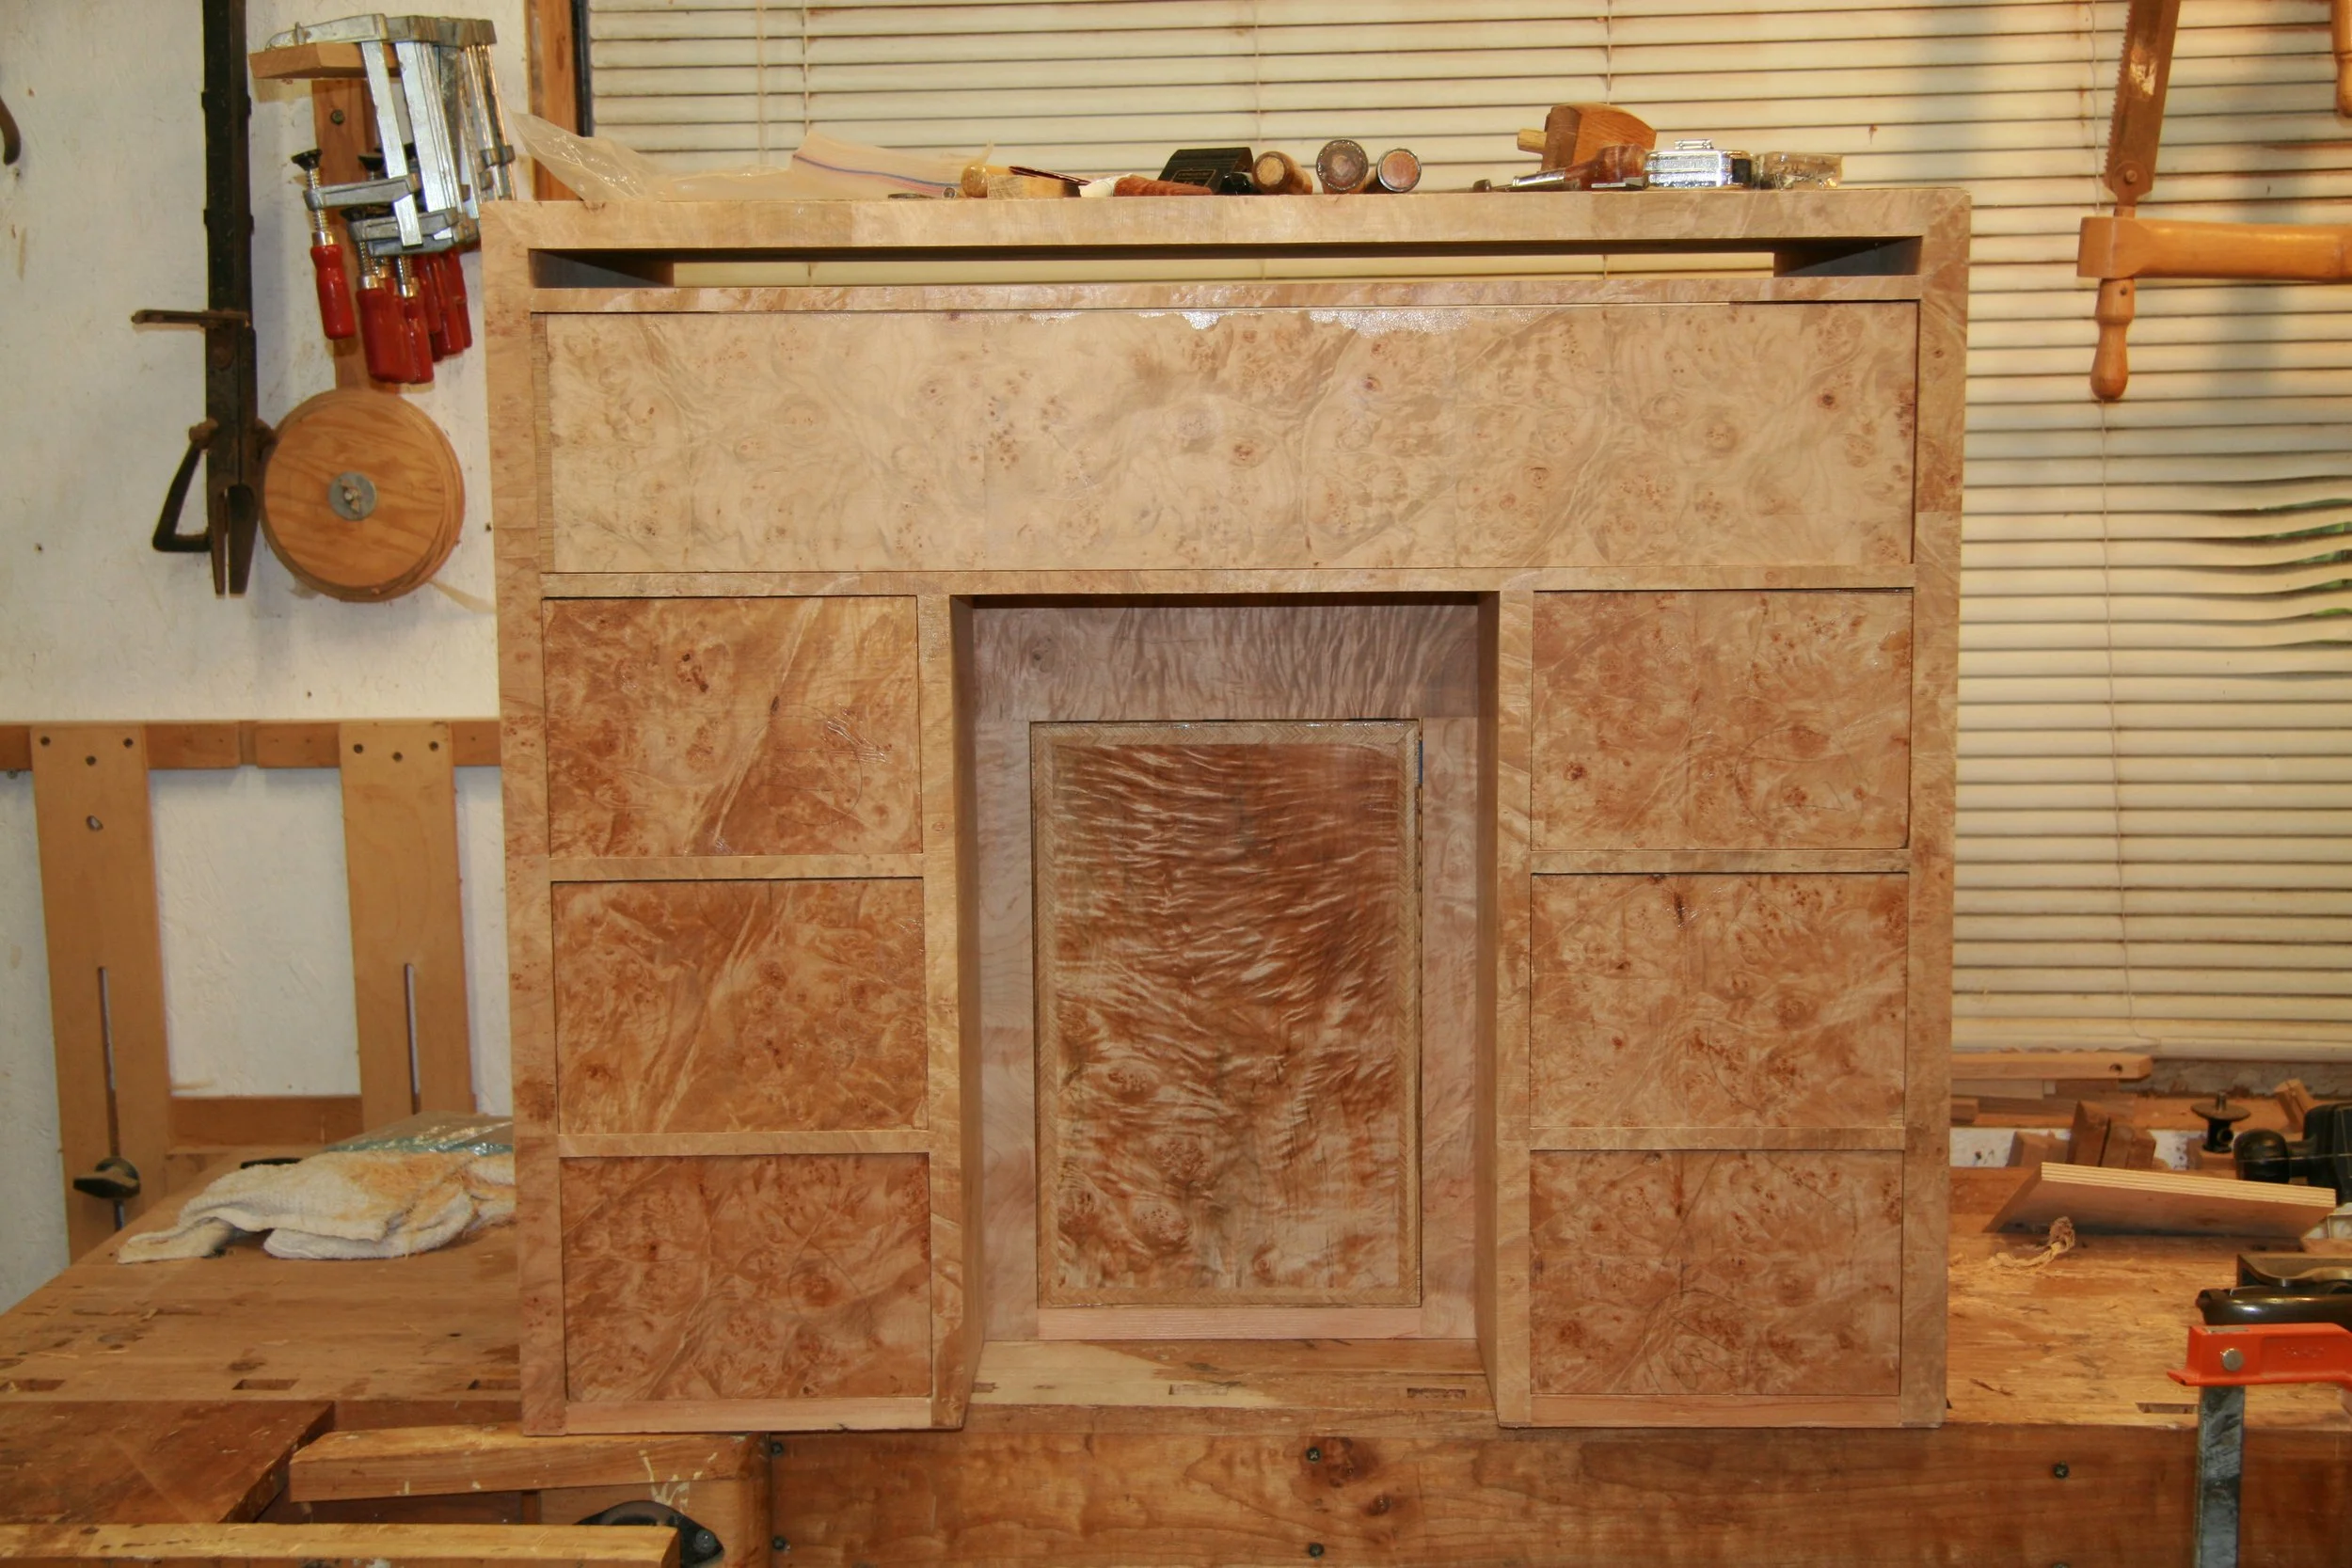
All the drawers veneered and ready for banding.
The bottom drawer has had the cockbead edge moulding applied and is almost finished.
Fitting the "pen" drawer. These are called pencil drawers today, but pencils didn't exist when this desk was originally built.
A secret mitre dovetail is used to hold the corner of the bracket feet together. This is similar to how the case sides are attached to the top. The secret miter dovetail guarantees that no end grain is exposed, which could eventually telegraph through the veneer and leave witness marks.

The finished bracket foot unit in place. This was another deviation from period practices. Full allowances for wood movement were made.
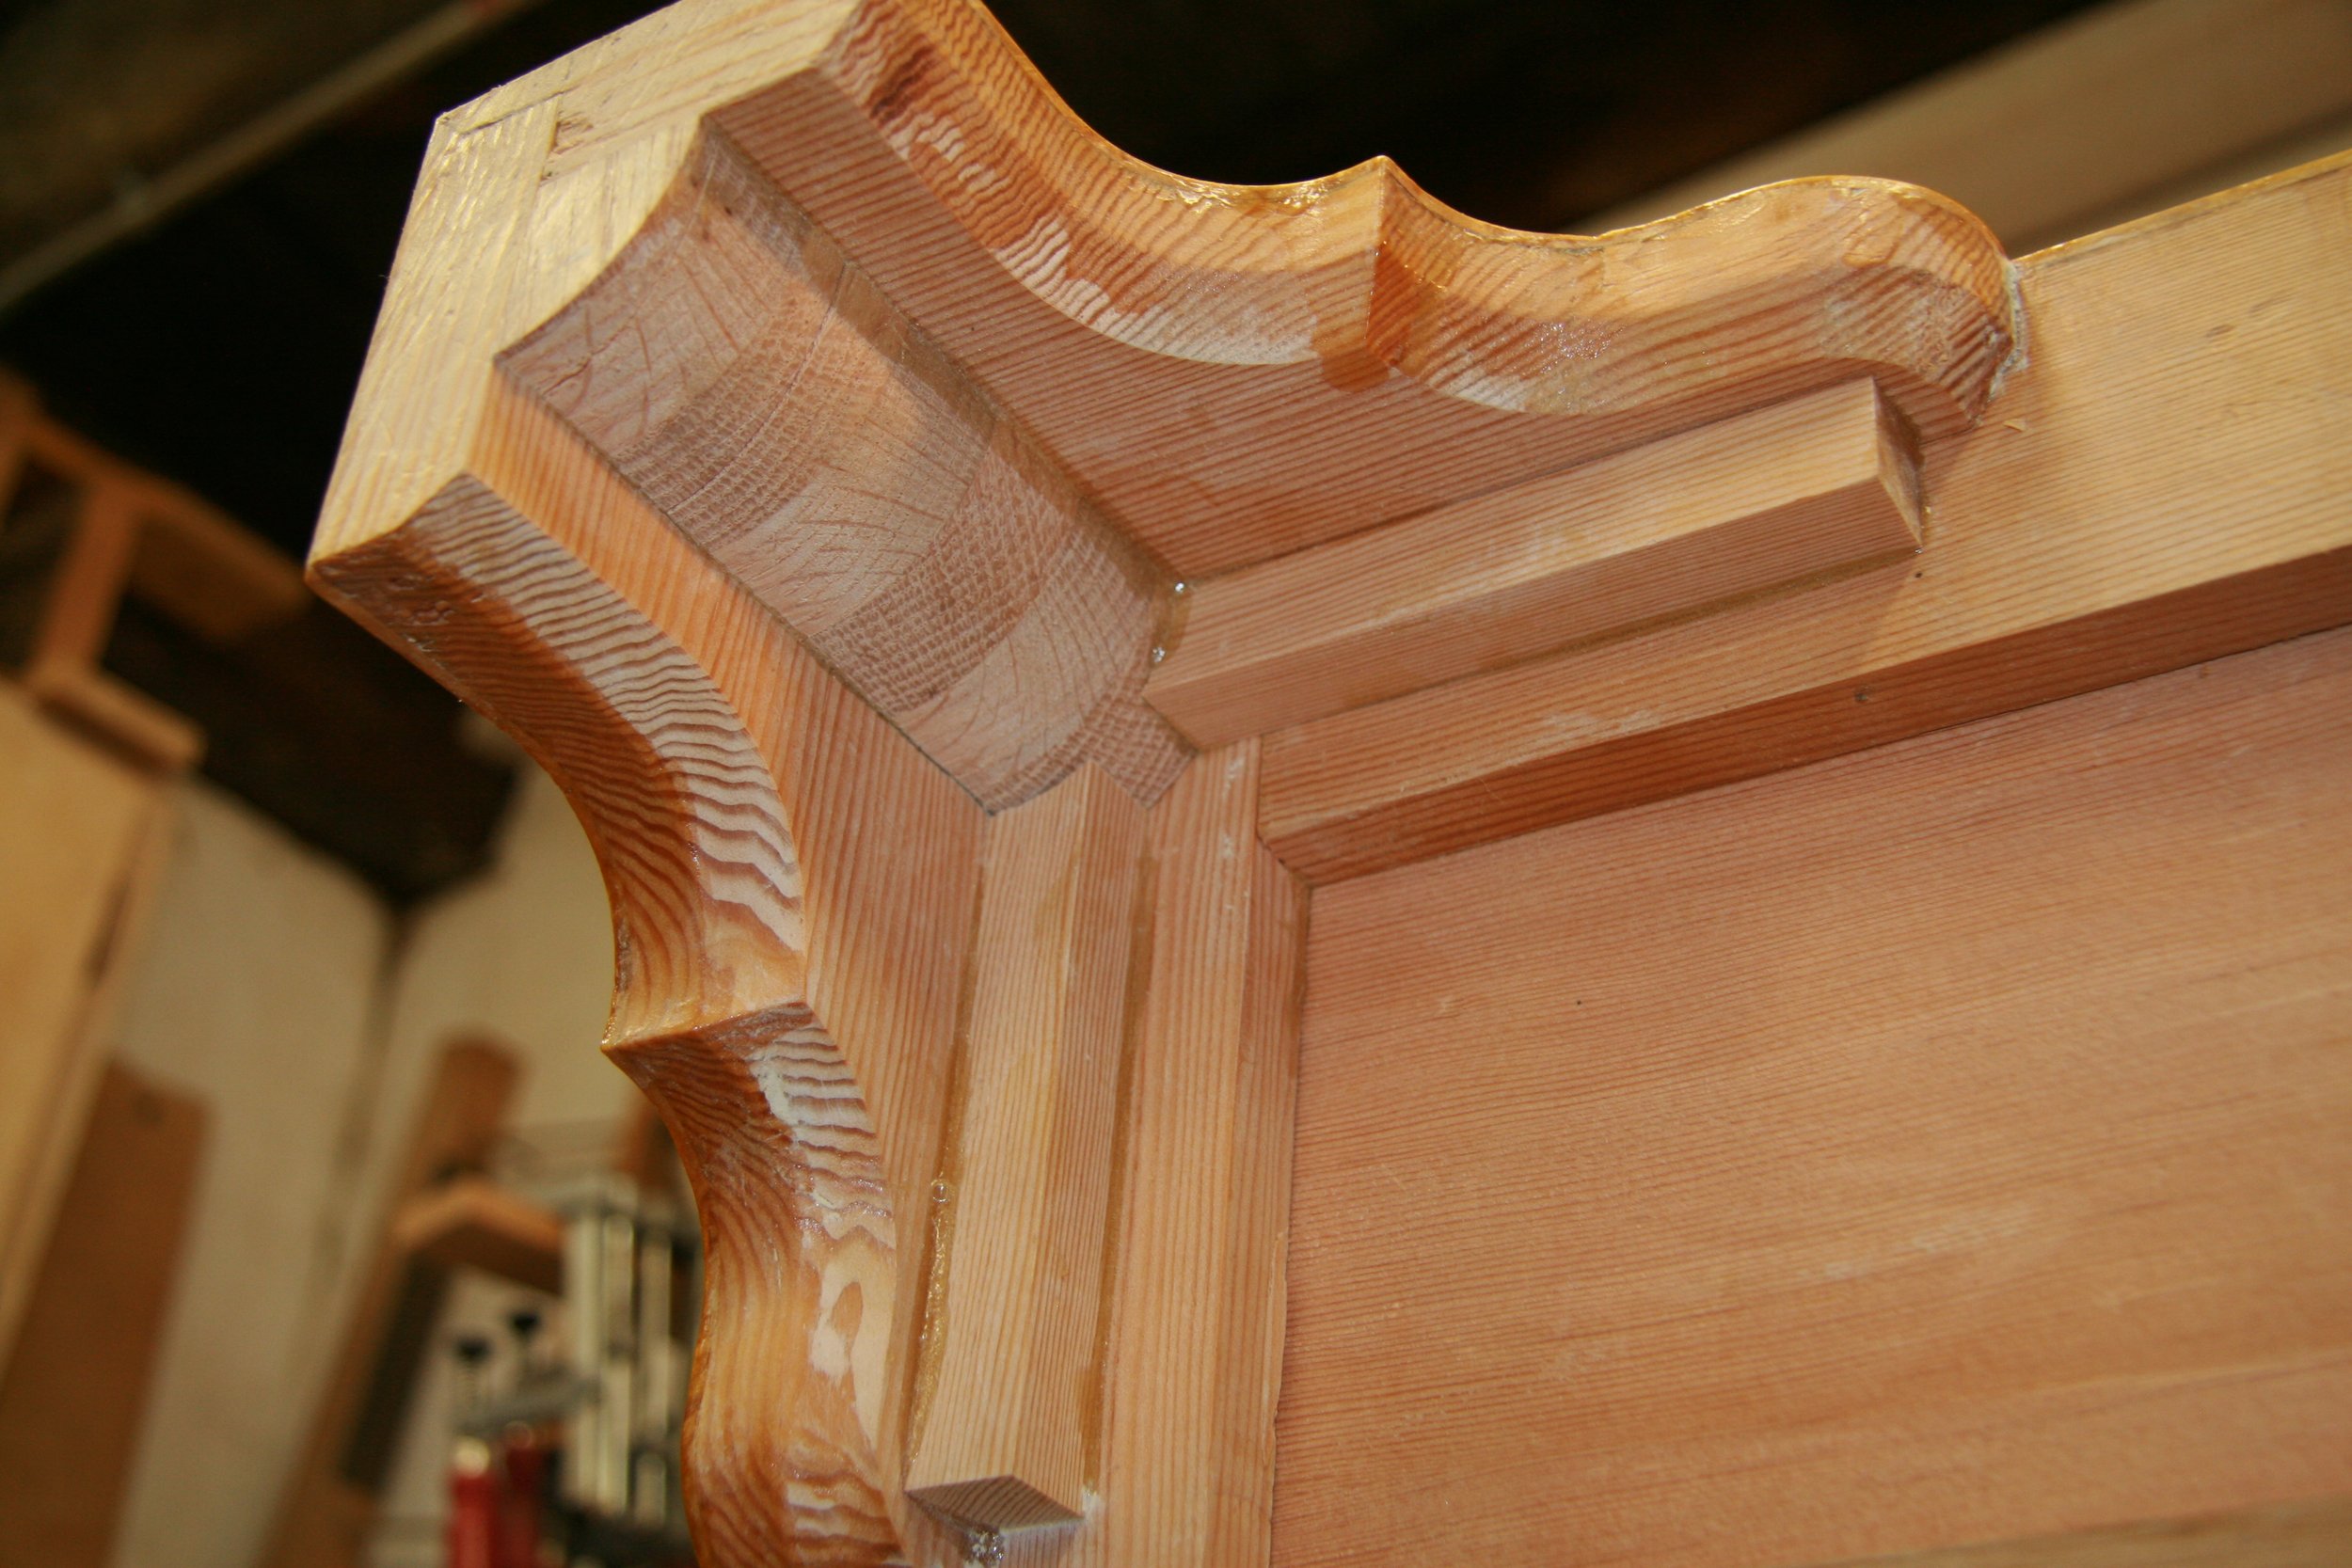
A view of one of the bracket feet showing the glue block made from alternating pieces of wood to avoid any cross grain construction.
The cross grain moulding that will go on top of the bracket feet. This is exactly as it was done in period pieces. It's far more durable than wrapping thin veneer around a moulded edge, as is commonly done on contemporary work.
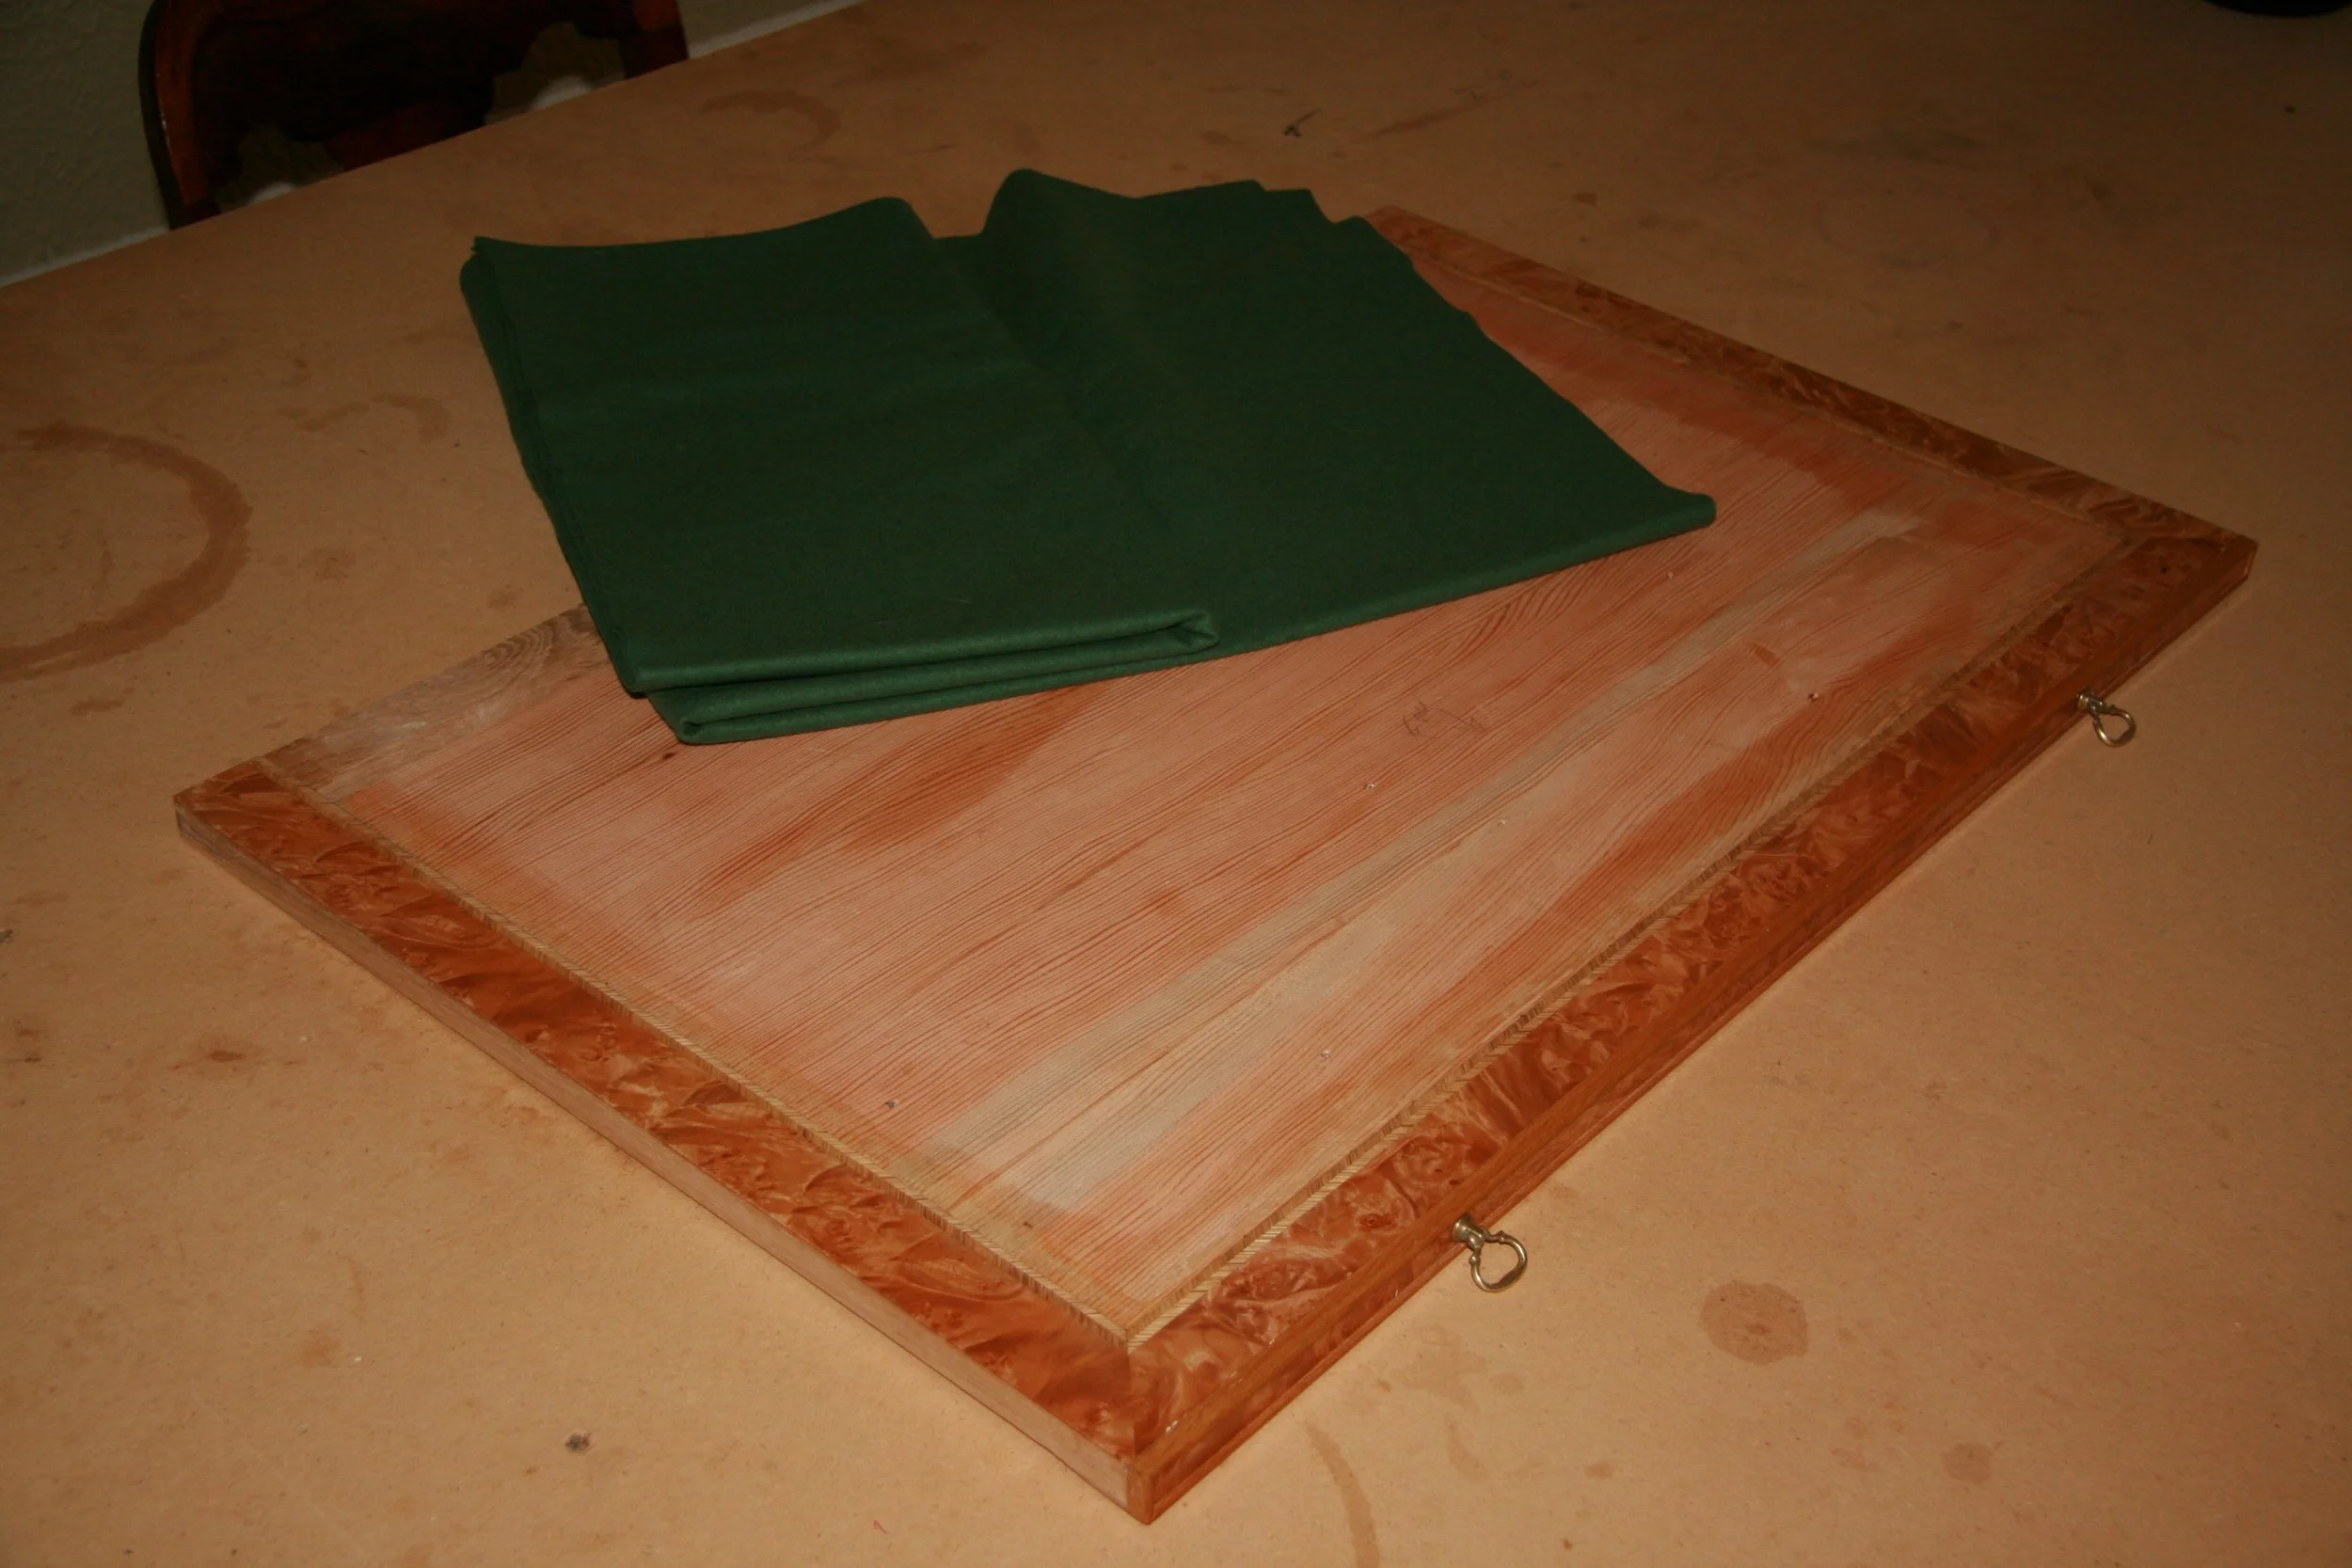
The writing slide with baize fabric ready to be glued in place.

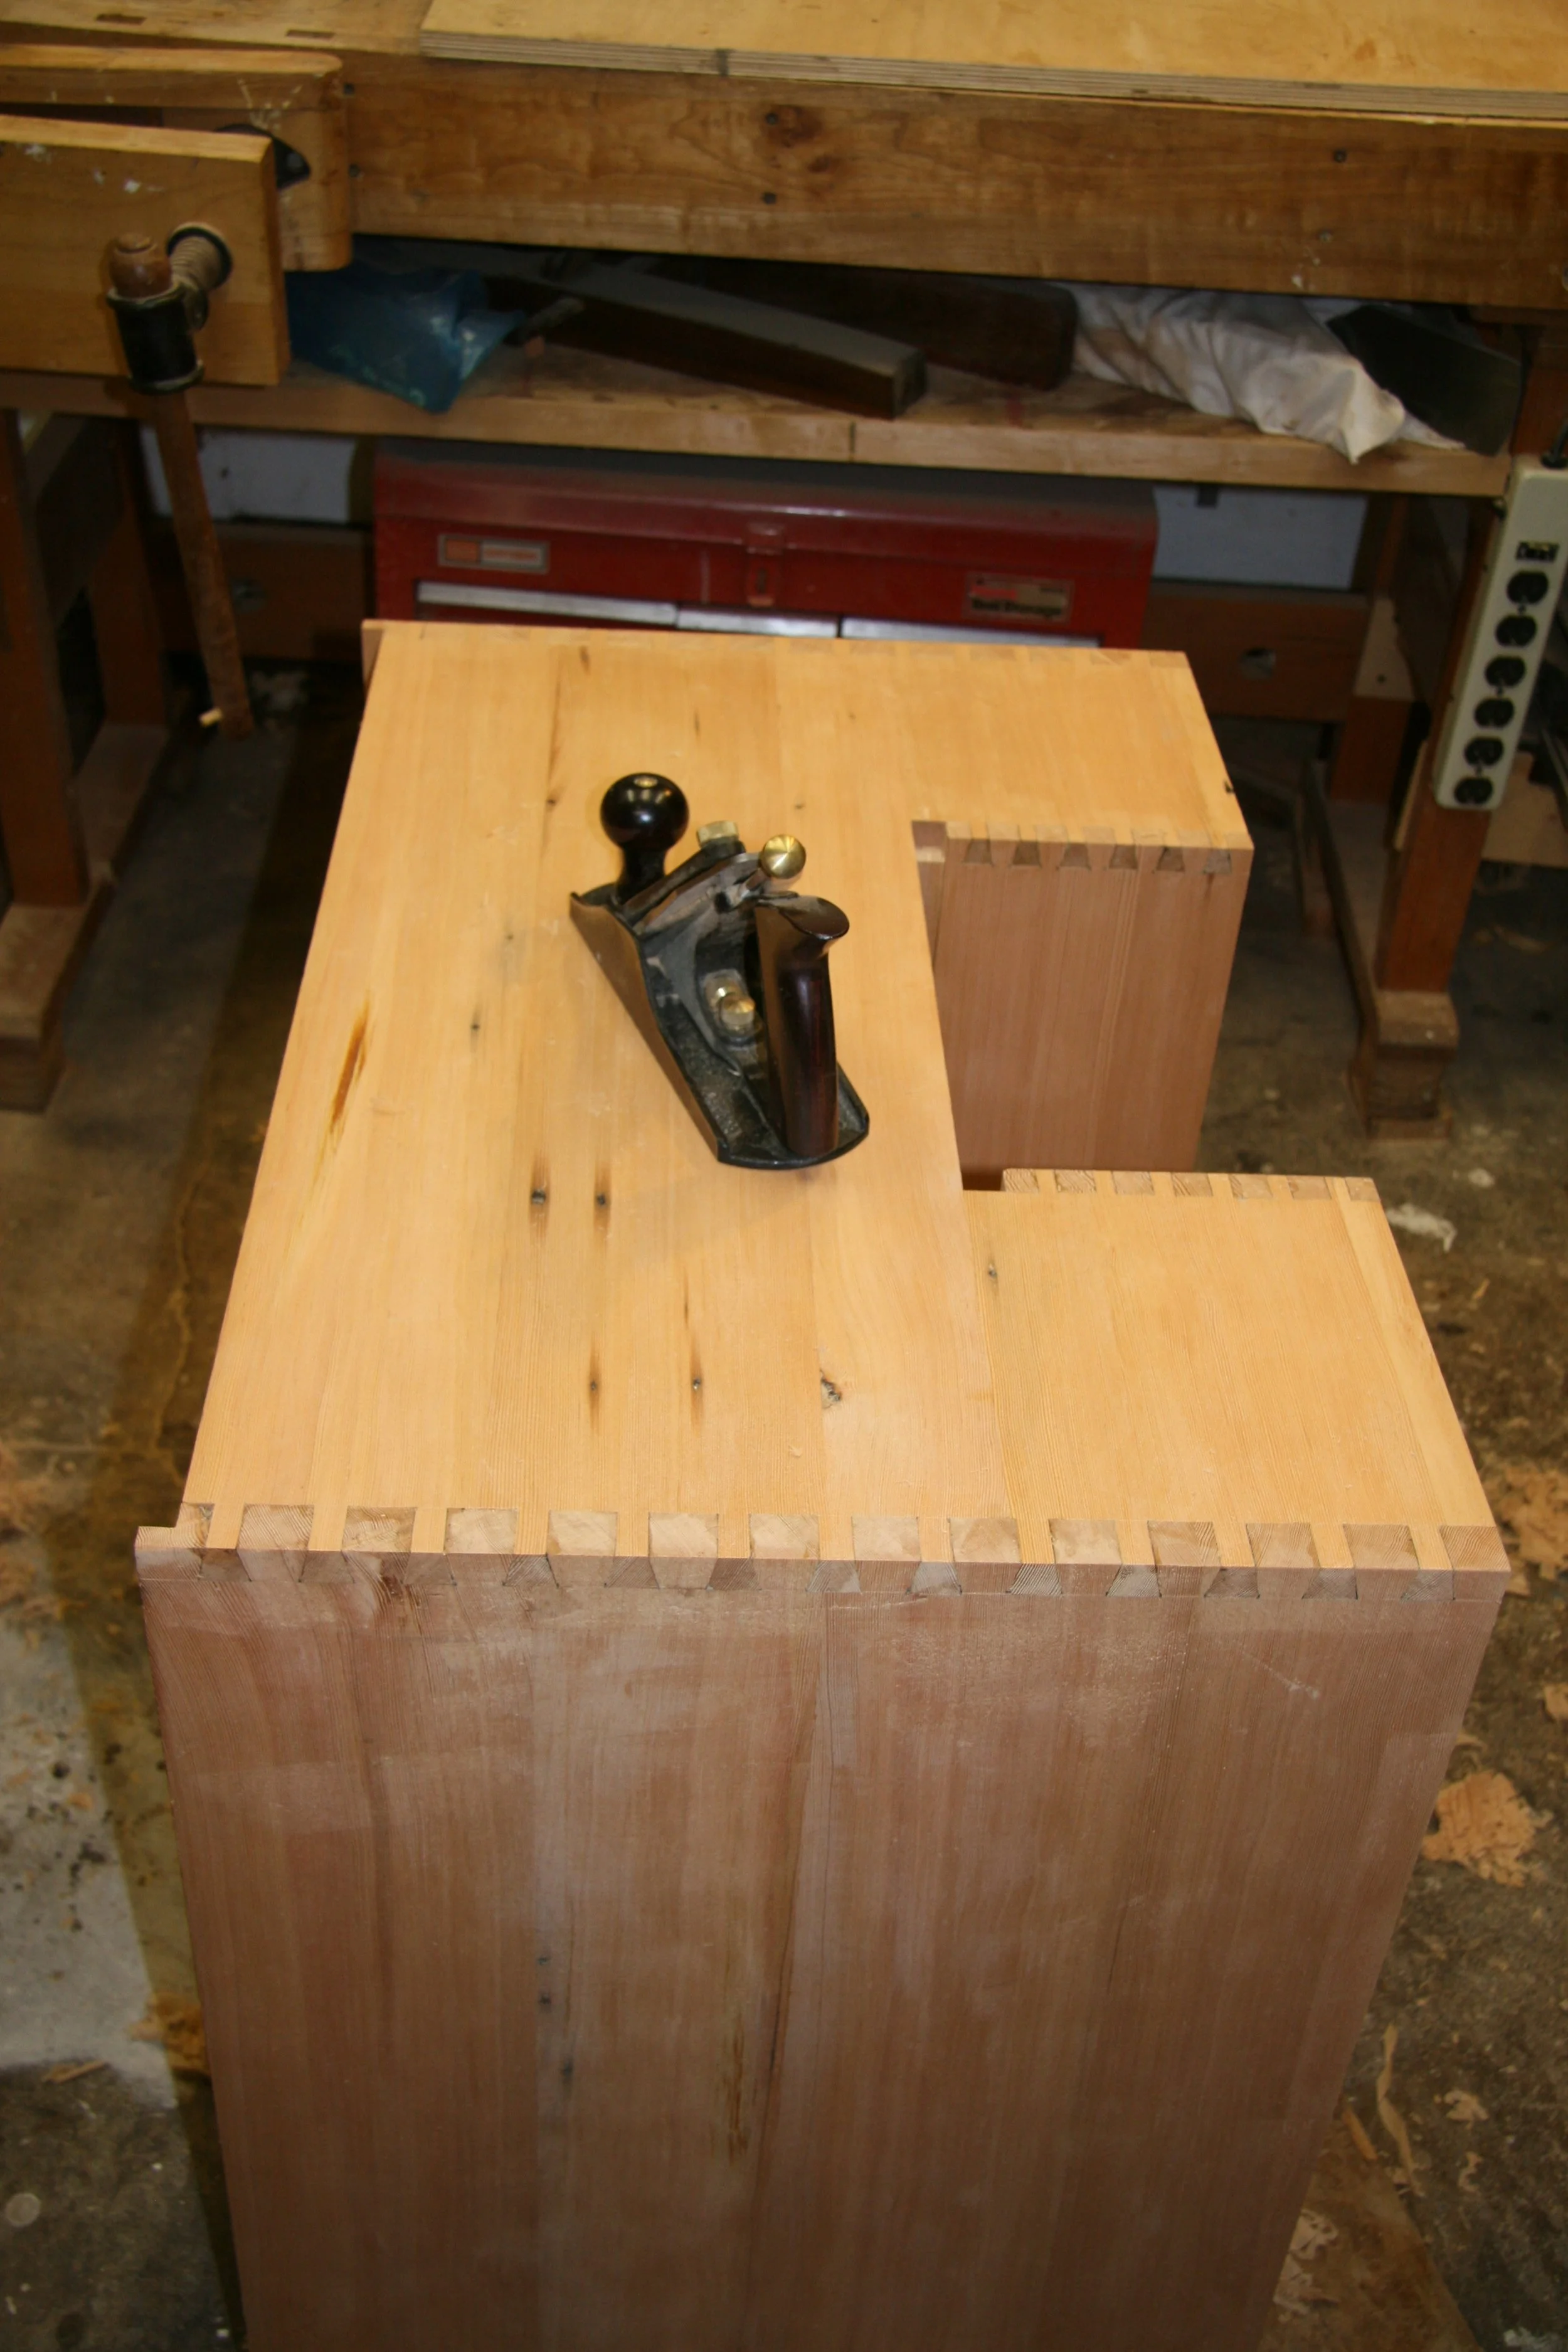
The bracket foot unit going in place, covering up the last of the carcase dovetails.
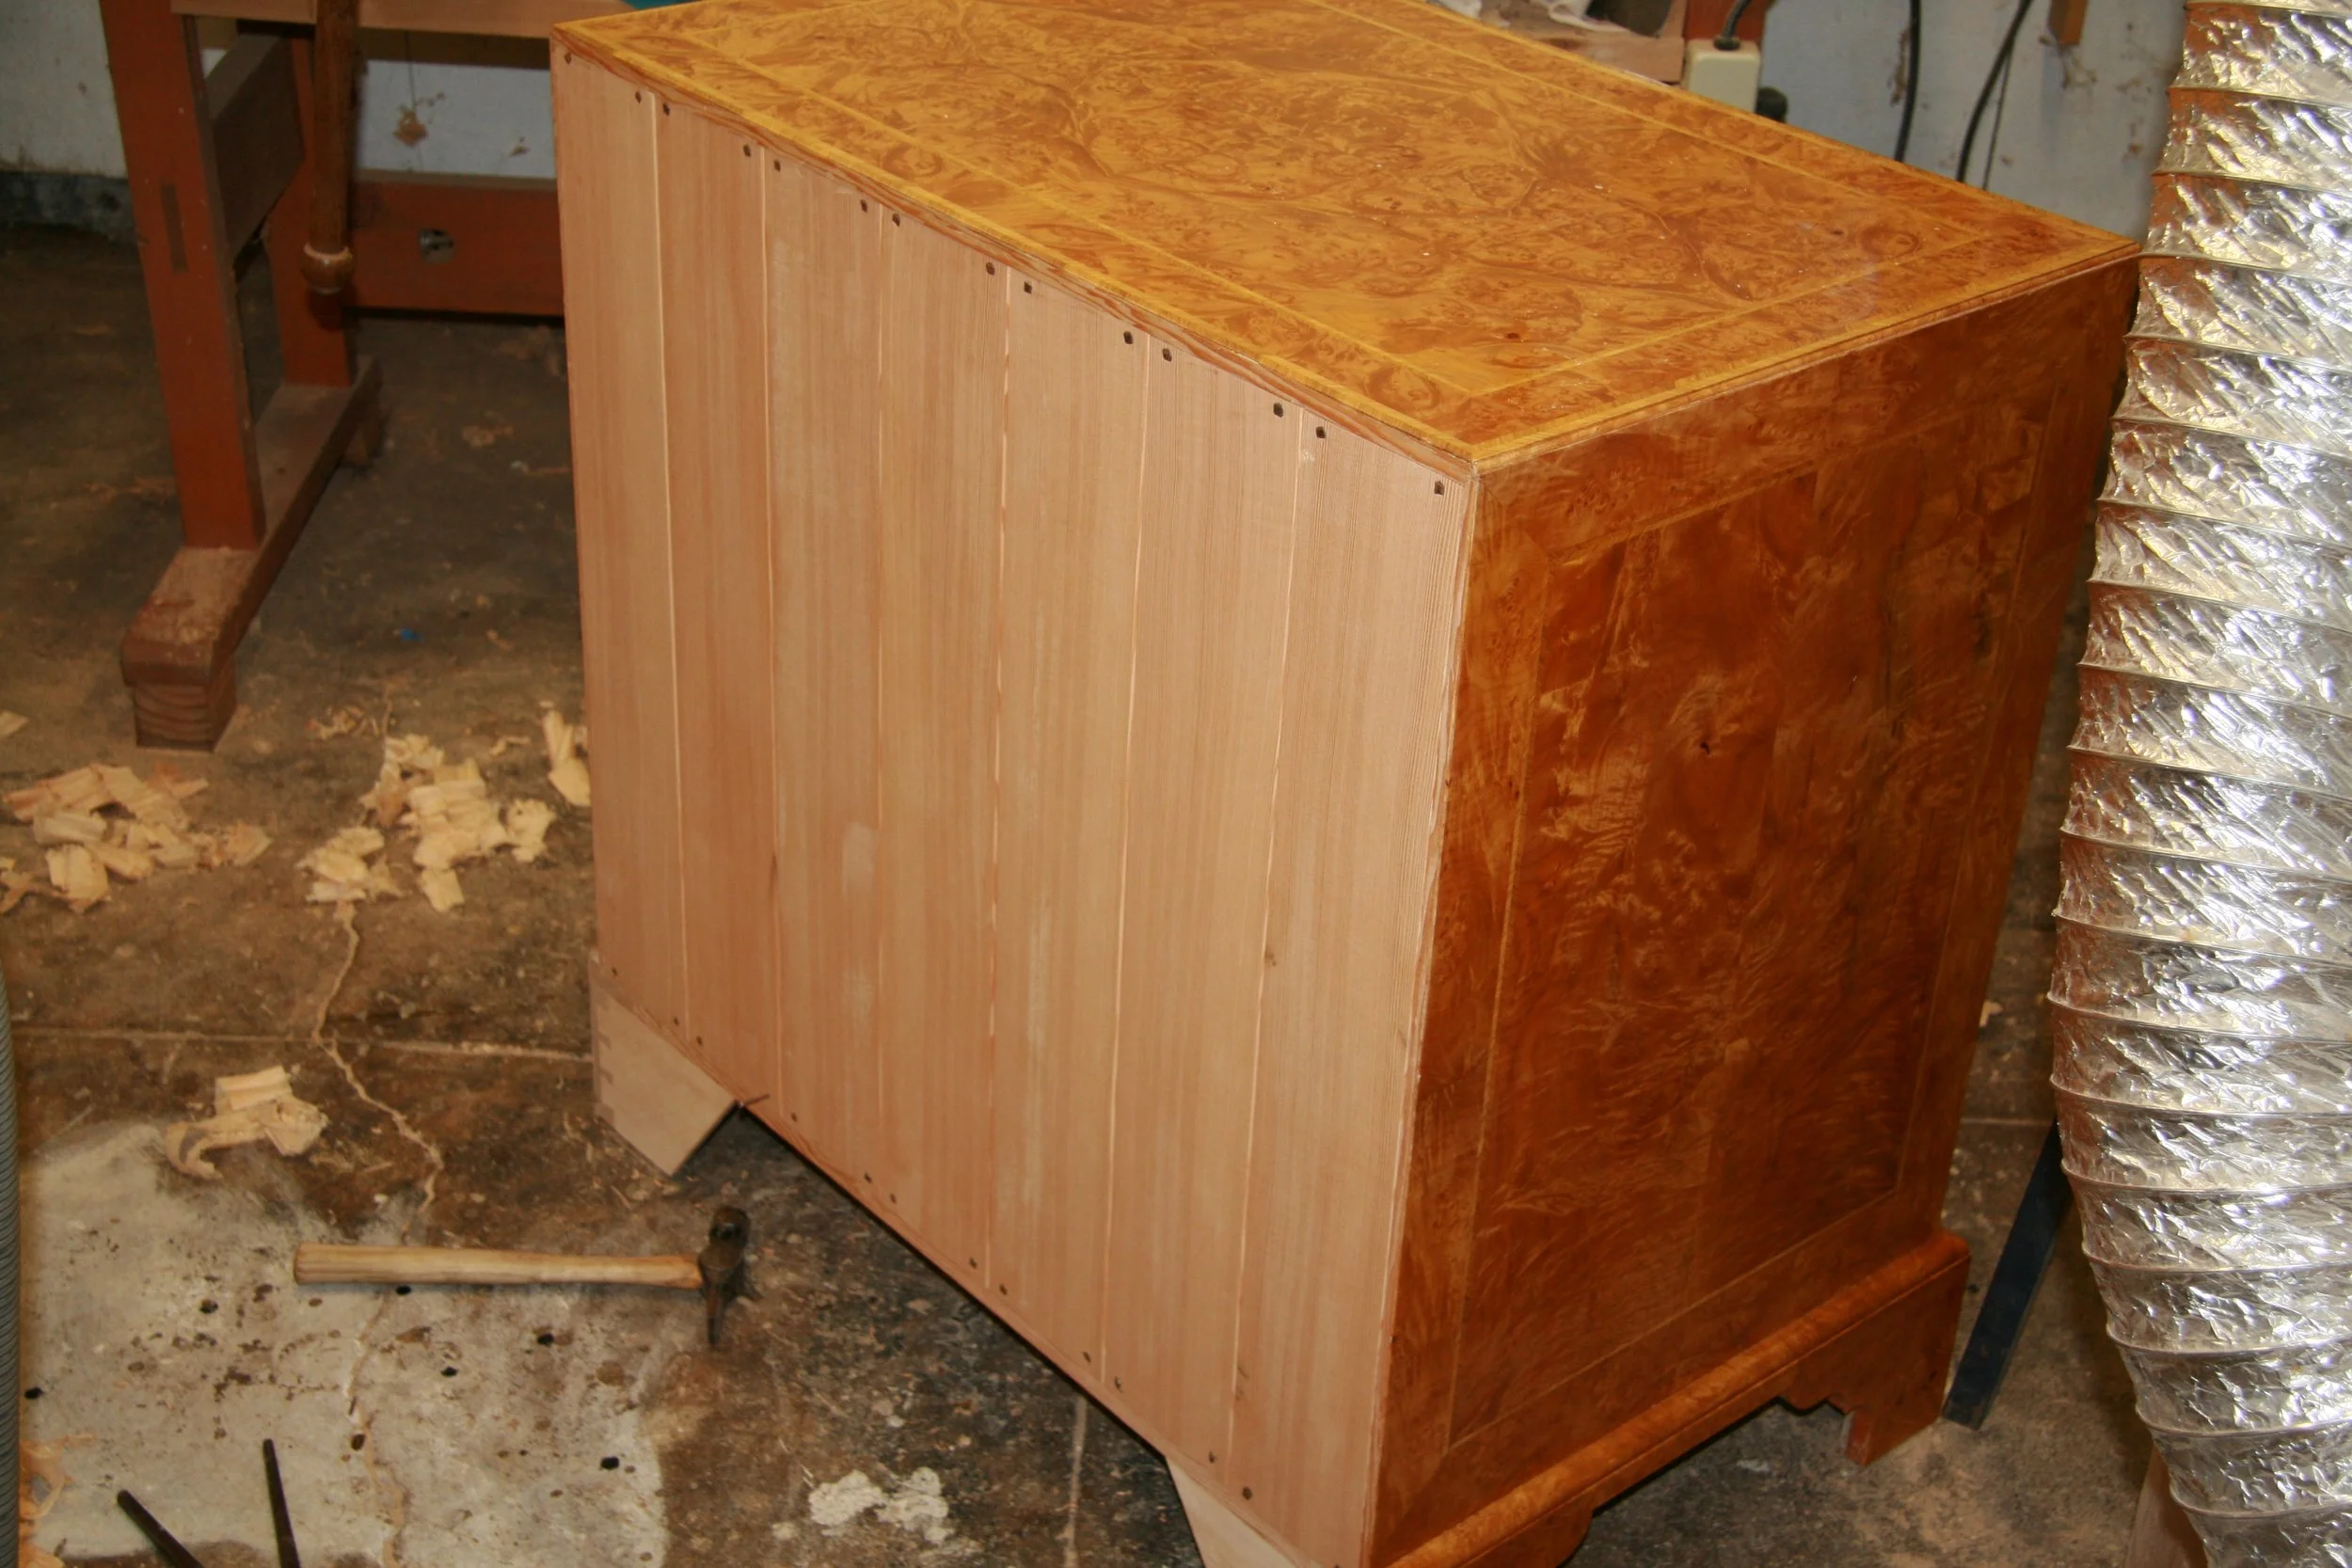
The case back going in. It was made up from solid tongue and grooved boards nailed in place using wrought nails, as in the originals.
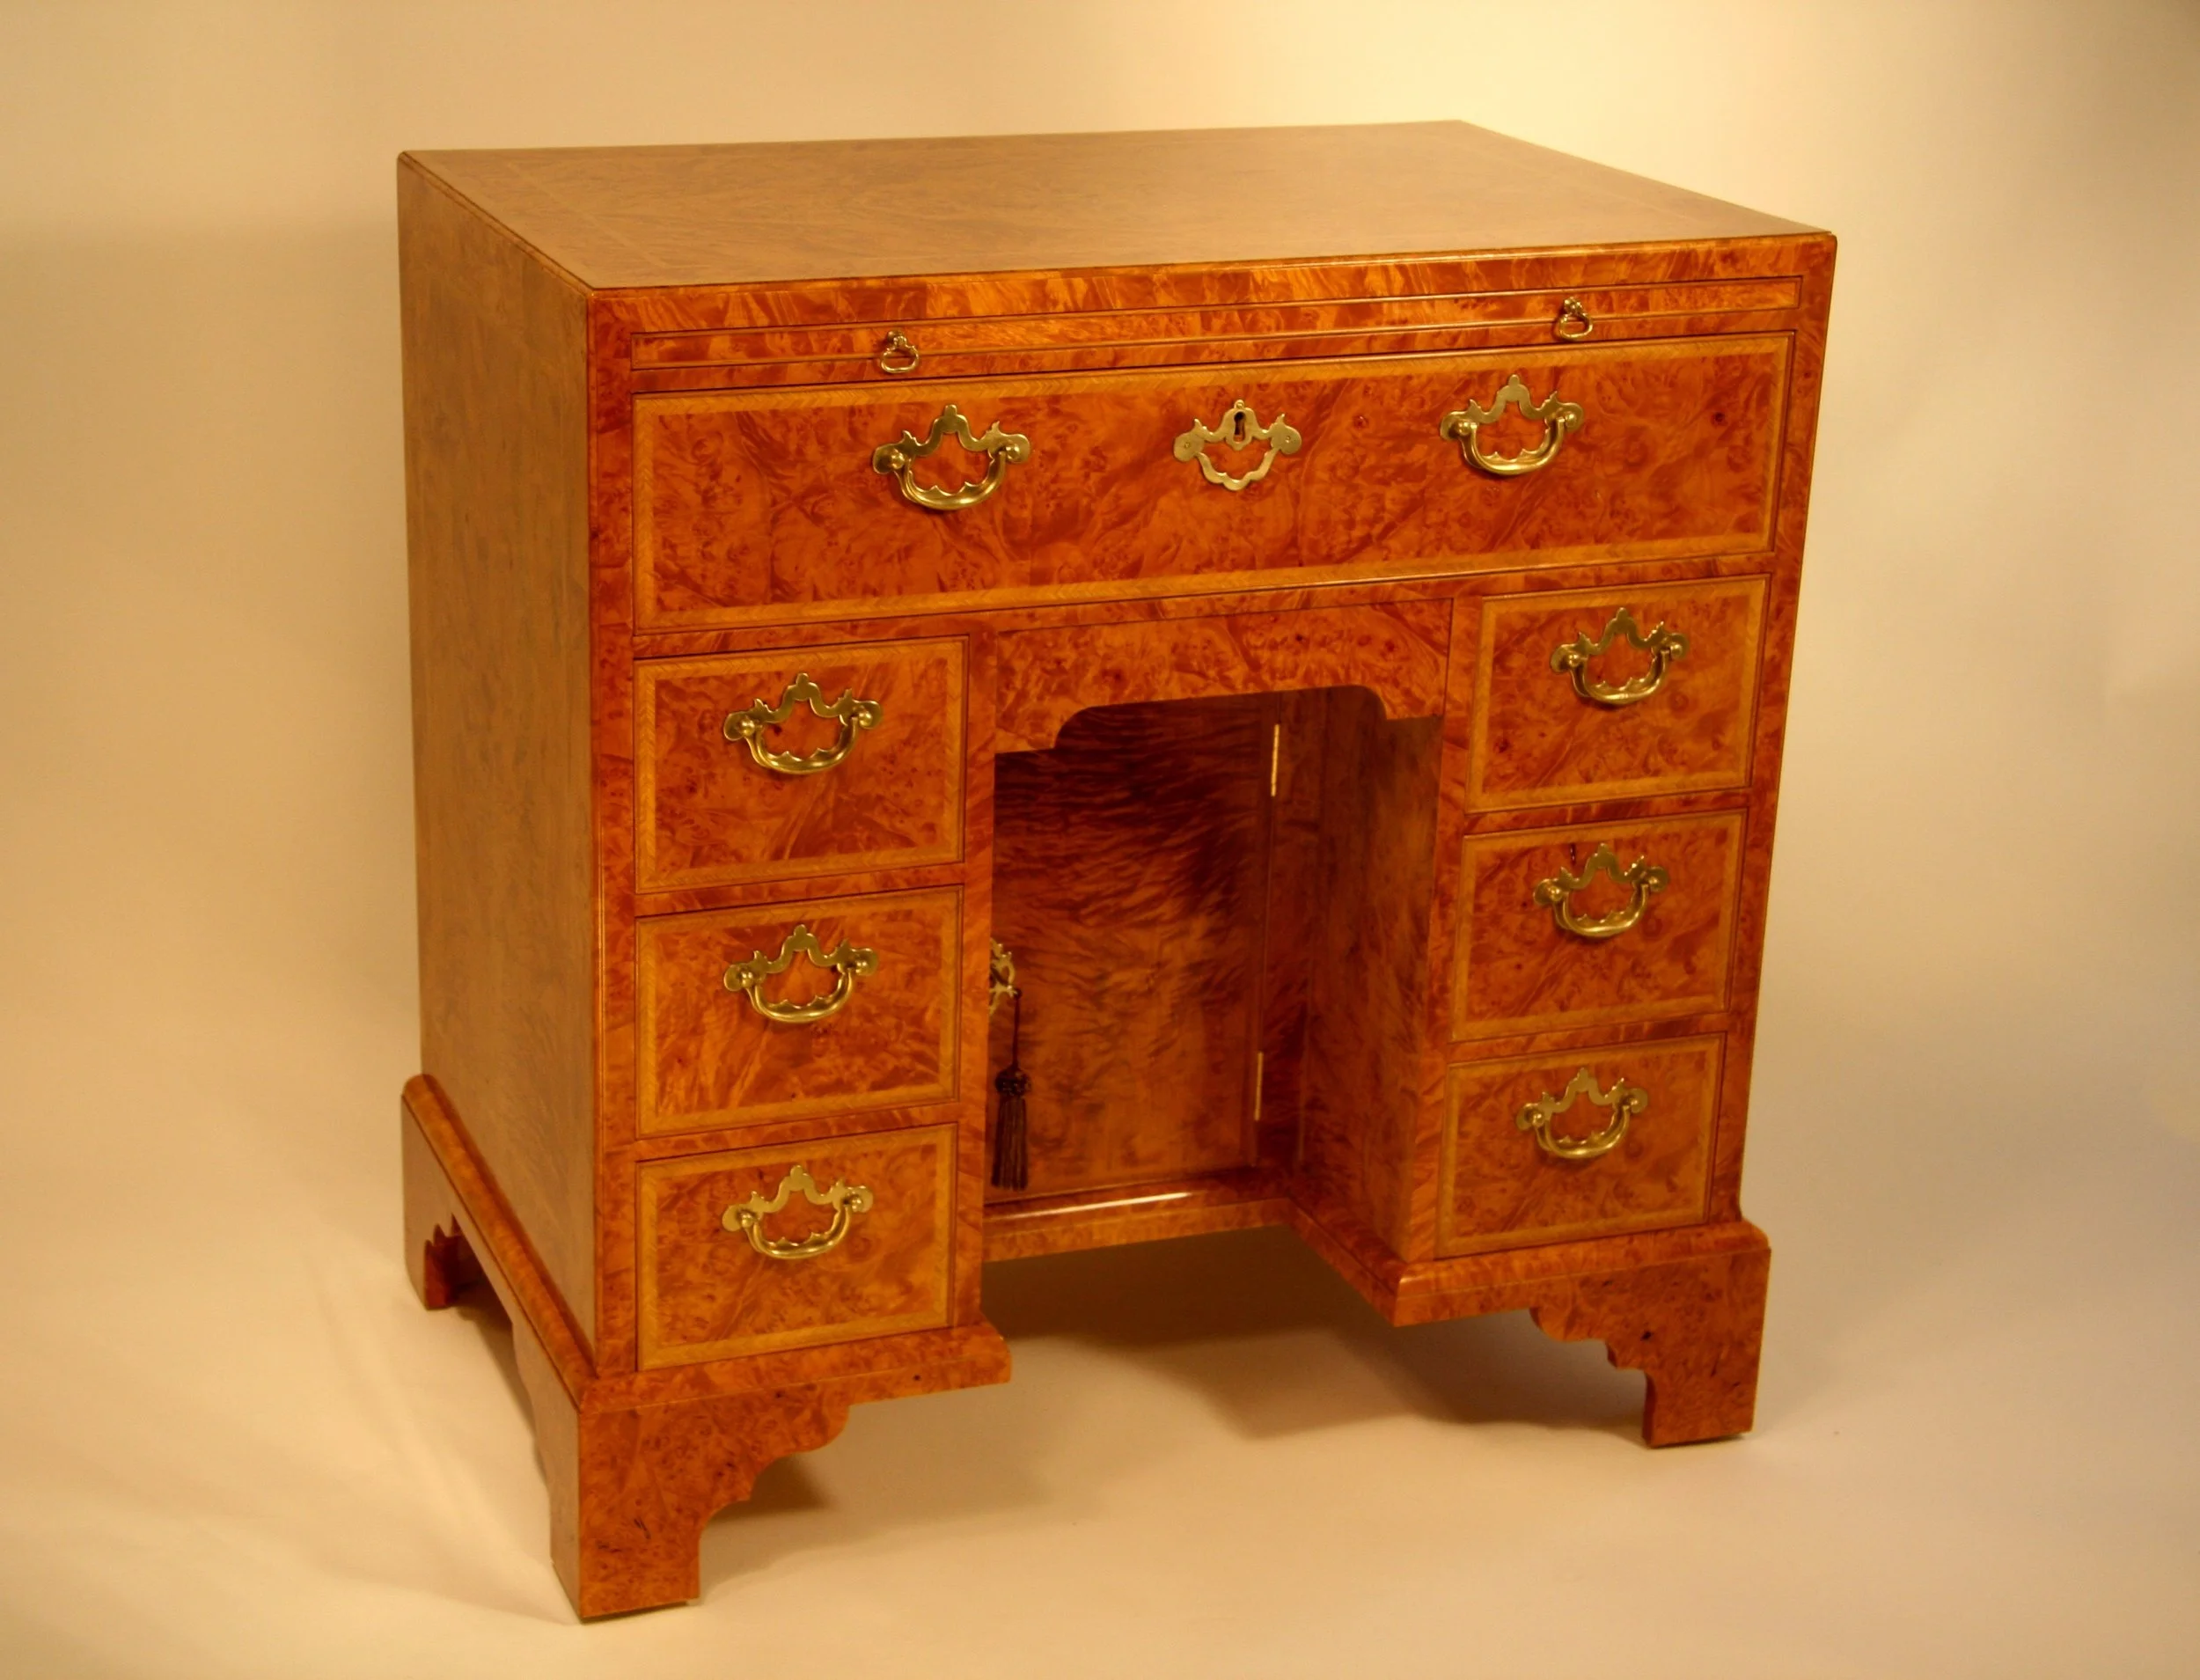
The finished desk.
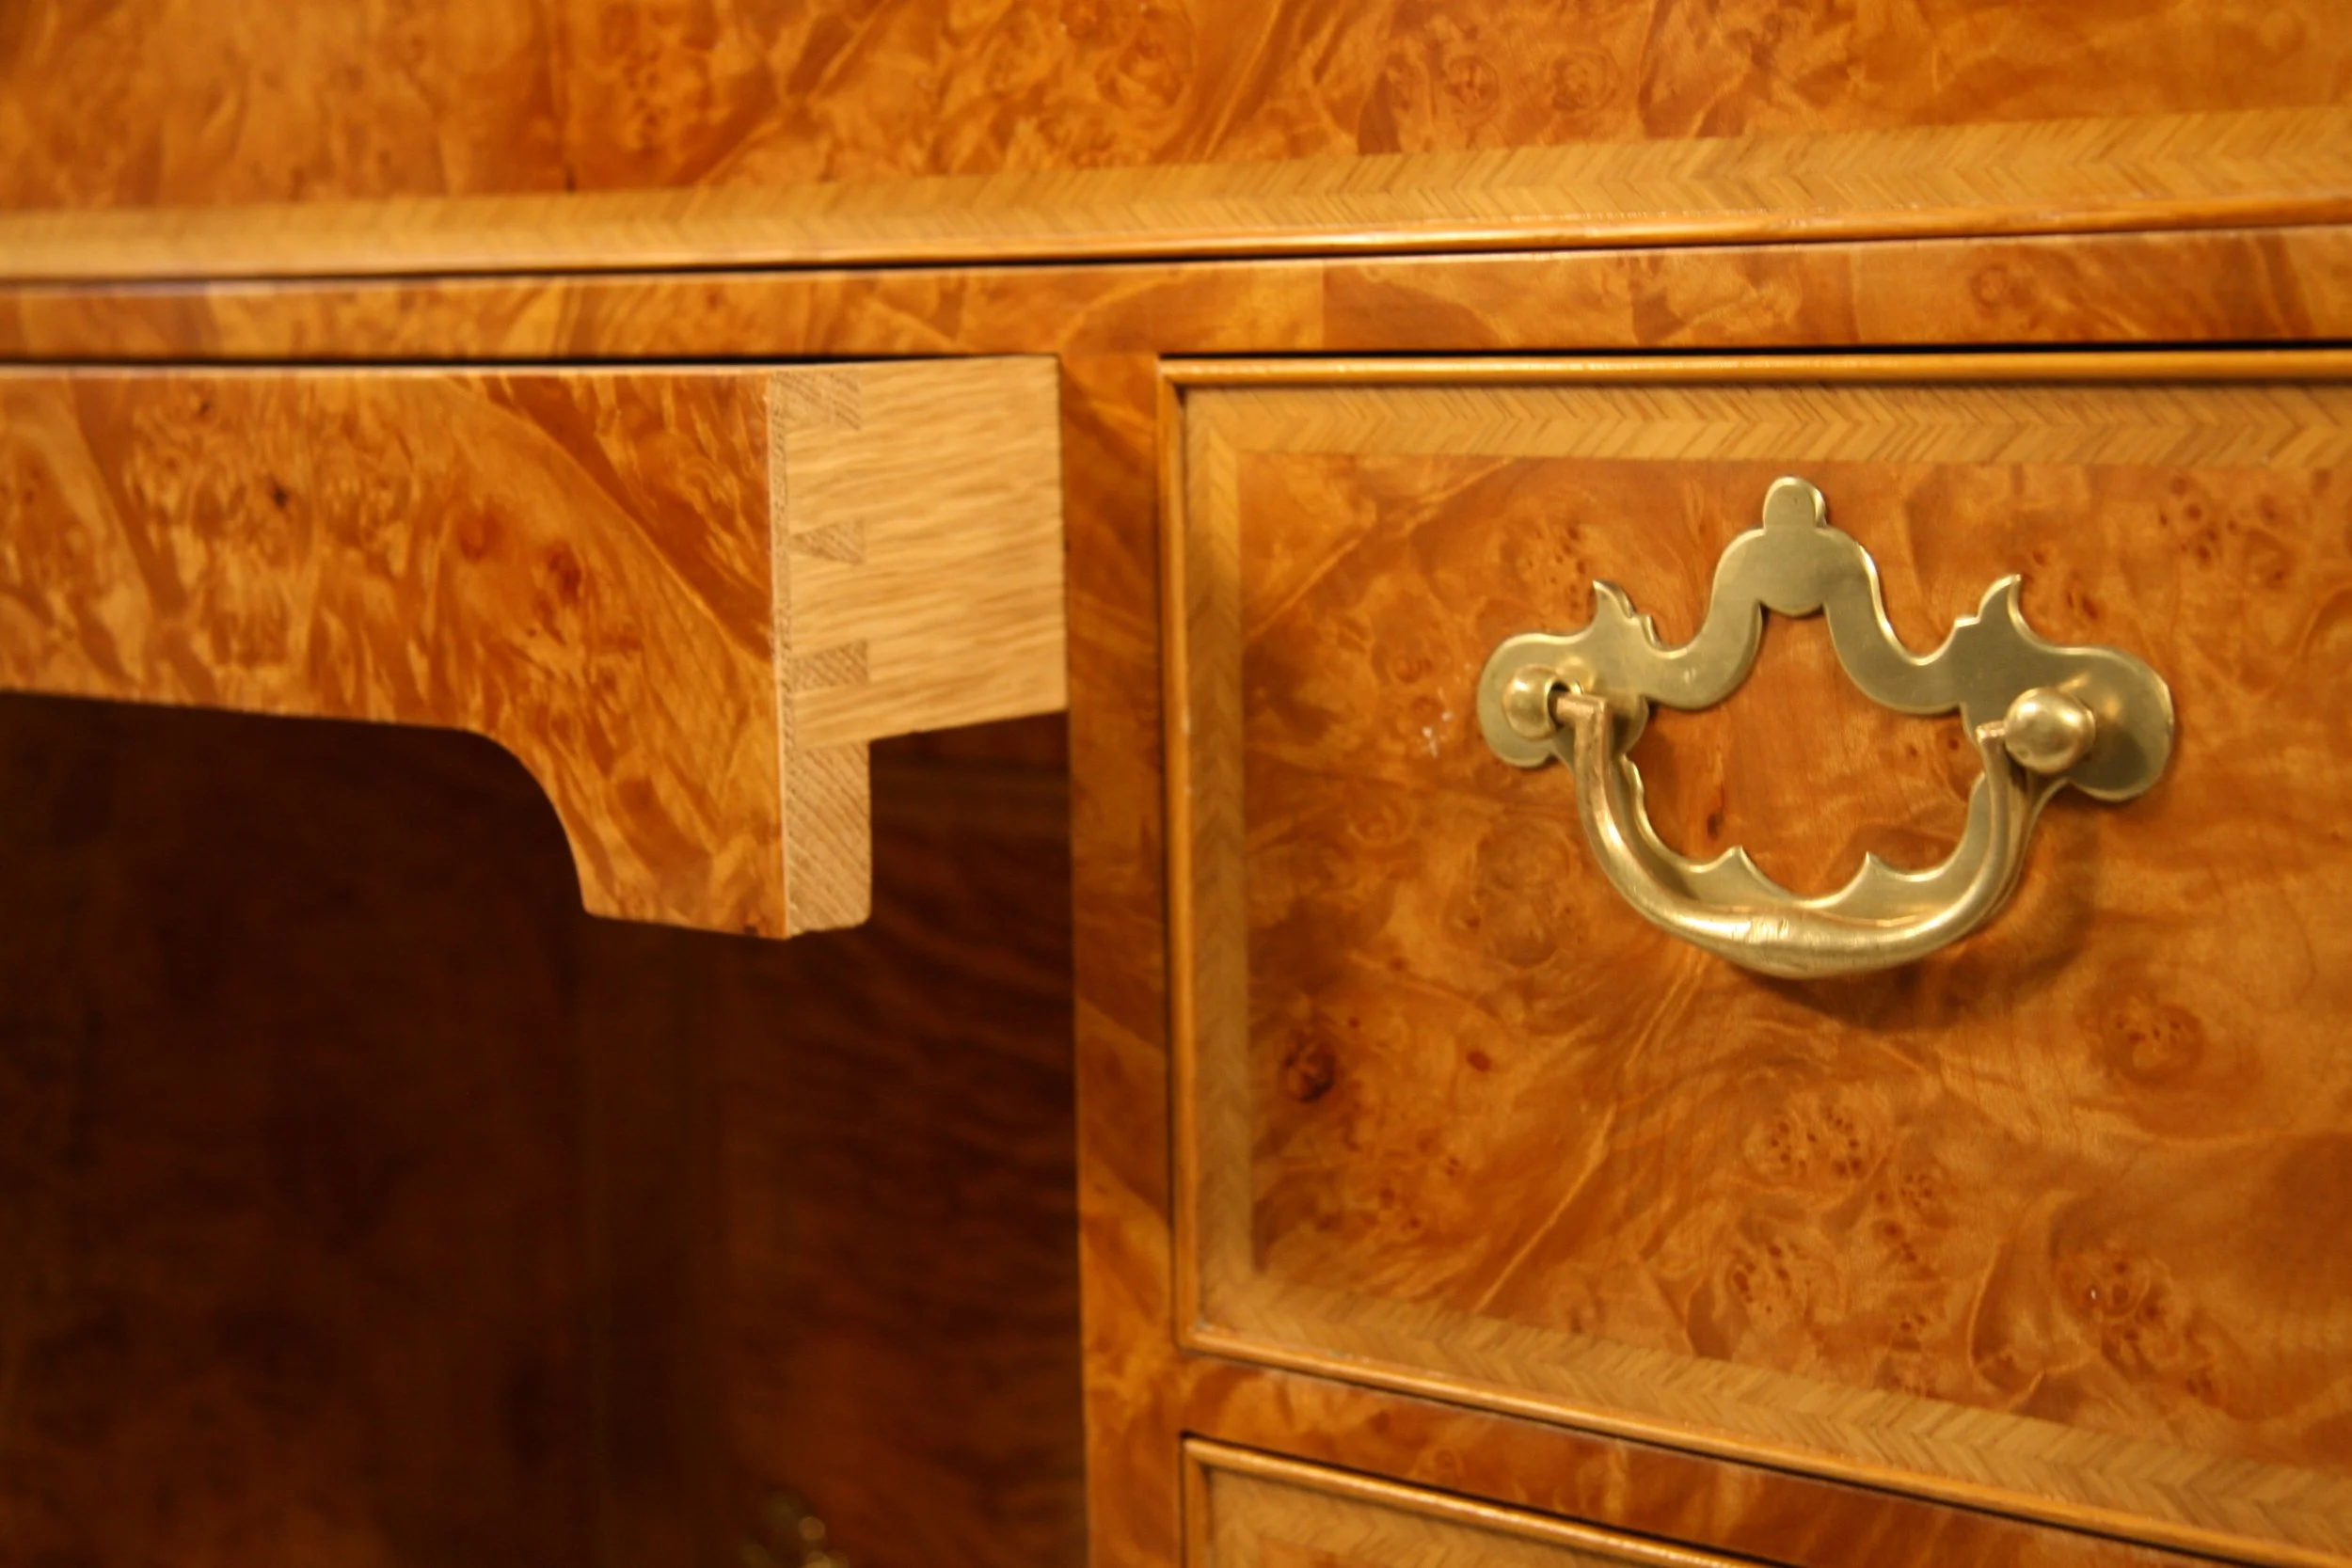
A closeup of the partially open pen drawer. The hardware from Londonderry Brasses is a close match to the desk's original.
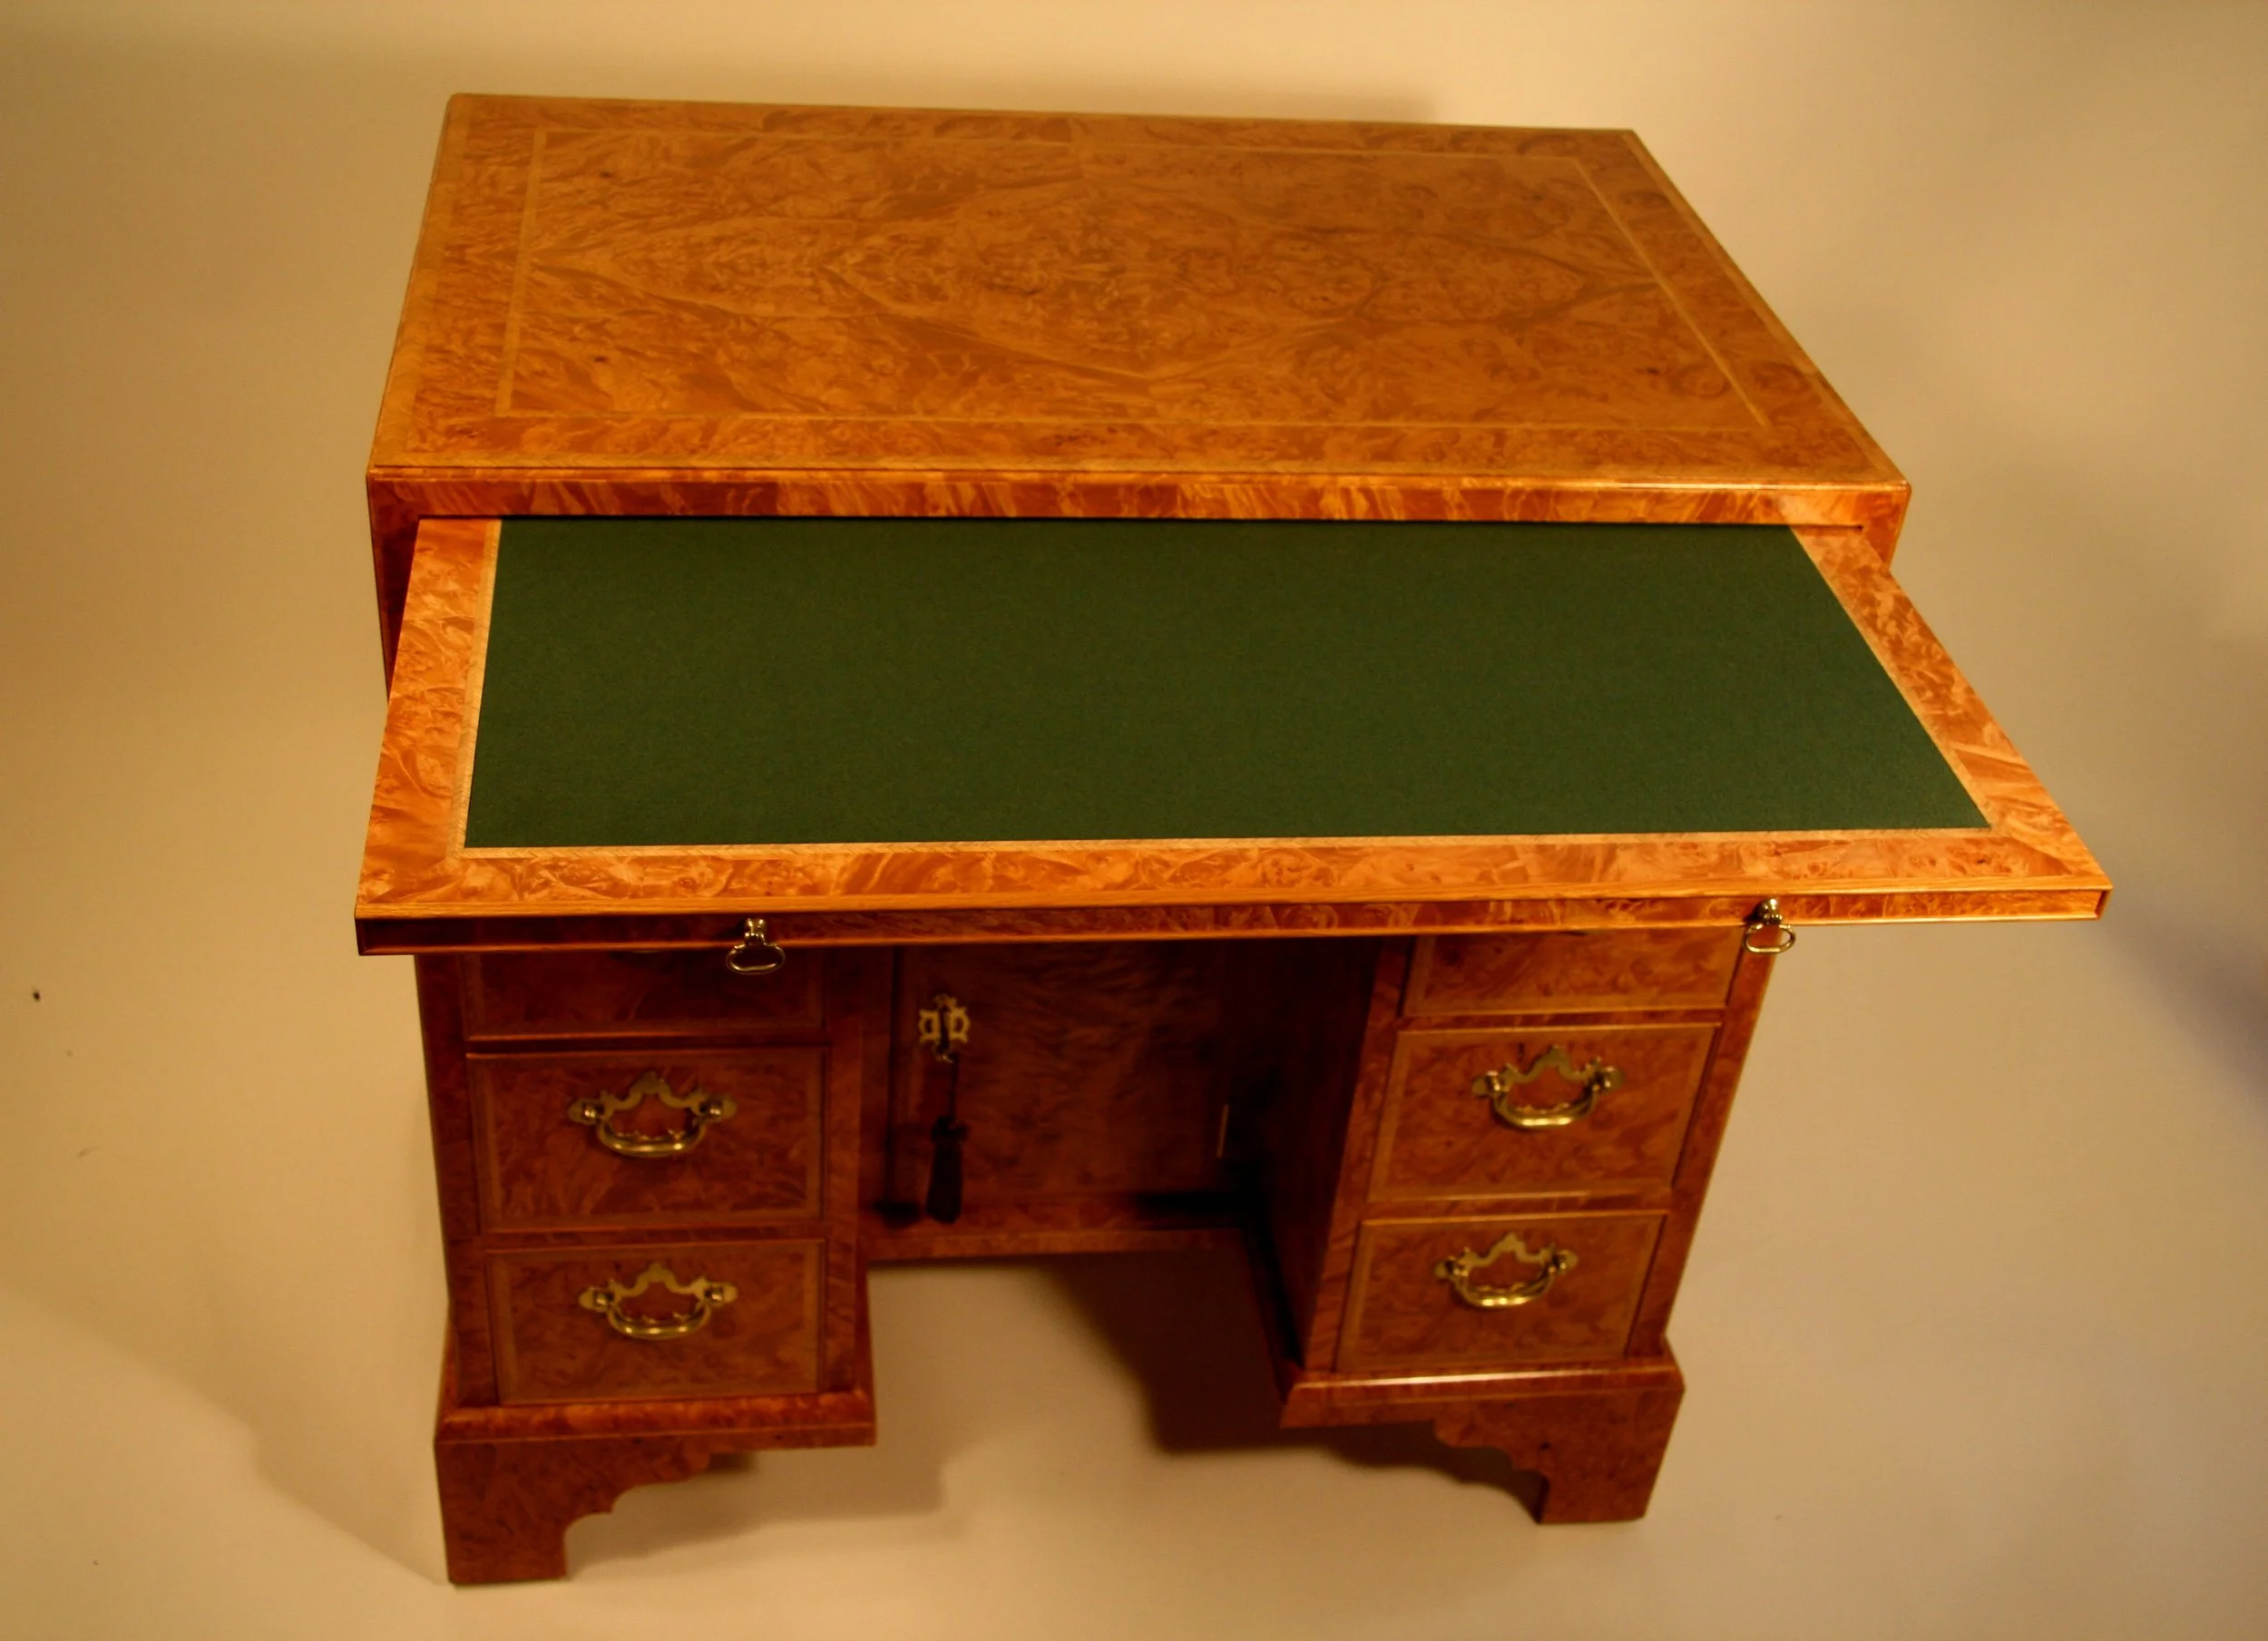
A view of the opened writing slide.